
// Photography · Landscape · original 2026-10-11 · rewritten and checked on this site 2026-10-12
Landscape photography from 31 real photos and 21 composition diagrams: composition, light and exposure
Rather than retouching the photos into dramatic “perfect landscapes,” this guide uses 31 real shots from a single day to work out which composition decisions work, which light can’t be rescued, and where to stand and what viewpoint to use next time.
- 31 photos Original JPEGs shot on a Google Pixel 9
- 21 images GPT composition illustrations, clearly labeled as generated
- 12/24 mm Main equivalent focal lengths
- 16 sections From reading photos and light to a four-week practice plan
- 2 tools On-device calculators: hyperfocal distance and ND shutter
- All 31 photos were taken by the author, with no AI generation and no replaced scenery
- The 21 composition images in chapter 04A are GPT-generated illustrations, not photographs
- Lines on the real photos are teaching overlays you can turn off
- Settings are starting points, not guarantees
- External photos are provided as links only
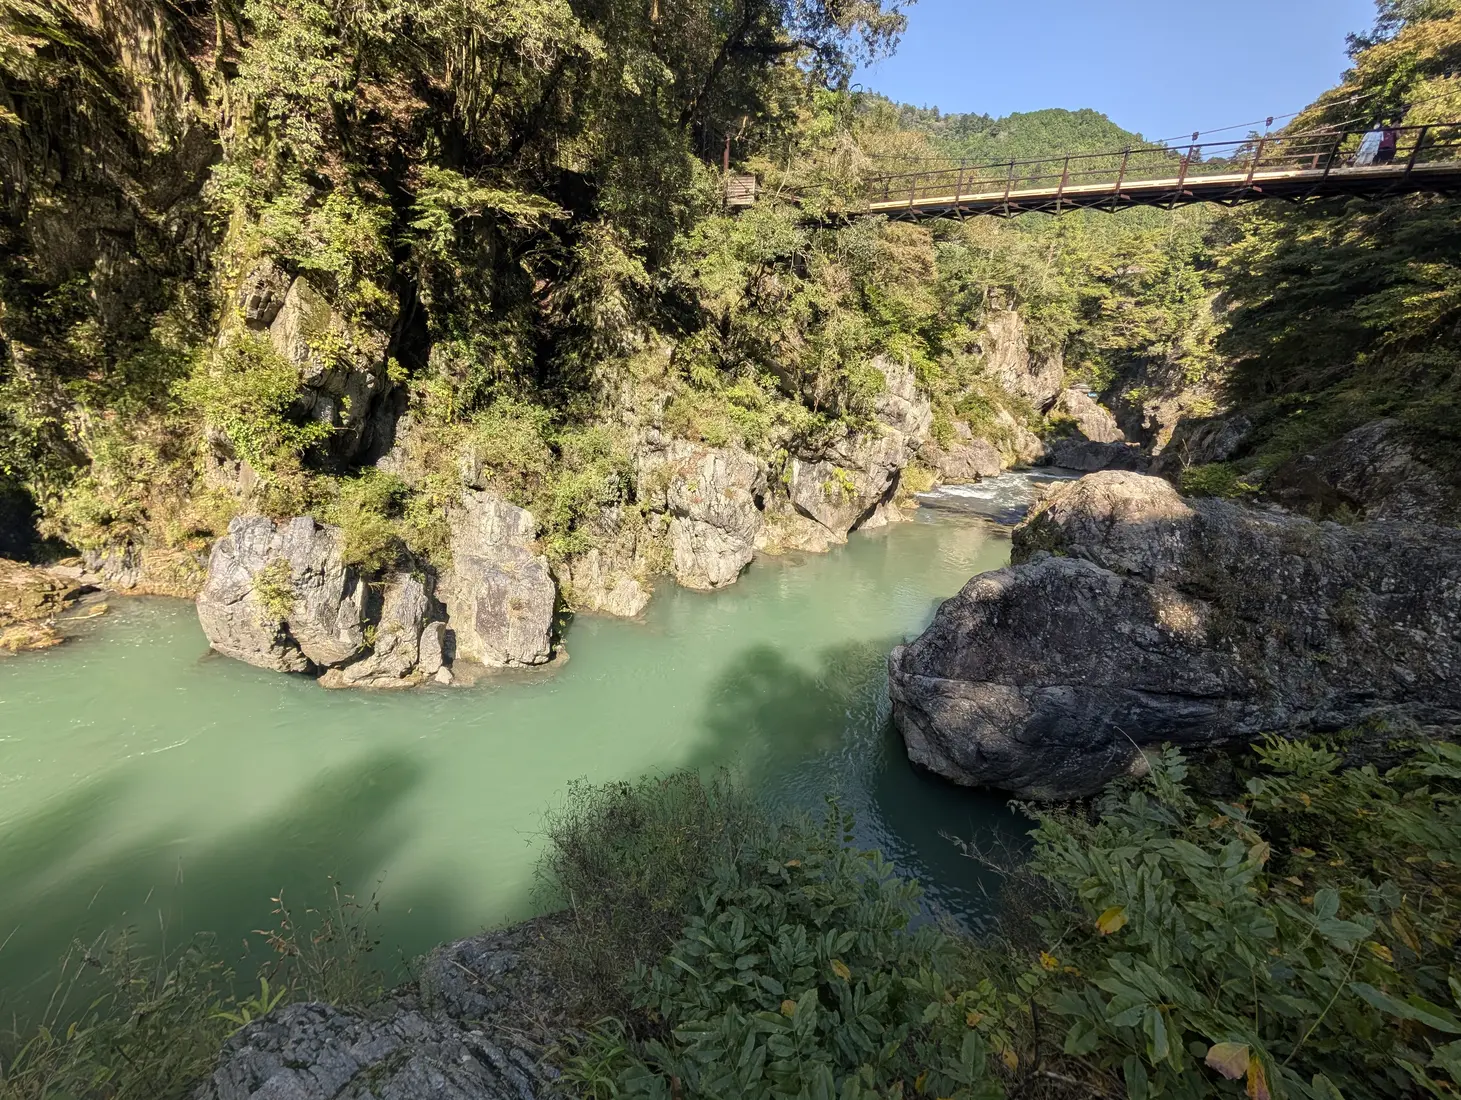
Cover: thumbnail of original file PXL_20261010_034347195.jpg. A good-looking landscape isn’t enough; you also have to choose the right frame.
The most useful improvement isn’t more saturation
The most distinctive shared subjects in this set are jade-green rivers, narrow gorges, dense forest and bridges. The real photographic challenge isn’t that the scenery lacks beauty, but that too much in the frame demands attention at the same time.
Existing strengths
The photos often use viewpoints that create depth from foreground to background: the river channel provides natural converging lines, the two sides of the gorge form a frame, and there’s an eye for elements that give scale, such as small boats, bridges and rocks.
Top priorities to fix
Reach for the ultra-wide less out of habit; first ask what the subject is, then decide on the camera position and viewpoint. Before pressing the shutter, check whether the light source is shining straight in, whether bridge shadows or stray branches cut across the subject, and whether anything at the edges is only partly in frame.
The diagrams below are options you can test, not a formula that is perfect every time. The rule of thirds, S-curves and a foreground–middle ground–background structure are not requirements for every photo; good minimalist, symmetrical and abstract work may break them on purpose.
First, learn what the marks on the photos mean
This page overlays teaching marks, which you can turn off, on the real photos:
- Rule-of-thirds lines
- Suggested eye path
- Visual elements worth keeping (solid circle)
- Distractions worth checking (dashed circle or box)
- Numbers refer to the notes below each photo
These two switches apply to every photo on the page; the “Guides” button at the top right of each photo toggles only that one. The marks change only what’s displayed, never the photos themselves.
How to read a photo: Turn the marks off and look for 3 seconds, pointing out for yourself where your eye lands first; then turn the marks back on and compare. If you need the caption to know where the subject is, the subject may not stand out enough yet.
Vertical gorge: the river naturally guides the eye
original file PXL_20261010_034054885.jpg · 12:40:54 · 12 mm equiv. · f/1.7 · 1/2088 s · ISO 59
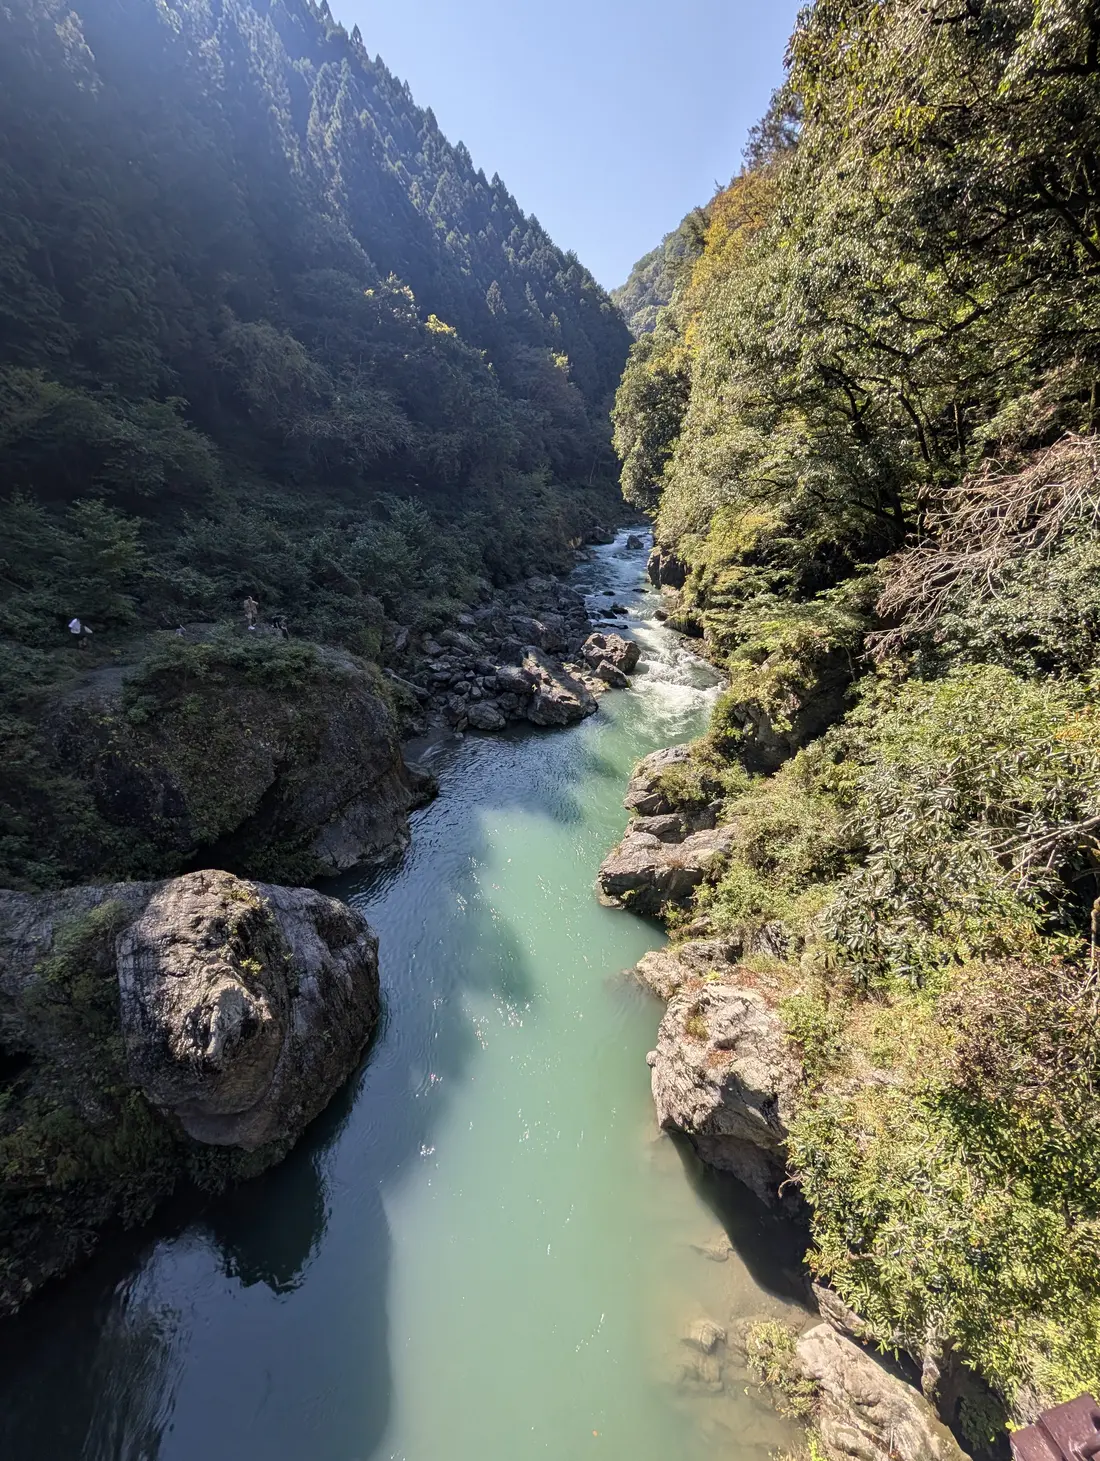
The river runs from the bottom of the frame into the distance, and the rock walls on both sides set the boundaries, creating a visual structure close to a “corridor.”
- ① The continuous shape of the river channel is the most useful leading line in this photo.
- The vertical frame earns its place here: it drops the clutter at the sides and pushes the viewer into the depth of the scene.
Four lessons most worth practicing
All of the following are original photos, with no AI-generated “improved versions”; the standalone composition illustrations are collected in chapter 04A. The original file name and EXIF are listed above each photo so you can check them one by one.
Case A | Emerald gorge: strong color, but the edges need cleaning up
original file PXL_20261010_034347195.jpg · 12:43:47 · 12 mm equiv. · f/1.7 · 1/1045 s · ISO 56
The green channel and whitish-gray rocks give good contrast in color and texture; the problems are concentrated in the bridge that isn’t fully in frame and the weeds close to the camera.
- ① The plants along the bottom edge are large and busy with detail, pulling attention away from the rocks and river.
- ② The bridge is cut off at the top right edge; either include it properly or move so it leaves the composition.
- ③ The boundary between the emerald water and the rocks on either side is the real visual core of this photo.
Case B | 12 mm from the bridge: there’s scale, but a shadow cuts the frame
original file PXL_20261010_045807548.jpg · 13:58:07 · 12 mm equiv. · f/1.7 · 1/1272 s · ISO 60
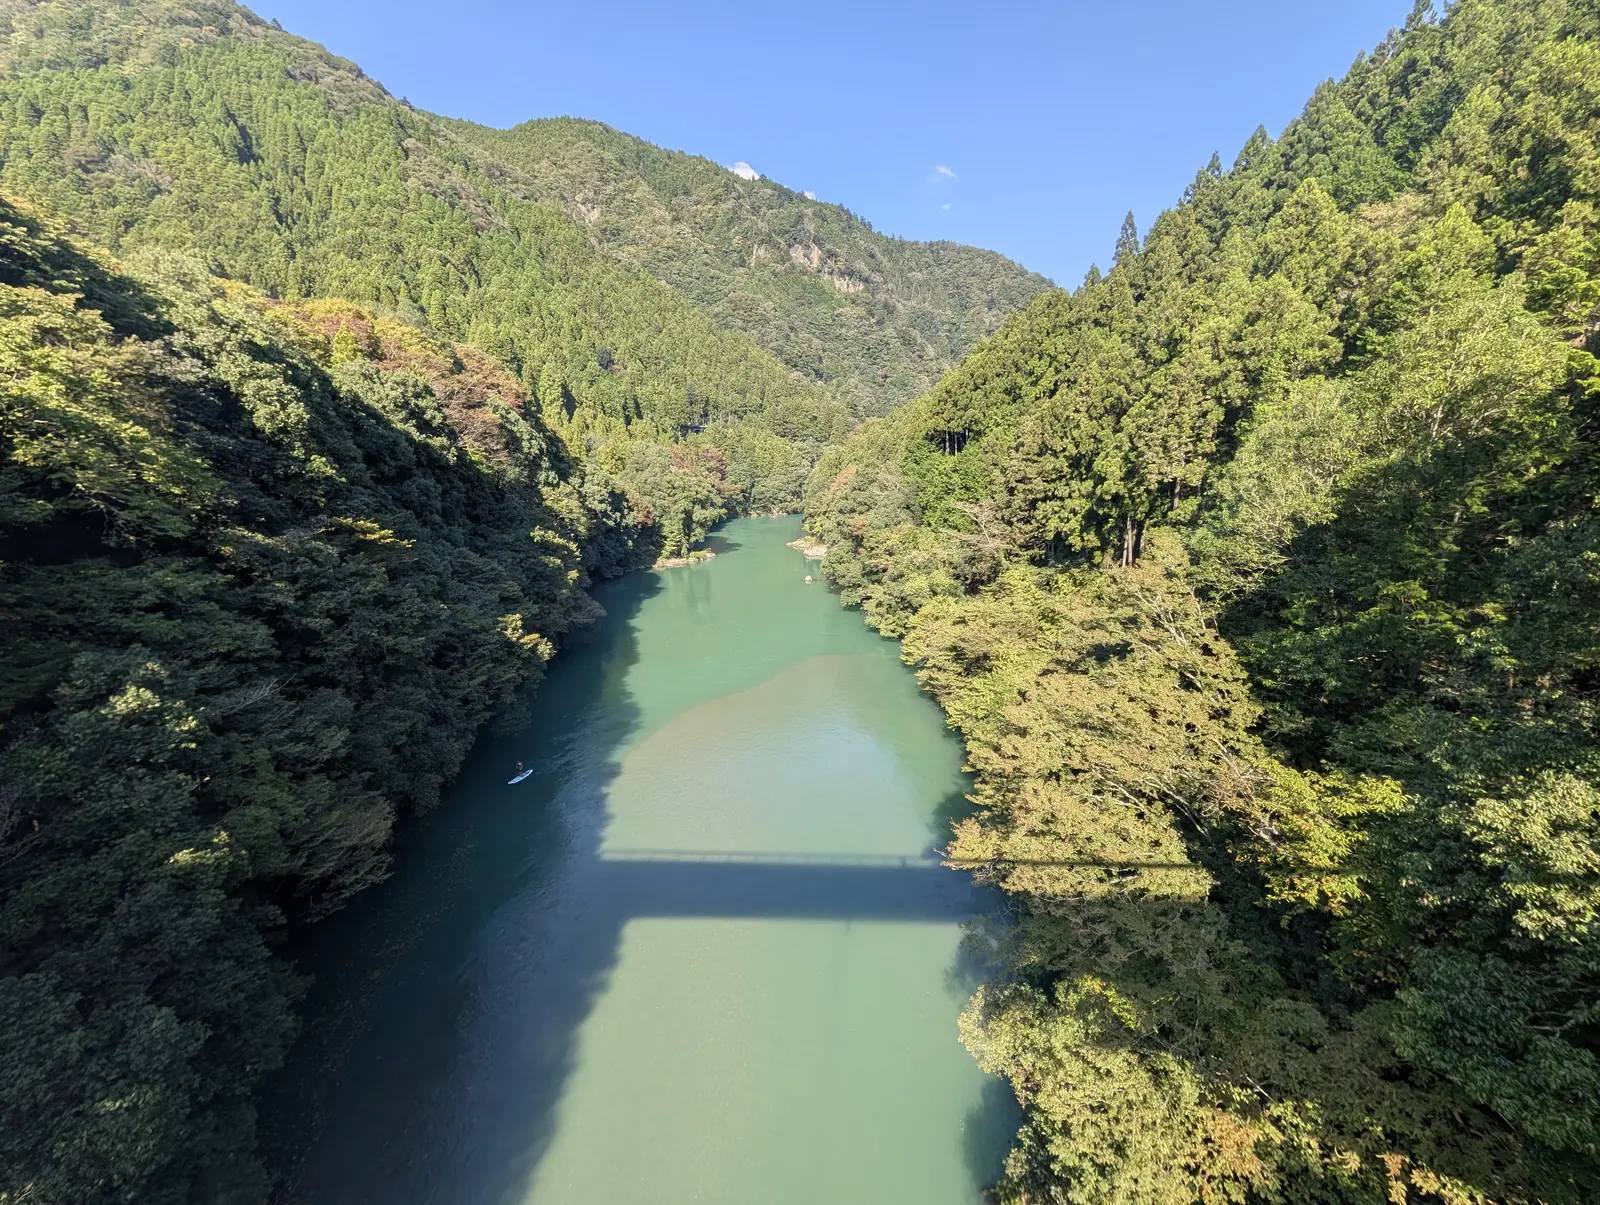
The ultra-wide takes in the whole valley and sky, and also makes the paddleboard by the bank look tiny; the bridge shadow becomes the strongest horizontal line near the camera.
- ① The paddleboard on the left is an important scale reference, but it sits too close to the edge and is too small.
- ② The high-contrast horizontal line of the bridge shadow interrupts the path the eye takes along the river.
- ③ The large area of nearby water takes up frame space that could have gone to the middle ground.
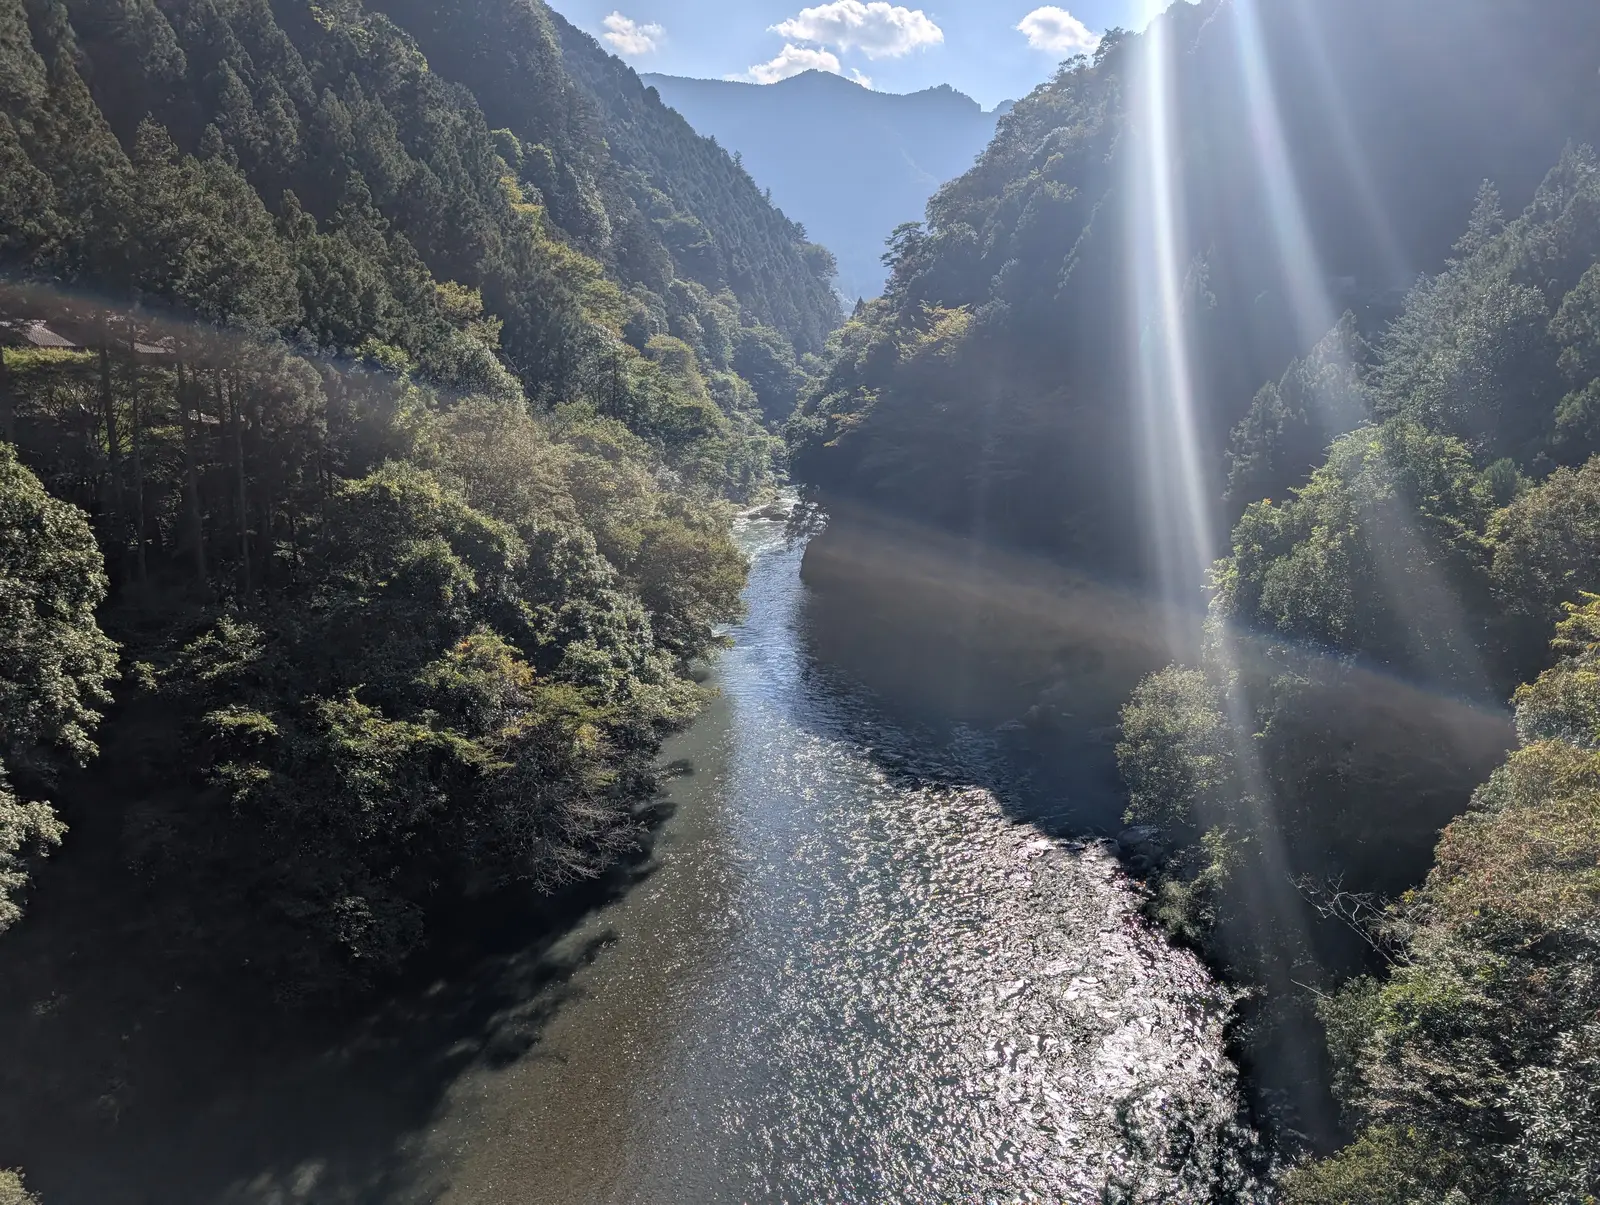
Case C | Backlit valley: great atmosphere, but flare dominates attention
original file PXL_20261010_045832826.jpg · 13:58:32 · 12 mm equiv. · f/1.7 · 1/9709 s · ISO 53
The rays deep in the valley are dramatic, but the direct light creates widespread flare and a glaring water surface that grab attention faster than the gorge itself.
- ① The brightness of the sun and its rays at the top is the first visual focal point.
- ② Glints on the river partly overlap the flare, making the channel’s outline hard to read.
- ③ The channel itself has a good near-to-far direction that recomposing could bring out.
- Order of fixes: first change the shooting direction or block the direct light, then shoot when the contrast between light and shadow is lower, and only then think about editing.
Case D | Dense forest: regular trunks, but no clear focal point
original file PXL_20261010_031416116.jpg · 12:14:16 · 12 mm equiv. · f/1.7 · 1/113 s · ISO 51
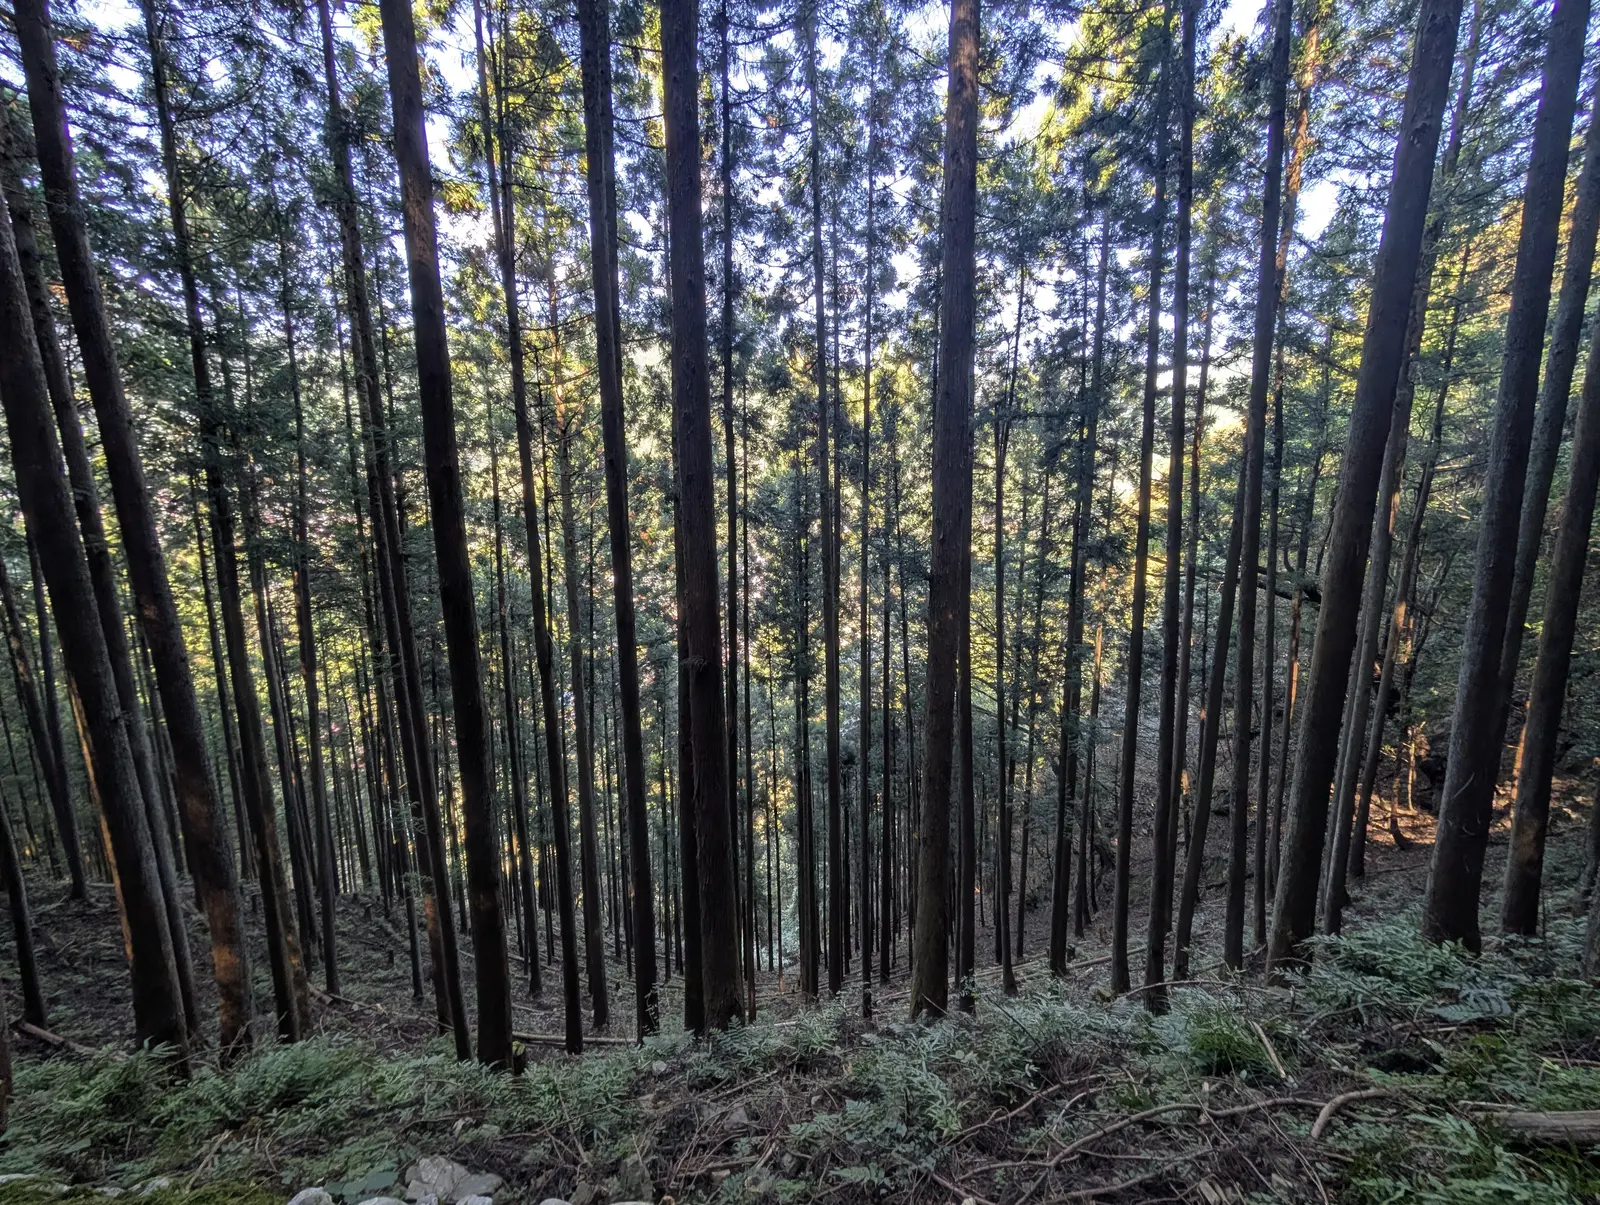
The dense trunks create a rhythm, but the light spots and background shapes keep repeating, and no single area is clearly more important than the rest.
- ① Many bright patches show through the treetops, so the eye jumps between different holes of light.
- ② The central trunk doesn’t clearly stand apart from the others; step sideways and look for a single sunlit tree.
- ③ The repeating rhythm of upright trunks is a strength; try a vertical frame or a tighter framing.
A real comparison from the same spot is more useful than an imagined “perfect version”
12 mm equivalent · ultra-wide
13:58:07 · f/1.7 · 1/1272 s · ISO 60
Keeps plenty of surroundings, but the water and the bridge shadow are more eye-catching than the paddleboard.
24 mm equivalent · main camera
13:58:12 · f/1.7 · 1/418 s · ISO 20
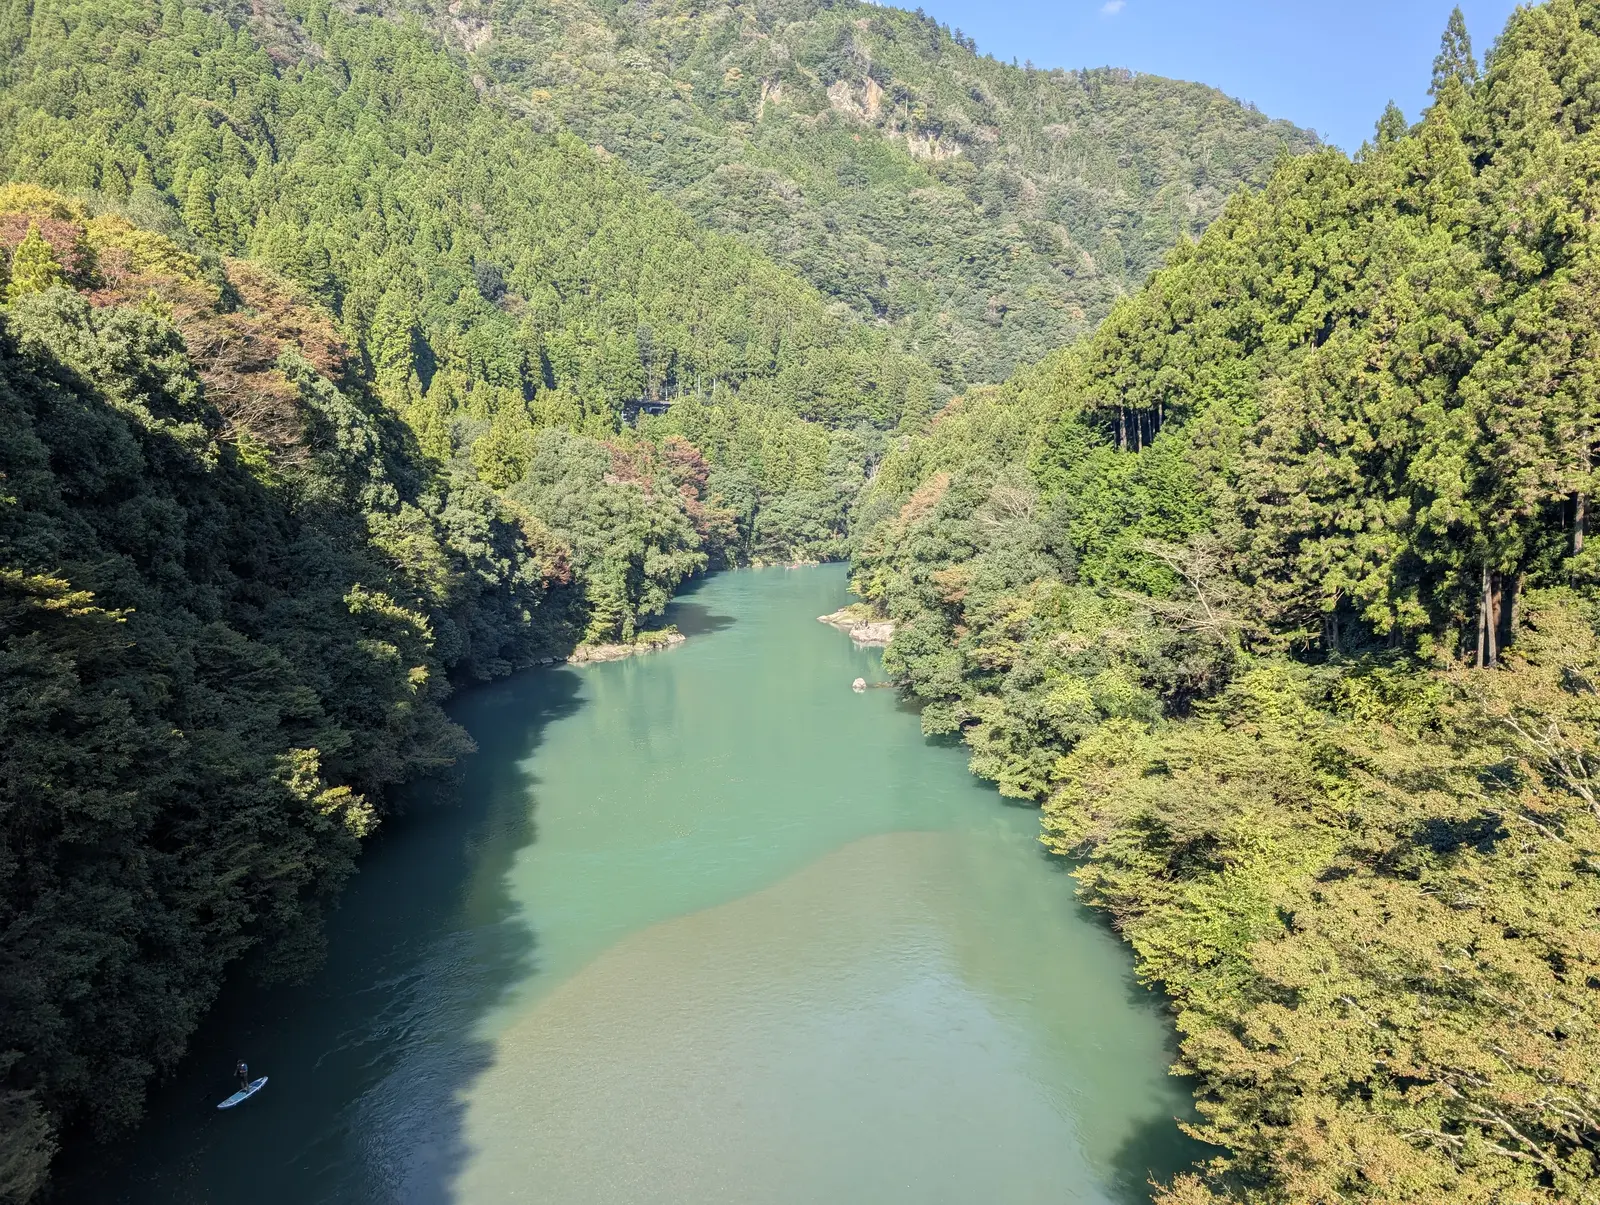
A more focused view, taken about 5 seconds after the left photo; the river channel becomes a clearer subject.
The light you can actually see in these photos, not just “golden hour”
Most of this set was shot between 11:27 and 14:53 (EXIF time zone +09:00), so the high-contrast problems of midday and early afternoon are typical. That doesn’t mean the timing was wrong; it’s a reminder that high-angle direct light is good for emphasizing shape but not necessarily for capturing a whole valley well in one frame.
Different framing, same time of day: the cost of backlight, seen directly
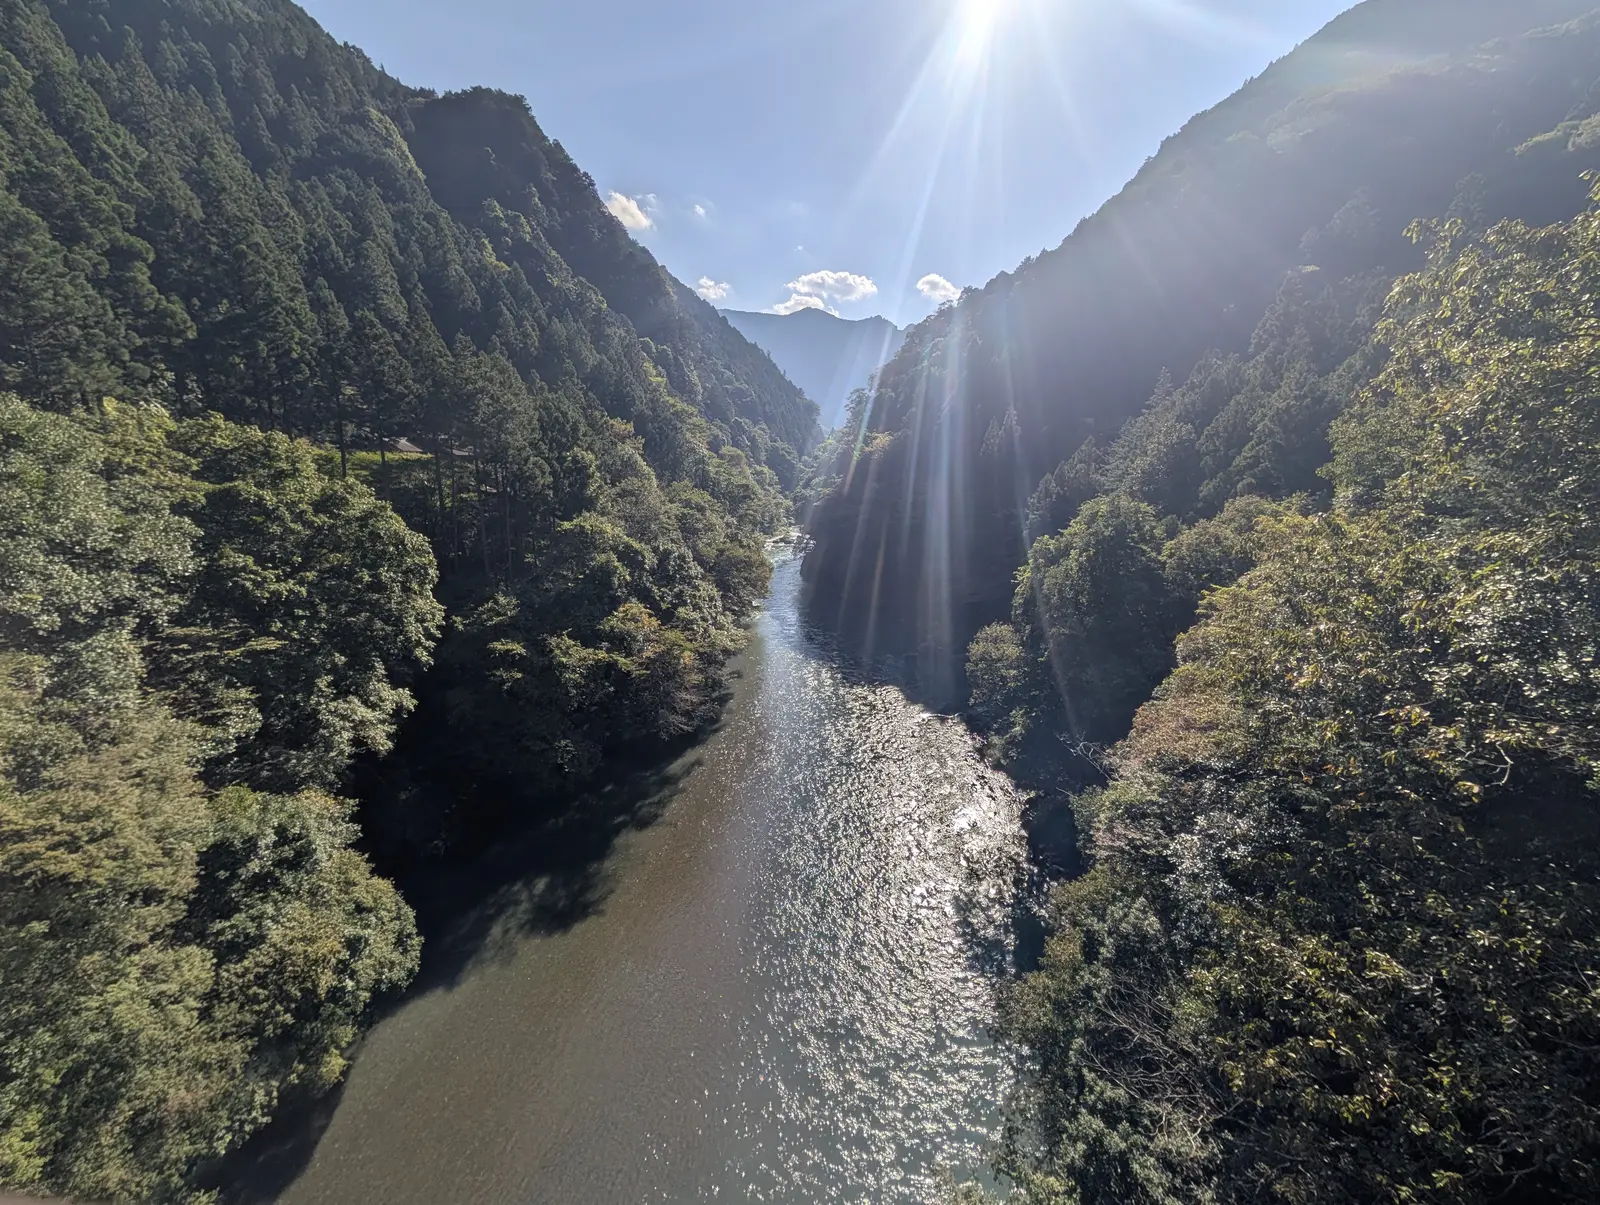
original file PXL_20261010_045827144.jpg · 13:58:27 · 24 mm equiv. · f/1.7 · 1/2740 s · ISO 19
Shot at about 13:58. The bright reflection on the water and the shadows of the forested hills share the frame; forcing all the dark areas brighter could throw the visual center of gravity out of control.
- Decide first whether the “bright rays” or the “valley river” is the lead, and don’t let the two compete.
- When you choose the rays as the subject, let the shadows become silhouettes; when you choose the river, look for an angle that cuts down the direct sunlight.
| Type of light | What you actually see | Recommended framing | Costs and limits |
|---|---|---|---|
| Low-angle side light | Ridges and rock walls show clear light and shade. | Make ridgelines, hills or rock walls the subject. | Not every location gets a view of the sunset; mountain walls may block the light. |
| High-contrast backlight | In this set’s valley photos, the rays and the reflections on the water stand out. | Use silhouettes or rim light, or block the sun shining straight into the lens. | Even RAW can’t recover highlights that have already clipped. |
| Overcast diffuse light | Brightness in forests and at waterfalls is more even. | Show less sky; shoot stones, water and leaf color. | Without dramatic shadows, you need lines and texture to create emphasis. |
| Light mist or after rain | Distant contrast drops and the layers separate. | Layered distant mountains, forest outlines, repeating mountain shapes. | Heavy dehazing destroys depth. |
| Blue hour | City lights and the blue sky form a warm–cool contrast. | Reflections on the ground, tracks, skylines. | Needs a stable camera position; moving people may blur. |
Subject, leading lines, framing and visual weight: spotting them in real photos
The subject isn’t “the biggest thing in the frame”
A shaft of light in the forest, a small boat beside the rocks, the valley at the end of the river channel: any of these can become the subject. Light, isolation and contrast decide how much attention it gets.
A frame can also become an obstruction
Trunks and leaves can wrap around the picture, but they mustn’t make the main subject hard to find. “Shooting the trees” and “shooting the lake through the trees” are two different compositions, so decide which one you’re making.
Paddlers between the trees: natural frame or obstruction?
original file PXL_20261010_044600603.jpg · 13:46:00 · 24 mm equiv. · f/1.7 · 1/917 s · ISO 218
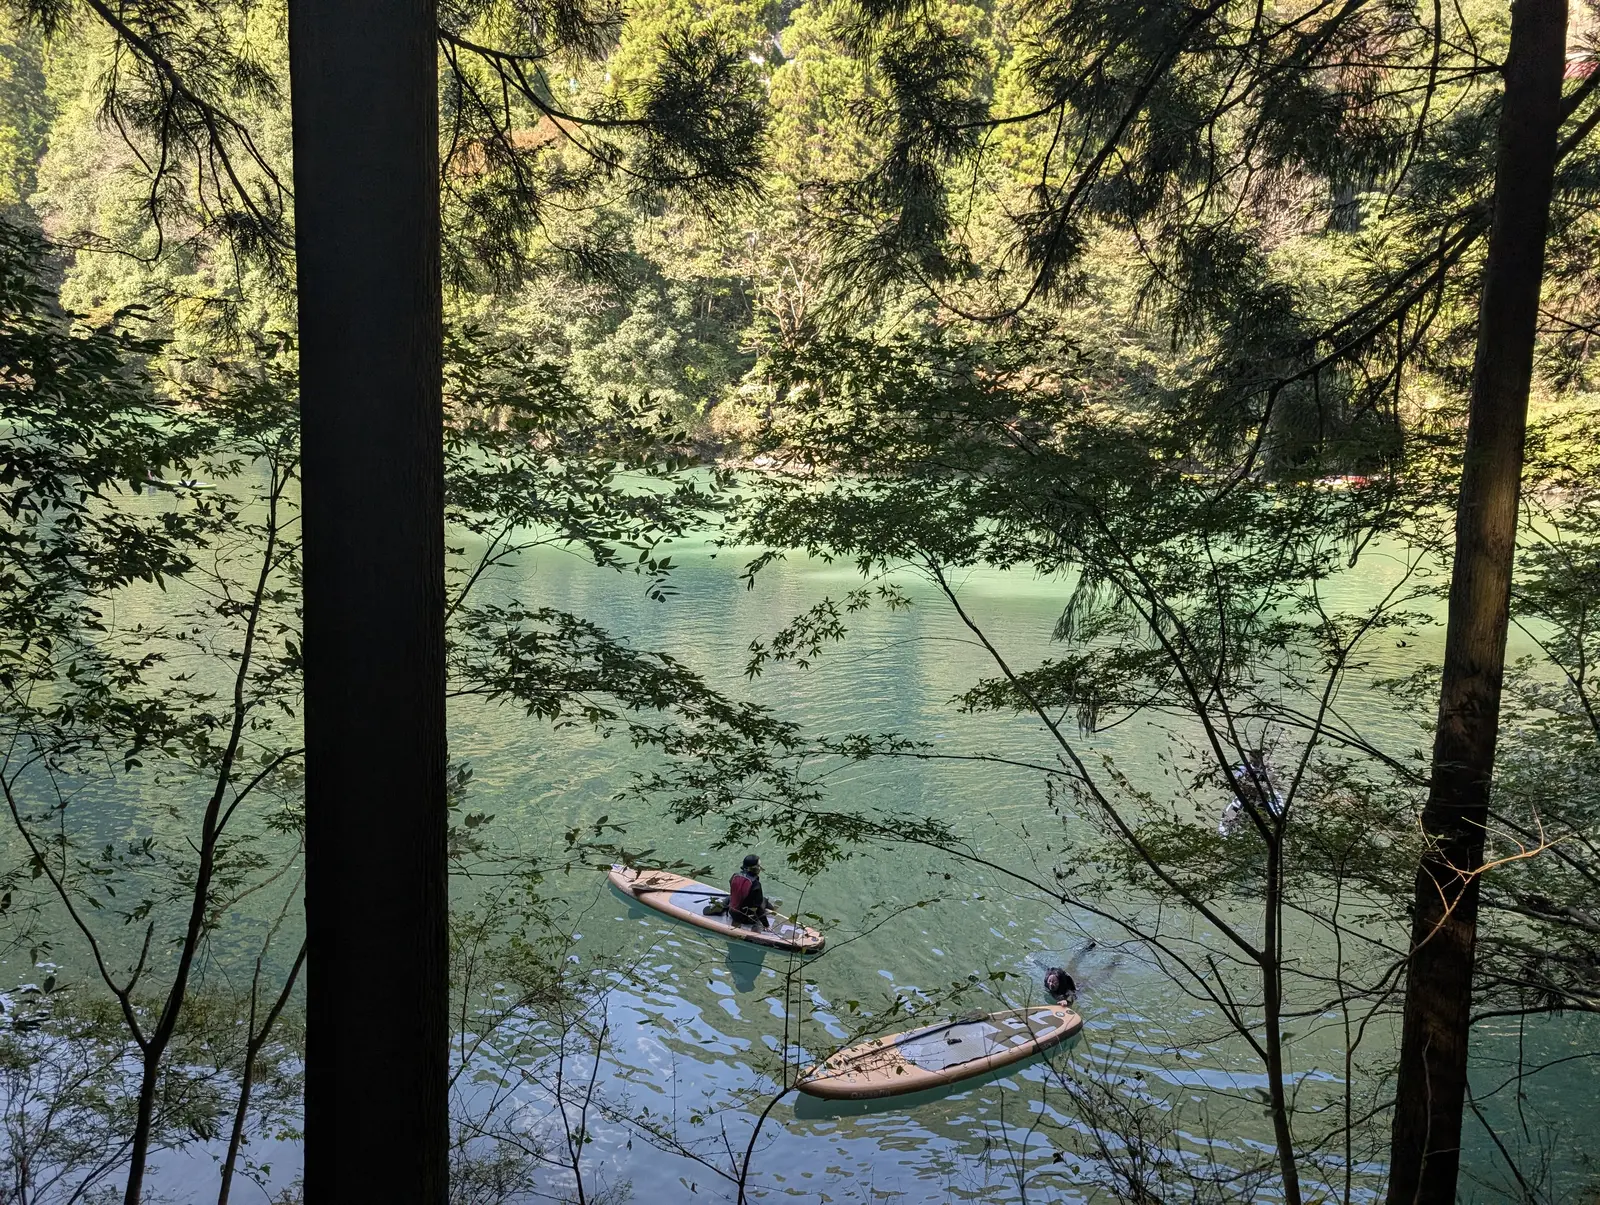
The water and the people on the paddleboards tell a story, but nearby trunks split them up. Moving just a few steps left or right could let cleaner branches frame the subject.
- ① The paddleboards and paddlers are the real narrative lead worth keeping.
- ② The thick trunk and branches can break the line of sight; find a clean window from a different standing spot.
Engineered structure and forest: a natural frame can lead the eye in
original file PXL_20261010_043748968.jpg · 13:37:48 · 24 mm equiv. · f/1.7 · 1/542 s · ISO 21
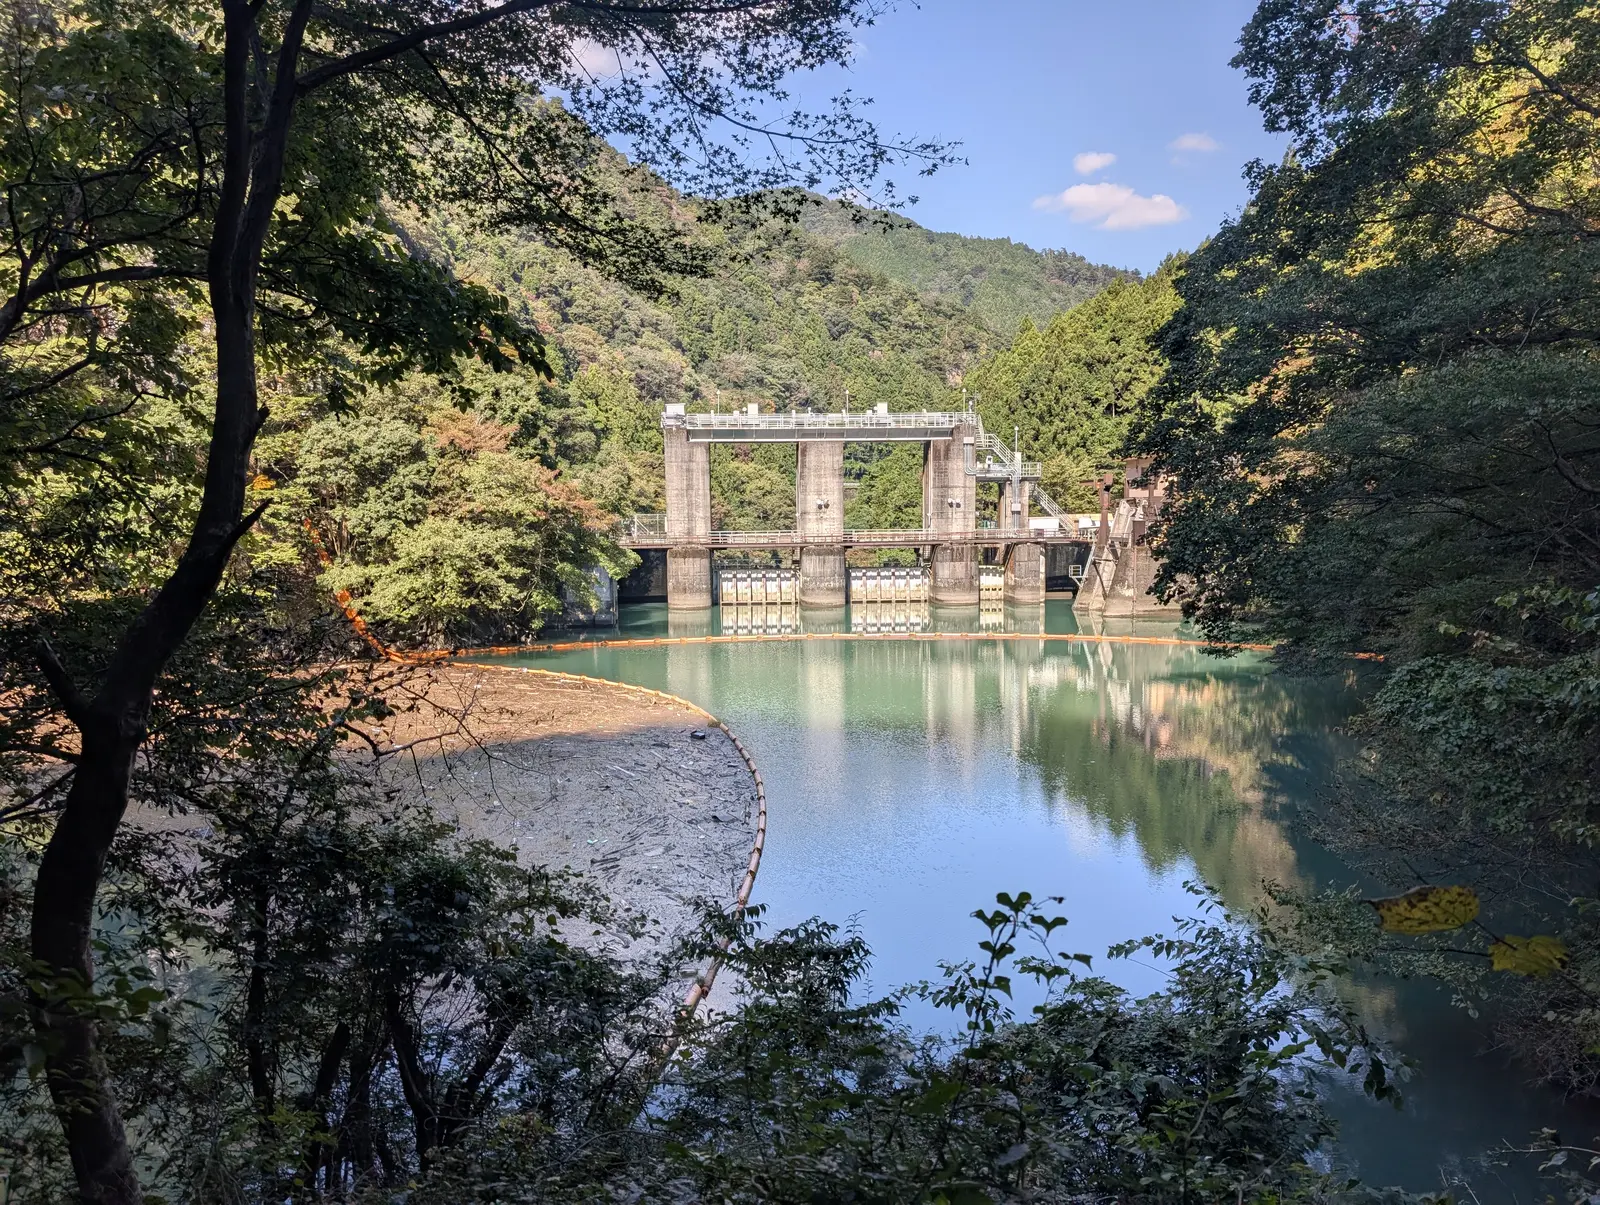
This shows clearly how an artificial structure can become the end point of a river valley; the trees on both sides act like a door frame, but nearby foliage still takes up a lot of the frame.
- ① The water gate is a clearly recognizable subject.
- ② The thin branches at the lower right and lower left may steal some attention.
- ③ The water and the reflection of the structure above create a vertical echo.
Five methods: just pick one to prioritize
| Compositional device | Real examples where it fits | Signs it’s failing |
|---|---|---|
| Rule of thirds | A bend in the river, a small boat, a lone tree. | Placed mechanically on an intersection, with nothing guiding the eye. |
| S-curves and converging lines | Rivers, mountain roads, stream stones, trails. | The line ends outside the frame and the subject isn’t on its path. |
| Natural framing | Branches in front of the water gate, a lake seen through the woods. | The frame blocks the view and its shadows weigh more than the subject. |
| Repetition and rhythm | Upright trunks in a cedar forest, rows of windows on a building. | Every element is equally prominent, with no change in rhythm. |
| Minimalism and negative space | A small boat on the water, a ridgeline in the mist. | The empty space loses its proportion to the subject. |
A photo doesn’t need the rule of thirds, leading lines, framing, and a foreground, middle ground and background all at once; use only the structures that help viewers “see what you want to say.”
GPT composition atlas: understanding composition through 21 generated illustrations
This chapter collects 21 large standalone images: 10 composition methods, 6 genre examples and 5 ideal examples supplied separately by the author. Read them one at a time: first look at the viewing order marked on the image, then read the notes below it, and finally go back to the earlier chapters of real photos and check whether your own photos are missing a subject, leading lines, a foreground, negative space or light control.
Editor’s analysis
The labels on the generated images are only approximate; when reading them, go by the text below each image and the real photos earlier on the page. For example, the symmetry image labels the vertical line through the center of the frame as the axis of symmetry, but the reflection in the lake is actually mirrored top to bottom across the horizontal shoreline; the ideal seaside example says the surfer is placed on an intersection of the rule-of-thirds lines, but in fact he is only close to the right-hand rule-of-thirds line; and the landscape example’s text treats the distant mountains as the subject, while the label in the image marks the winding river as the subject. This page reproduces the images as they are and does not alter anything in them.
A | Ten composition methods
Learn the composition methods themselves first, then take them into any scene.
Composition method 01
Rule of thirds
Decide on the main subject first, then steady the frame with an intersection and negative space.
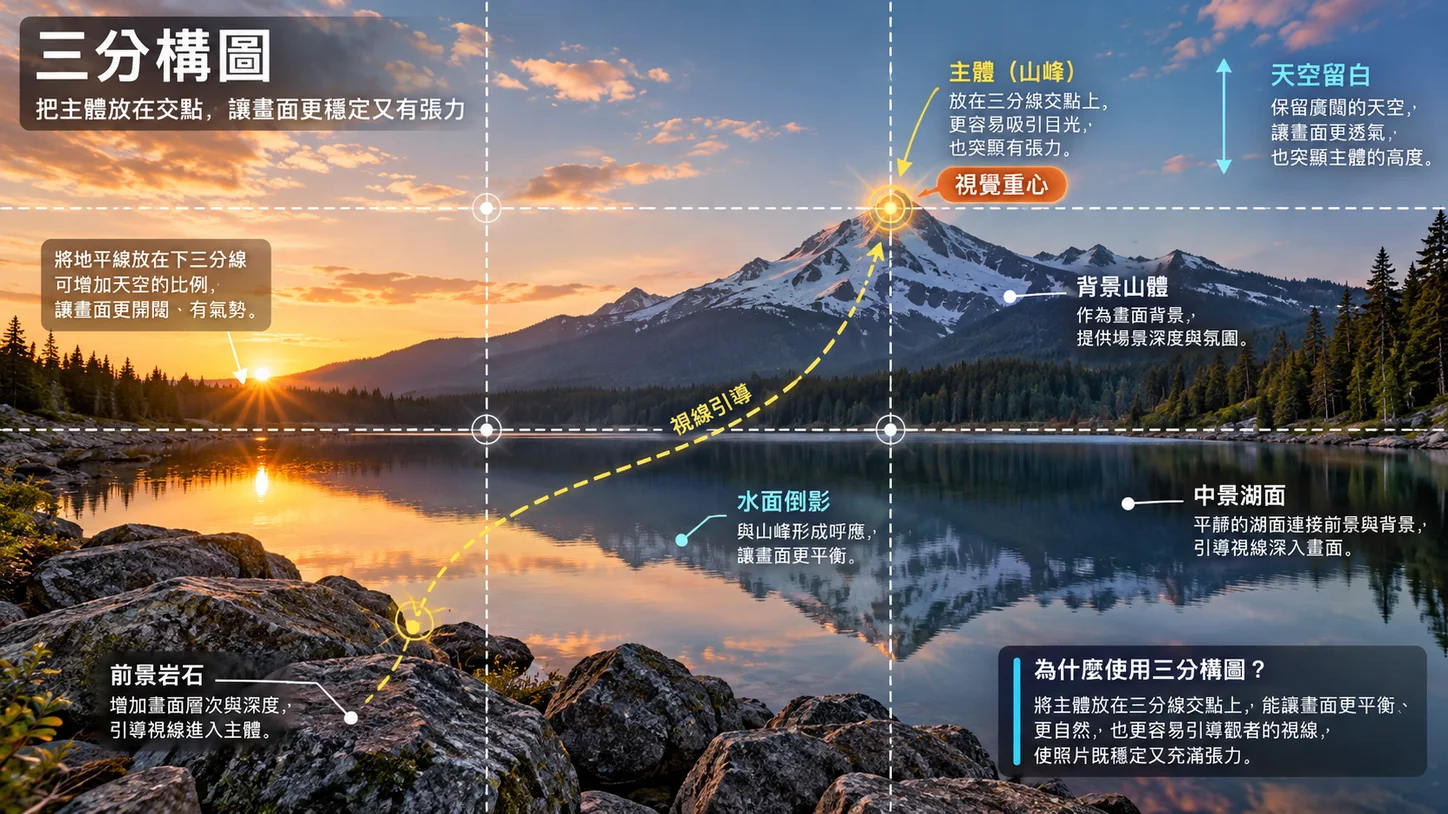
- What this image shows
- Shows how, once the subject sits in a strong position, the sky, the mountain and its reflection come into balance. The value of the rule of thirds isn’t in fitting a grid; it’s in helping you find the visual center of gravity faster.
- Taking it on location
- On location, first ask whether the main subject is the mountain, a tree, a person or the light, then move until the most important subject sits where the eye finds it most easily.
- Common failure signs
- Fixating on an intersection while missing brighter, busier elements nearby that steal the show; or a visibly tilted horizon.
- Good subjects
- Well worth taking back to lake, mountain and gorge scenes.
Compare with the earlier section: Composition · Open full size
Composition method 02
Leading lines
Use roads, railings and rivers to lead the eye to the subject step by step.
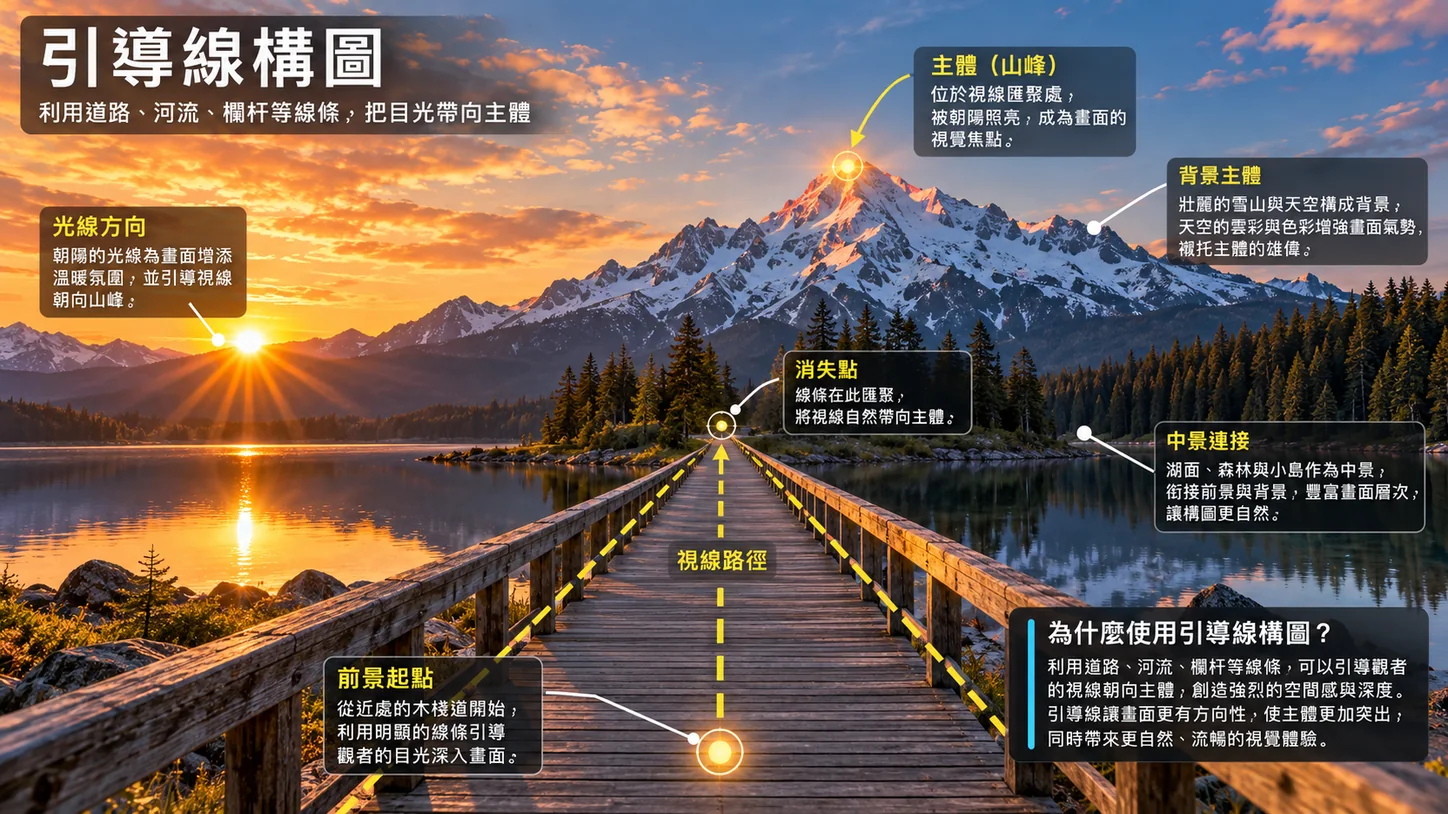
- What this image shows
- Bridge decks, roads or edge lines in the frame become tracks for the eye. As long as the end point is clear enough, viewers are naturally drawn into the photo.
- Taking it on location
- First look for lines that really lead to the subject, not just lines that look good. If a road, bridge deck or river channel can enter from the bottom edge, the result is usually more solid.
- Common failure signs
- The lines are strong but lead the eye out of the frame, or the end point is just a cluttered background.
- Good subjects
- Suits bridges, trails, roads, river channels and tracks.
Compare with the earlier section: Four cases · Open full size
Composition method 03
Foreground
Use close elements to build an entry point and make the frame feel more immersive.
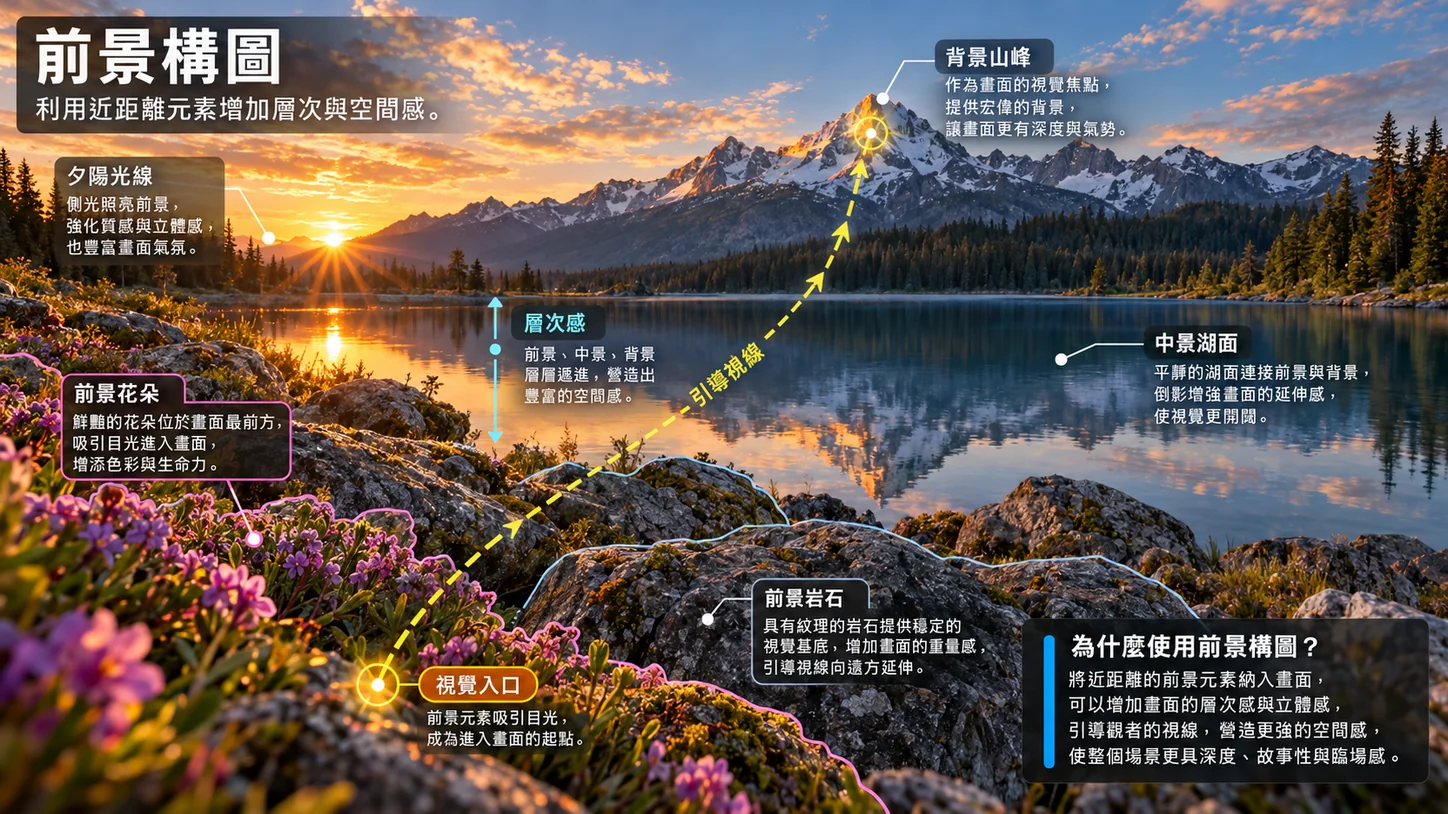
- What this image shows
- The foreground isn’t decoration; it tells viewers “where to start looking.” As long as the entry point is clear, the frame usually gains depth.
- Taking it on location
- Crouch low and get close to stones, flowers and grass, or ripples on the water, but don’t let the foreground bury the main subject. The foreground should be the first step that brings viewers into the frame.
- Common failure signs
- A foreground that is too big, too bright or too busy ends up as the wrong main subject.
- Good subjects
- Works for waterfalls, gorges, lakeshores and views looking down from high places.
Compare with the earlier section: Four cases · Open full size
Composition method 04
Framing
Use cave mouths, branches, window frames or door frames to push attention back onto the subject.
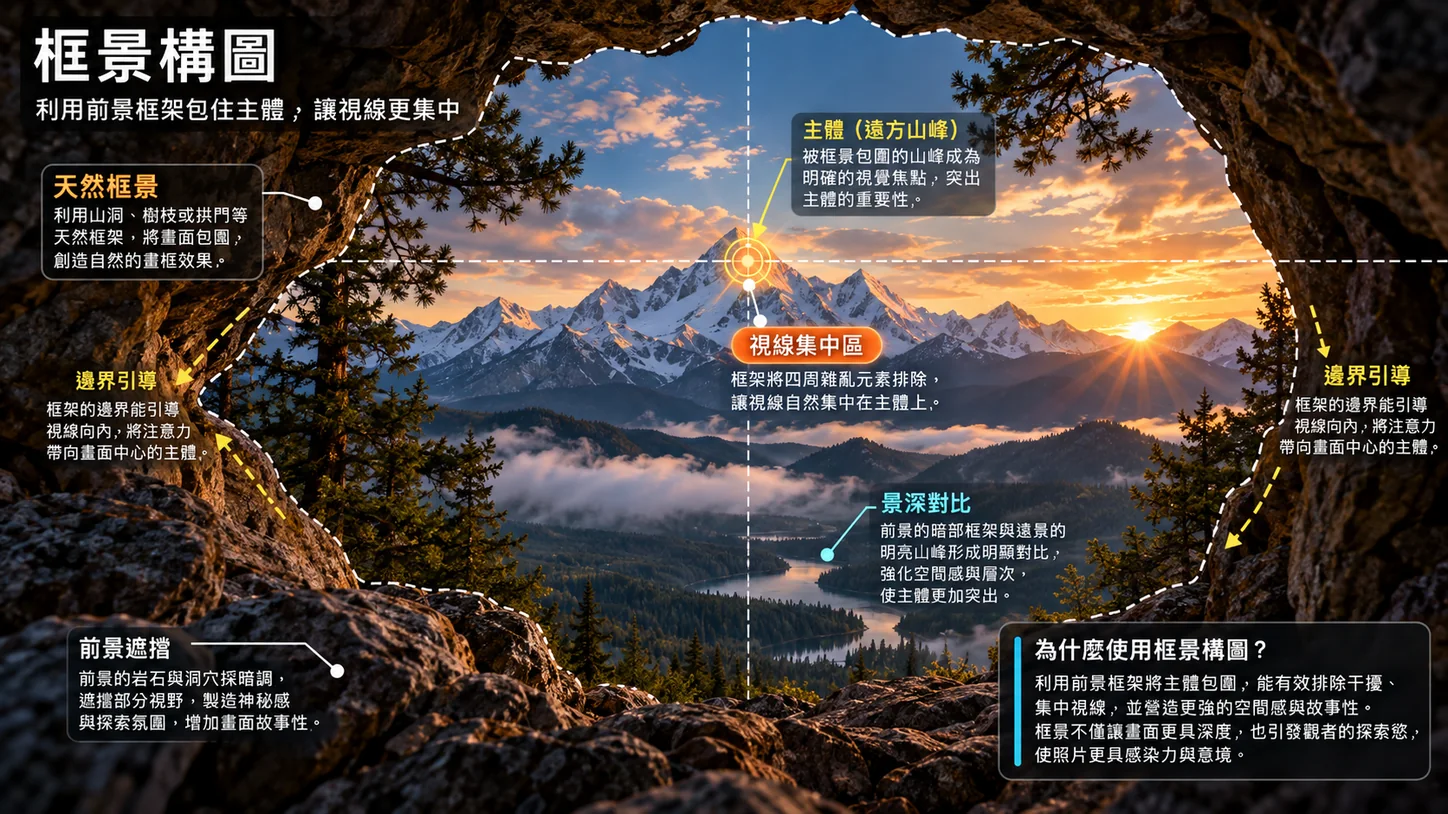
- What this image shows
- A frame tidies the edges, cuts distractions and strengthens the direction of viewing. When the outer ring is darker and the inner area brighter, the subject usually stands out more.
- Taking it on location
- Move left and right while shooting so the subject doesn’t stick to the edge of the frame. The frame can be thick, but it mustn’t upstage the main subject.
- Common failure signs
- The frame is too heavy or too dark, or cuts straight through the subject, making the picture feel oppressive.
- Good subjects
- Woods, small boats, caves, doors and windows, and arcades all work well.
Compare with the earlier section: Composition · Open full size
Composition method 05
Symmetry
When the reflection is clean enough, central symmetry can be very powerful.
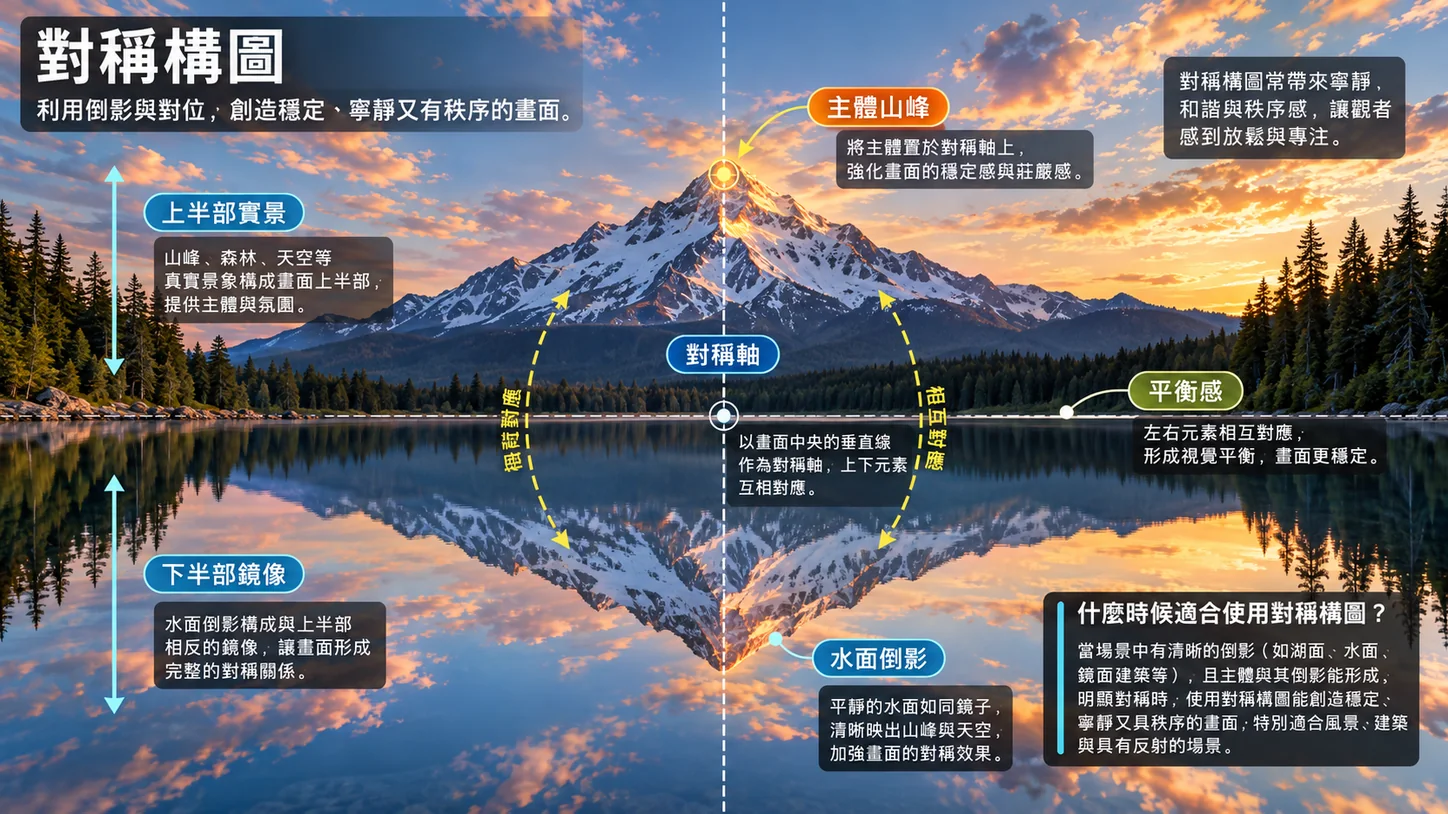
- What this image shows
- Symmetry gives the frame a sense of order. What really matters isn’t just the center line but whether the weight is balanced left and right, top and bottom.
- Taking it on location
- First check whether the water is flat, then turn on the level. Shoot a version with the line centered first, then versions with it higher or lower, and compare.
- Common failure signs
- Forcing symmetry when the wind is too strong and the water too choppy; or a horizon that is slightly off, which ruins the effect very visibly.
- Good subjects
- Suits lakes, reflections, ponds and mirrored architecture.
Compare with the earlier section: Light and weather · Open full size
Composition method 06
S-curve
Let a winding path create rhythm and lead viewers slowly deeper into the scene.
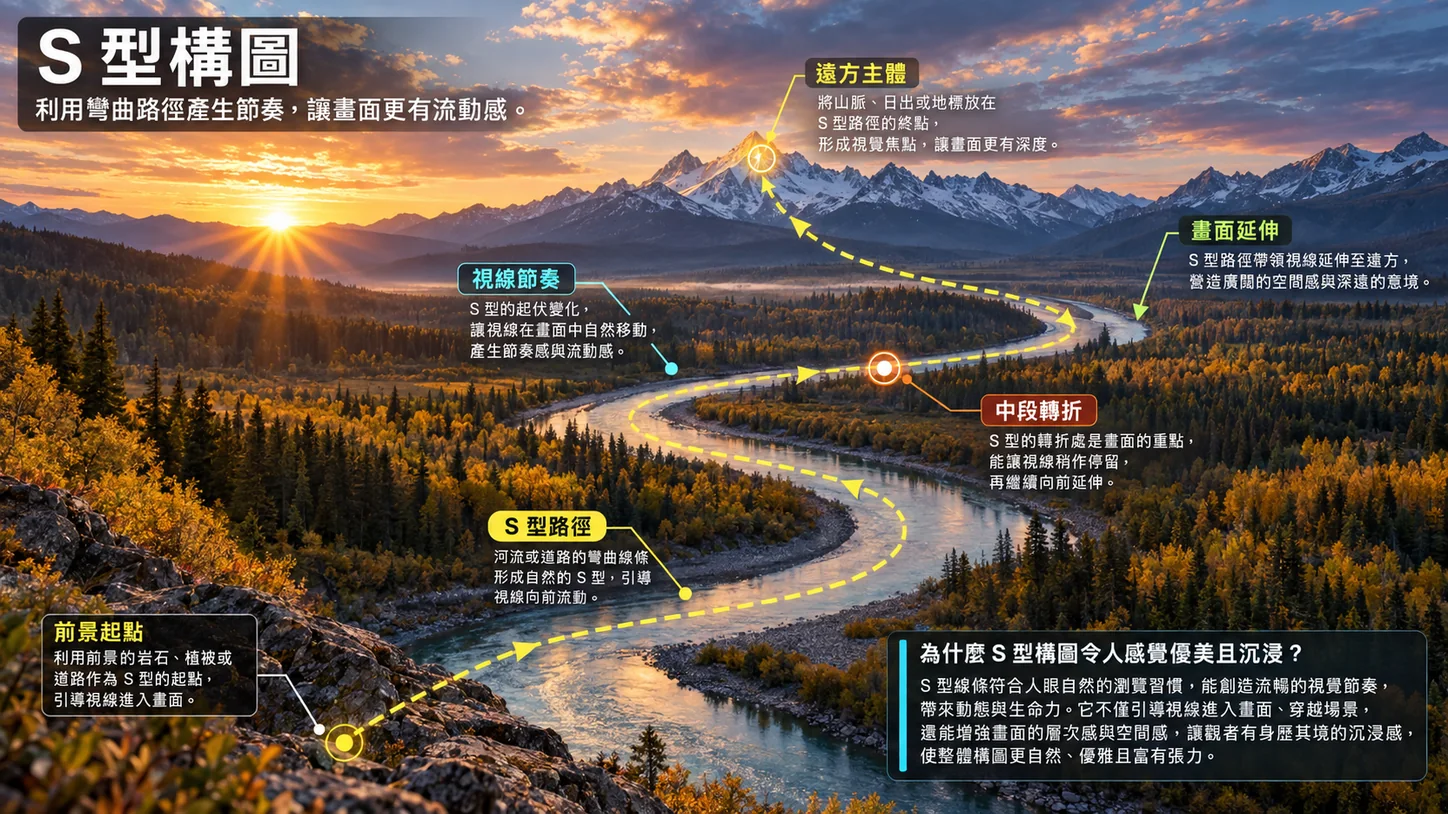
- What this image shows
- With an S-curve, the eye doesn’t rush straight in; it stops, turns and moves on again, so the frame gains a sense of flow and story.
- Taking it on location
- Stand at an angle where you can see the whole bend, rather than catching only half of the curve. The first bend usually needs to be clear.
- Common failure signs
- Only a short stretch of the curve is in the frame, or the line breaks off partway, and the visual rhythm stops working.
- Good subjects
- River channels, mountain roads, curving coastlines and country lanes all work well.
Compare with the earlier section: Four cases · Open full size
Composition method 07
Golden ratio
Treat it as a tool for checking the flow of the eye, not as a formula to force onto the frame.
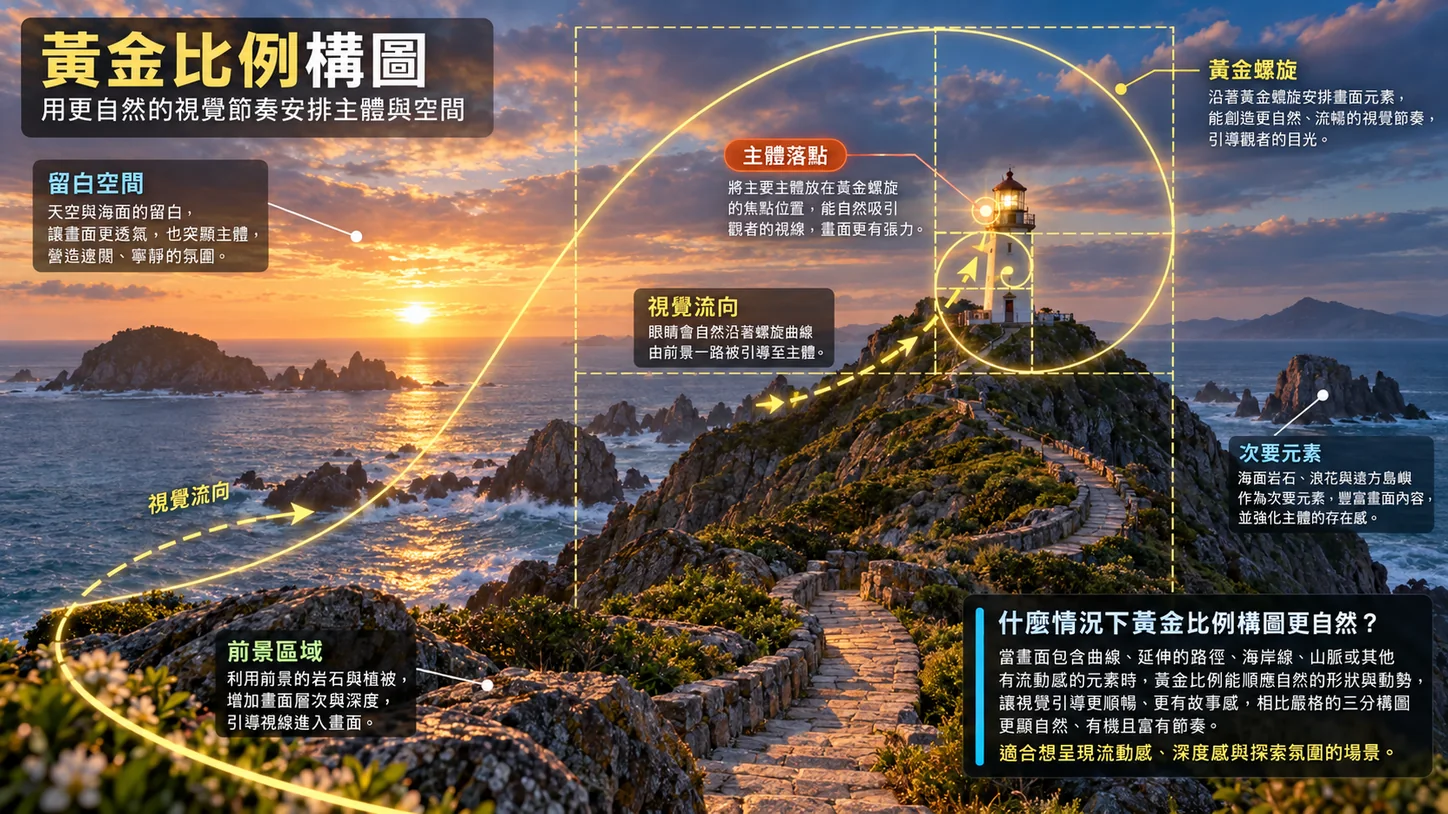
- What this image shows
- The point of the spiral is that the eye converges from the outside in and from large to small, not mathematical accuracy for its own sake.
- Taking it on location
- Shoot an intuitive version first, then look back to see whether the eye spirals naturally into the subject. If it does, fine-tune where you stand.
- Common failure signs
- Sacrificing the light, the theme or the story just to force a spiral.
- Good subjects
- Coastlines, lighthouses, roads, fjords, people and single subjects are especially good fits.
Compare with the earlier section: Composition · Open full size
Composition method 08
Diagonals
Let diagonal lines bring tension, a sense of speed and a direction of travel.
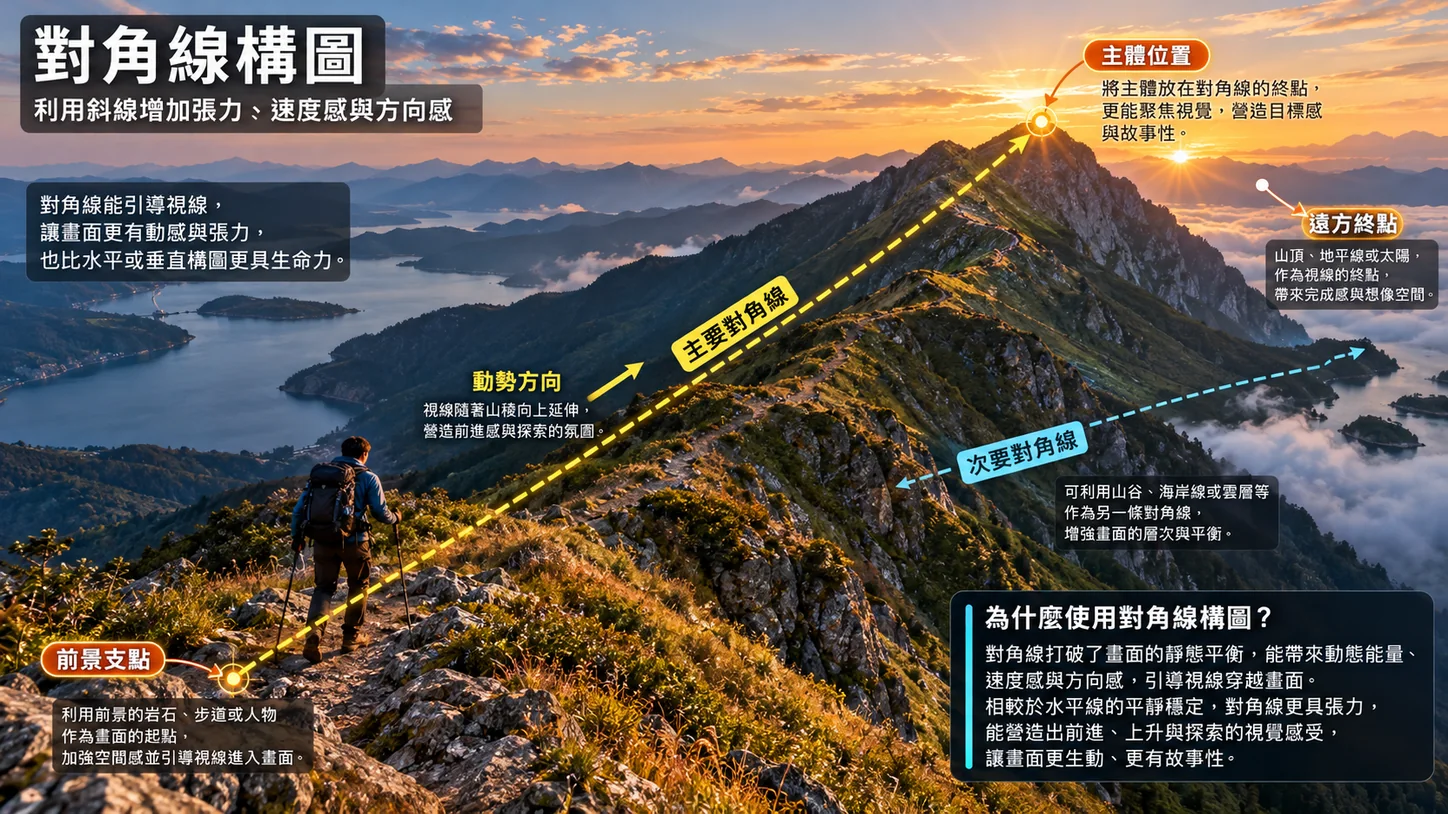
- What this image shows
- A diagonal feels more like “something is happening” than a horizontal line does, which makes it ideal for conveying power and direction of movement.
- Taking it on location
- Find a ridgeline, slope, coastline or trail that genuinely leads to the main subject, then have the person or the light follow that direction.
- Common failure signs
- Every line slants at random with no shared end point, and all that’s left is chaos.
- Good subjects
- Ridgelines, hillsides, trails and people on the move are all good fits.
Compare with the earlier section: Five genres · Open full size
Composition method 09
Negative space
Deliberately simplify the elements so the subject is clearer and the mood purer.
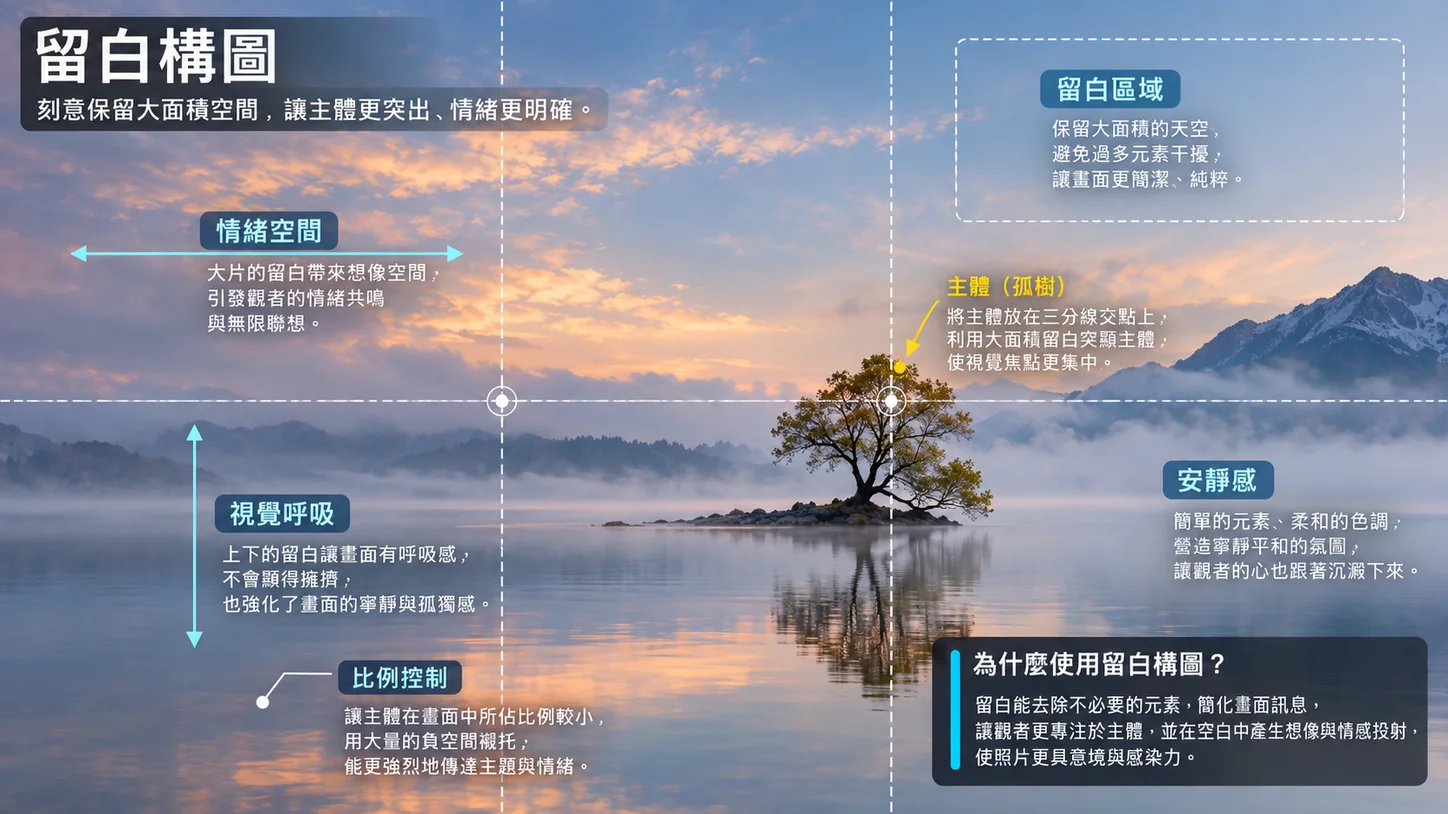
- What this image shows
- Negative space isn’t emptiness; it keeps breathing room for the subject. When the background is quiet enough, the mood comes through more purely.
- Taking it on location
- Keep stray branches, passersby, buildings and bright spots out of the frame, and let the subject become a little smaller; that often makes the picture more evocative.
- Common failure signs
- When the subject is both too small and not clear enough, the frame just turns empty rather than simple.
- Good subjects
- Misty scenes, single trees, lone boats, snowfields and still water are all ideal.
Compare with the earlier section: Light and weather · Open full size
Composition method 10
Layering
Separate the foreground, middle ground and background clearly, and the frame naturally looks more three-dimensional.
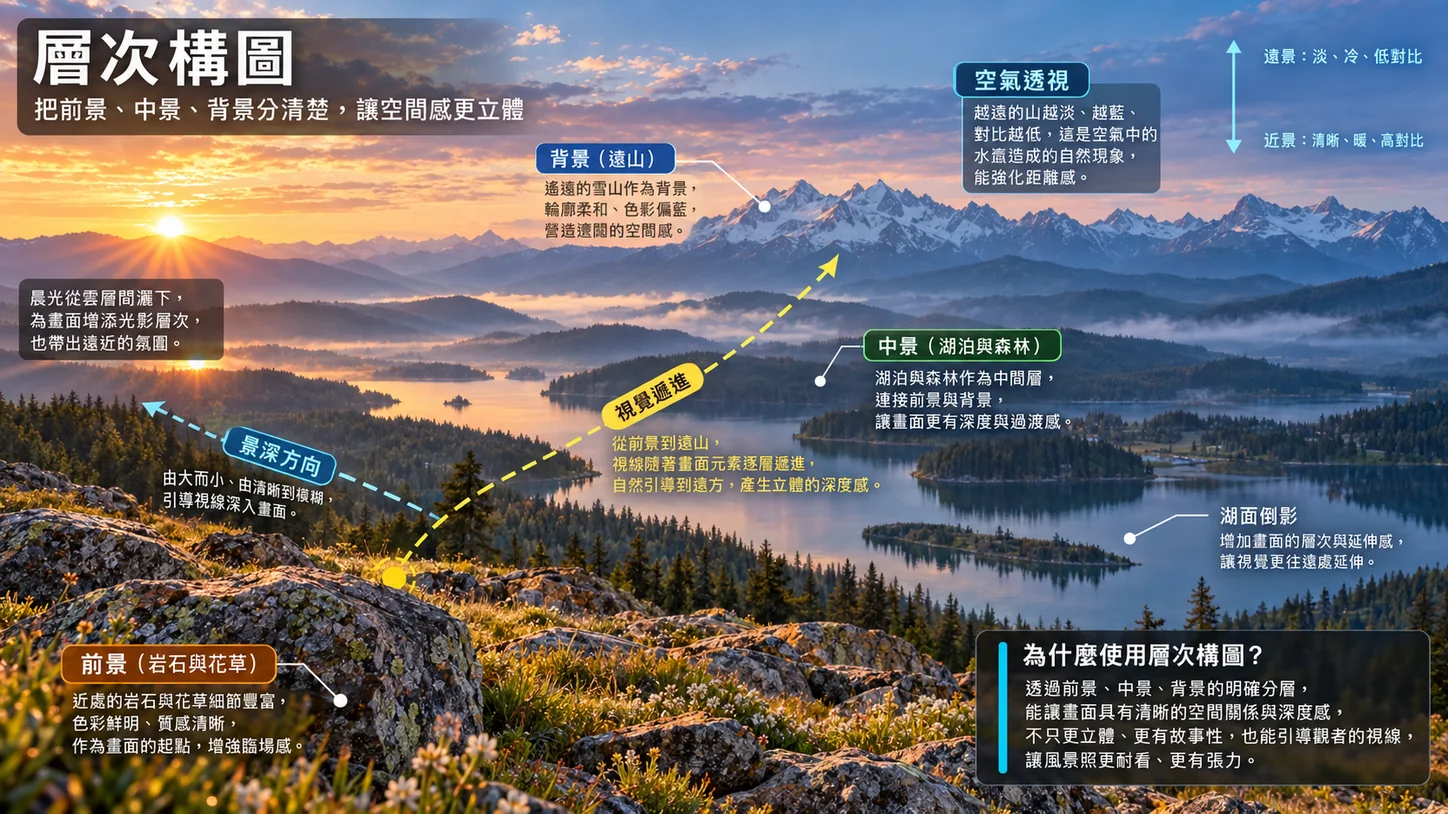
- What this image shows
- Layering makes a landscape not just pretty but spacious. When the foreground, middle ground and background all hold up, the photo usually rewards a longer look.
- Taking it on location
- Actively look for three or more layers at different distances, then separate them with light, tonal contrast, mist and sharpness.
- Common failure signs
- Everything is equally bright and equally sharp, so the frame goes flat.
- Good subjects
- Gorges, forests, lakes and mountainous scenes are the most worthwhile places to practice this.
Compare with the earlier section: Four cases · Open full size
B | Genre examples
Start from the genre and learn the common judgment calls for city, countryside, architecture, night, landscape and seascape scenes.
Genre example 11
City example
How streets, pedestrians, traffic and the lines of tall buildings create a sense of story in the city.
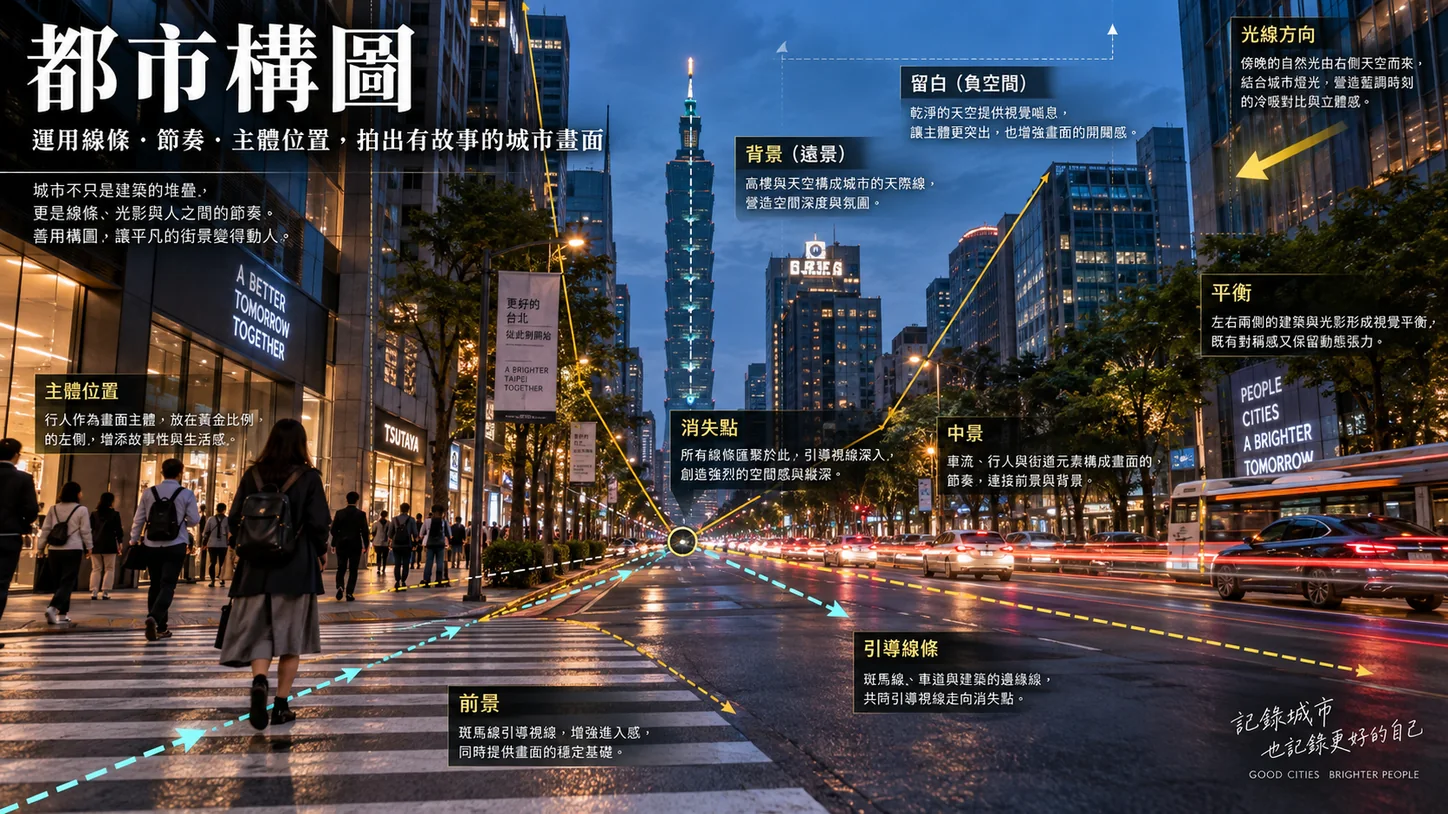
- What this image shows
- In city scenes, what matters most is the vanishing point, rhythm and where the subject sits. Streets, tracks, traffic and pedestrians come together to form a story.
- Taking it on location
- First find a street that leads to a distant subject, then wait for a pedestrian or vehicle to move into a good position. Blue hour is especially good for practicing warm–cool contrast.
- Common failure signs
- A busy frame with no main subject, or signs and light boxes so bright that they swallow the subject entirely.
- Good subjects
- Works for shopping districts, riversides, intersections, streetcars and high-rise street scenes.
Compare with the earlier section: Composition · Open full size
Genre example 12
Countryside example
Use the curve of a road, farmhouses and layers so that even a quiet scene can tell a story.
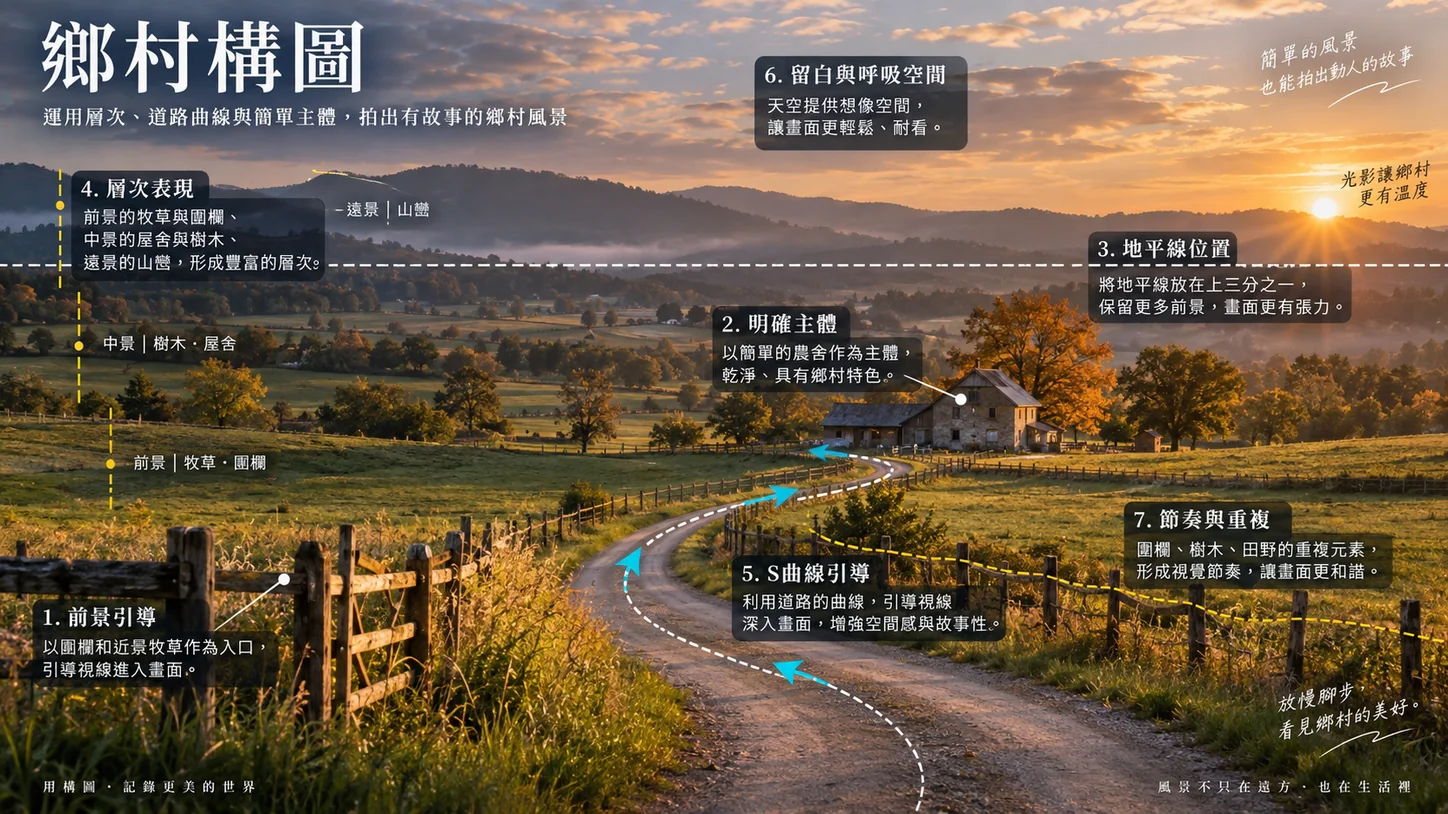
- What this image shows
- Countryside pictures usually hold together through the rhythm of the road, the layers of the fields and a simple subject. Quiet doesn’t mean boring.
- Taking it on location
- Find a bend in the road, a farmhouse, a tree or a barn to be the center of the story, and make the most of the slanting light of early morning or evening.
- Common failure signs
- A path that enters the frame but has no end point, or foreground weeds and fences in a tangled mess.
- Good subjects
- Applies directly to suburbs, fields, hills, highways and farming villages.
Compare with the earlier section: Five genres · Open full size
Genre example 13
Architecture example
Symmetry, control of verticals, framing and geometric order are the keys to architectural photos.
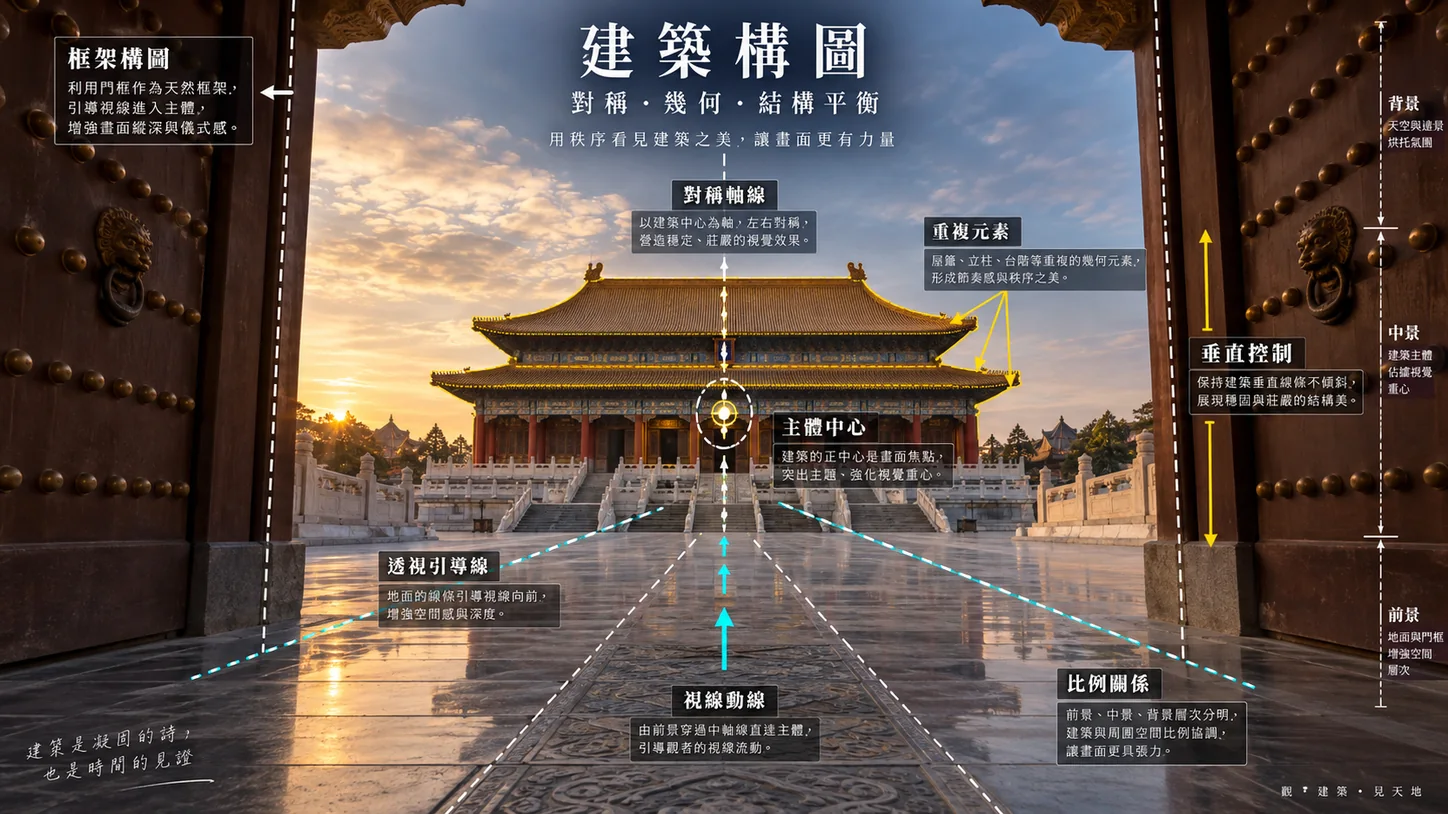
- What this image shows
- The core of architectural photos is a sense of order: a central axis, repeated elements, steady verticals and clear spatial proportions.
- Taking it on location
- Check the verticals first, then decide whether to go for central symmetry. If the surroundings are cluttered, use doors, windows or corridors to close off the edges.
- Common failure signs
- Buildings that lean or are badly distorted, or a messy foreground that breaks the sense of geometry.
- Good subjects
- Suits temples, stations, shophouses, historic sites, halls and modern buildings.
Compare with the earlier section: Composition · Open full size
Genre example 14
Night example
A night scene isn’t just about brightness; it’s about controlling highlights, guiding the eye and balancing the shadows.
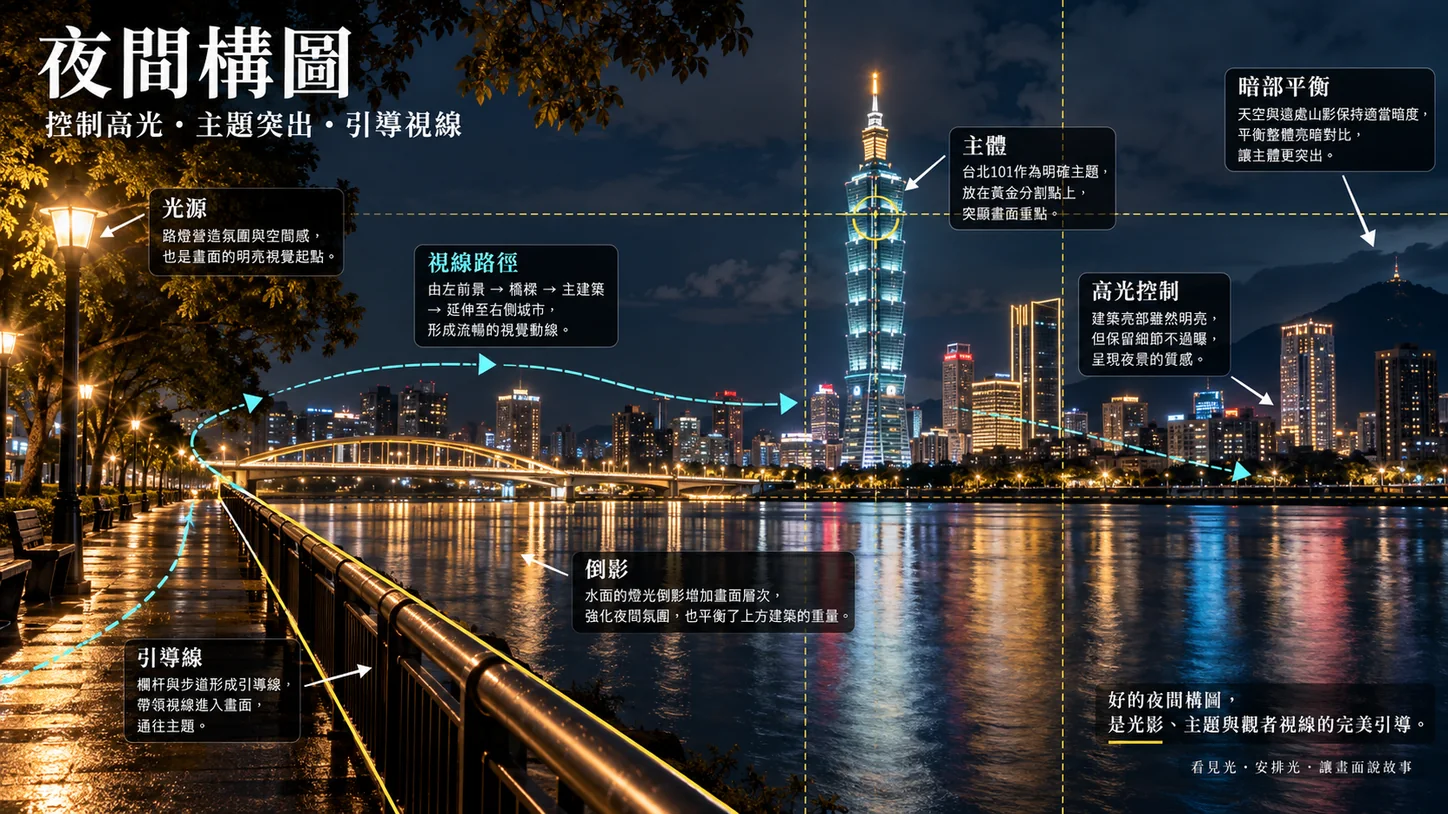
- What this image shows
- The keys to a night scene are highlights that don’t blow out, shadows that keep the mood, and a subject that is clear enough.
- Taking it on location
- First find the subject that is both the brightest and the most worth shooting, then see whether a railing, the water, a walkway or a bridge can lead the eye.
- Common failure signs
- Highlights blown to pure white, a completely black sky, a tilted horizon, or a mass of lights with no theme.
- Good subjects
- Very useful for city night views, riversides, bridges, high-rises and reflections.
Compare with the earlier section: Light and weather · Open full size
Genre example 15
Landscape example
In a grand landscape, what matters is the foreground, middle ground and background, the direction of the light, and how the eye travels into the depth.
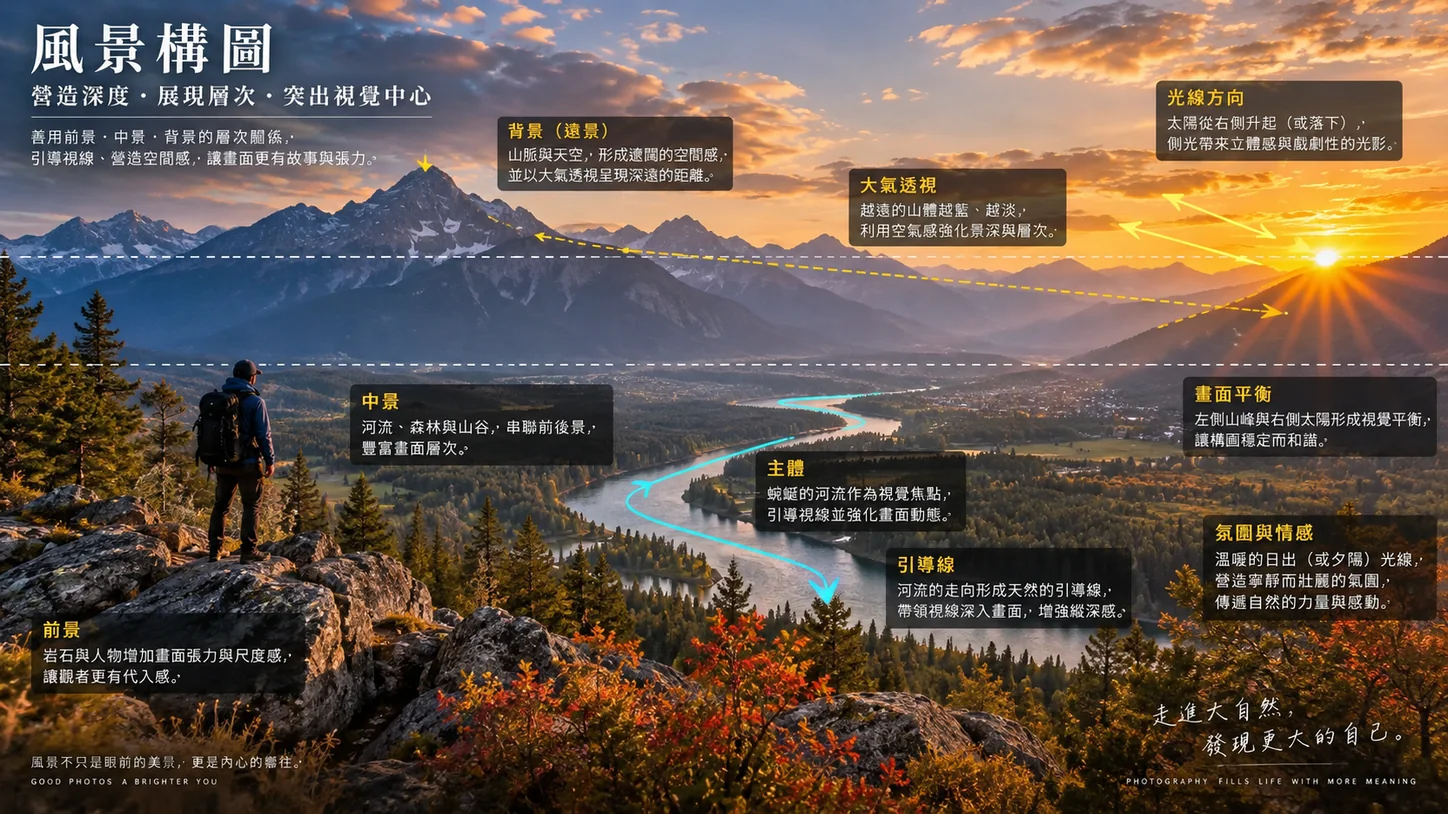
- What this image shows
- This is a summary example of a grand landscape: the foreground entry point, the leading line in the middle ground, the distant mountains as subject and the direction of light all fall into place at once.
- Taking it on location
- On a high point, don’t look only at the distant mountains: first check whether the foreground works, then see whether a river, a ridgeline or the light can carry the eye into the frame.
- Common failure signs
- Only a beautiful background, with no foreground and no leading line; or the sun, a person and the main peak fighting one another.
- Good subjects
- Works well as a review template for landscape photography as a whole.
Compare with the earlier section: Four cases · Open full size
Genre example 16
Seascape example
A good seascape depends on the horizon, the rhythm of the waves, the coastline and a clear subject.
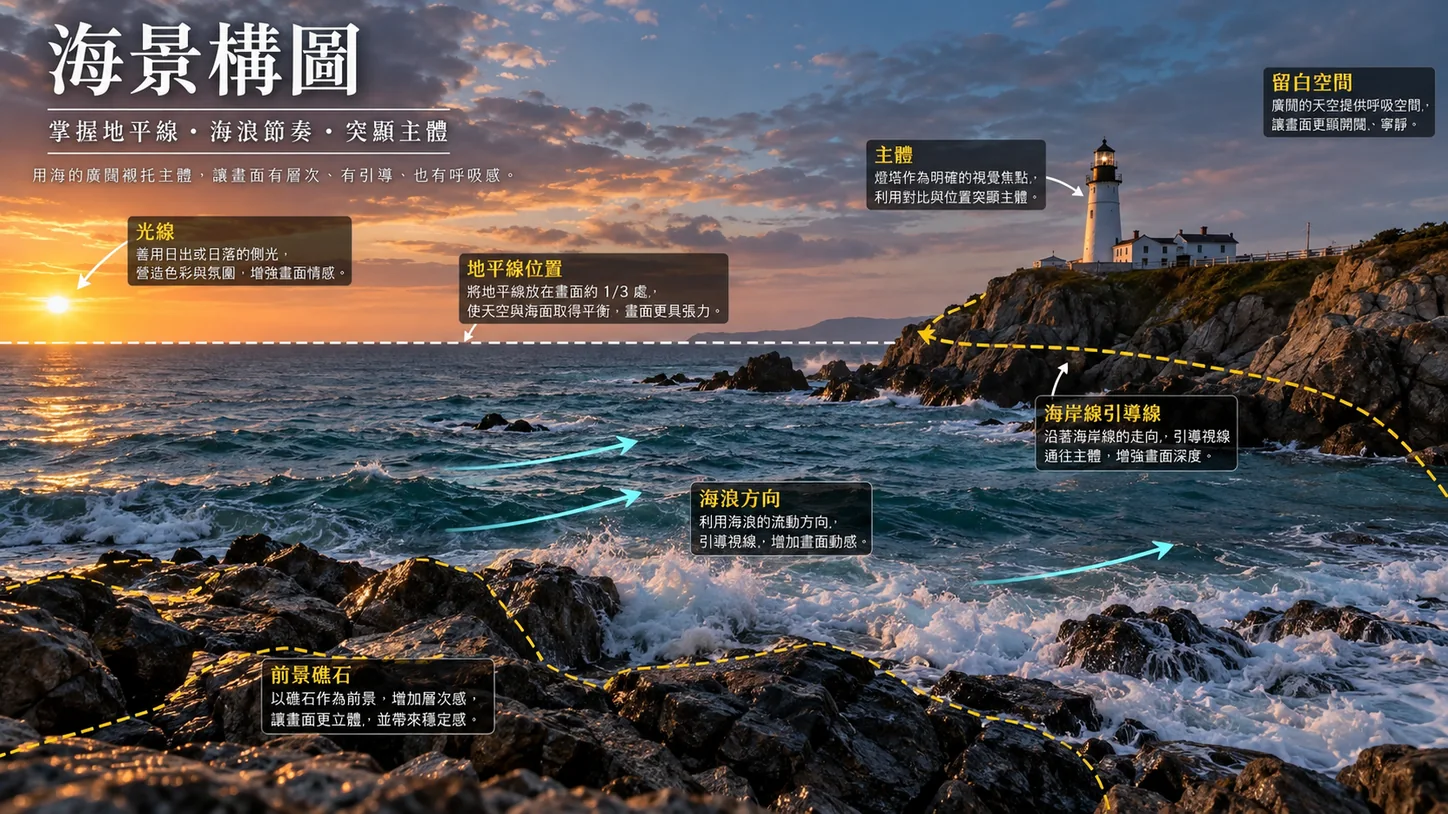
- What this image shows
- A seascape has few elements, so every one of them matters: where the horizon goes, how the waves move, whether the foreground rocks work, and whether the lighthouse is clear enough.
- Taking it on location
- First get the horizon level, then decide whether to emphasize the sky or the waves. If there is a lighthouse, pier, rocks or a boat, try to make it a clear focal point.
- Common failure signs
- Just a vast expanse of sea with nowhere for the eye to rest, or a tilted horizon and a cluttered foreground.
- Good subjects
- Applies directly to coasts, lighthouses, breaking waves and sunrise or sunset seascapes.
Compare with the earlier section: Composition · Open full size
C | Ideal examples from the author
Five complete illustrations supplied separately by the author. Each is labeled “100% fictional” right in the image and ties the whole viewing order together in a single picture.
From the author 17
Ideal mountain example
The rule of thirds, a trail as the leading line, foreground, middle ground and background, and highlight control, condensed into one complete illustration.
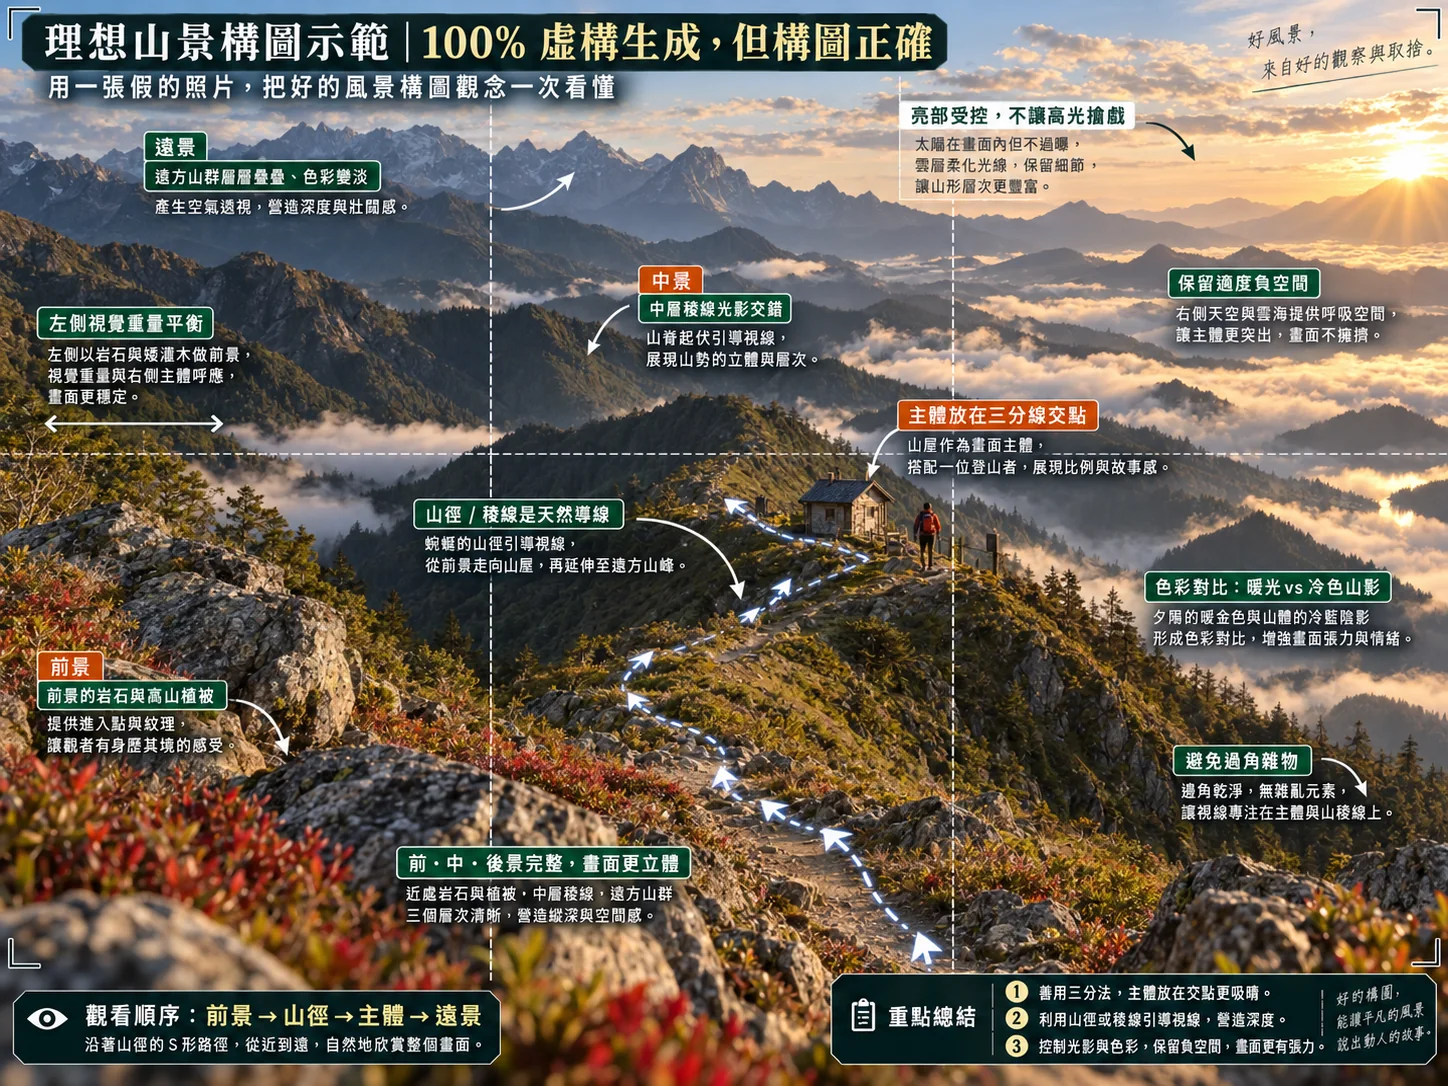
- What this image shows
- This image is a very complete distillation of the most common right decisions in mountain scenes: rocks in the foreground provide an entry point, the trail forms a leading line, the subject sits on a rule-of-thirds intersection, and the sky on the right keeps some breathing room.
- Taking it on location
- When shooting for real, there’s no need to copy the same mountain; what matters more is copying this viewing order: foreground → leading line → subject → distant view.
- Common failure signs
- If the foreground is removed, the leading line breaks, or the bright sky on the right blows out uncontrolled, the stable structure of this image falls apart.
- Good subjects
- Works very well as a master template for an “ideal mountain scene.”
Compare with the earlier section: Four cases · Open full size
From the author 18
Ideal forest example
The rhythm of the trunks, a stream as the leading line, a person as the subject and layers of light rays: forest composition at a glance.
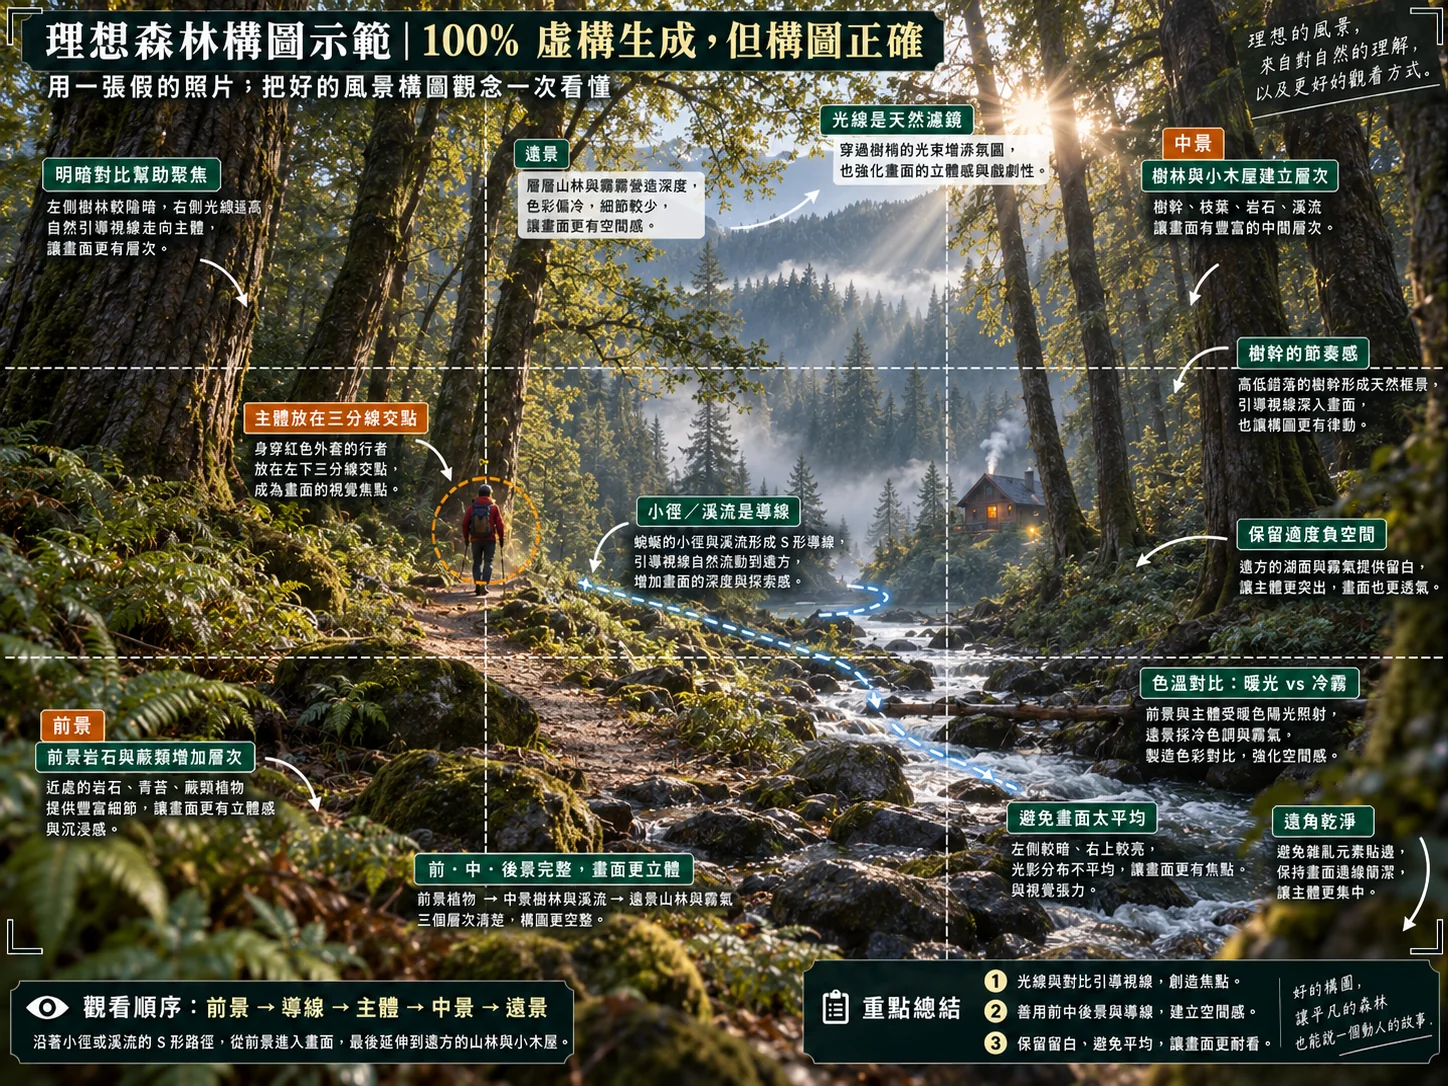
- What this image shows
- This image shows the hardest part of forest subjects: how to establish a focal point in a complex scene. The answer is to have the person, the stream and the shafts of light work together.
- Taking it on location
- In a real forest, first find a path or stream that will carry the eye in, then wait for a shaft of light or place a person to give the eye somewhere to rest.
- Common failure signs
- If the whole forest is evenly lit and the subject is unclear, the photo is left with nothing but “lots of trees” and no focus.
- Good subjects
- This image works very well as a reference to check against when shooting forests, stream valleys and forest roads in the future.
Compare with the earlier section: Four cases · Open full size
From the author 19
Ideal seaside example
The horizon, a surfer as the subject, a lighthouse, the coastline and shells in the foreground together build a complete reading path through the seascape.
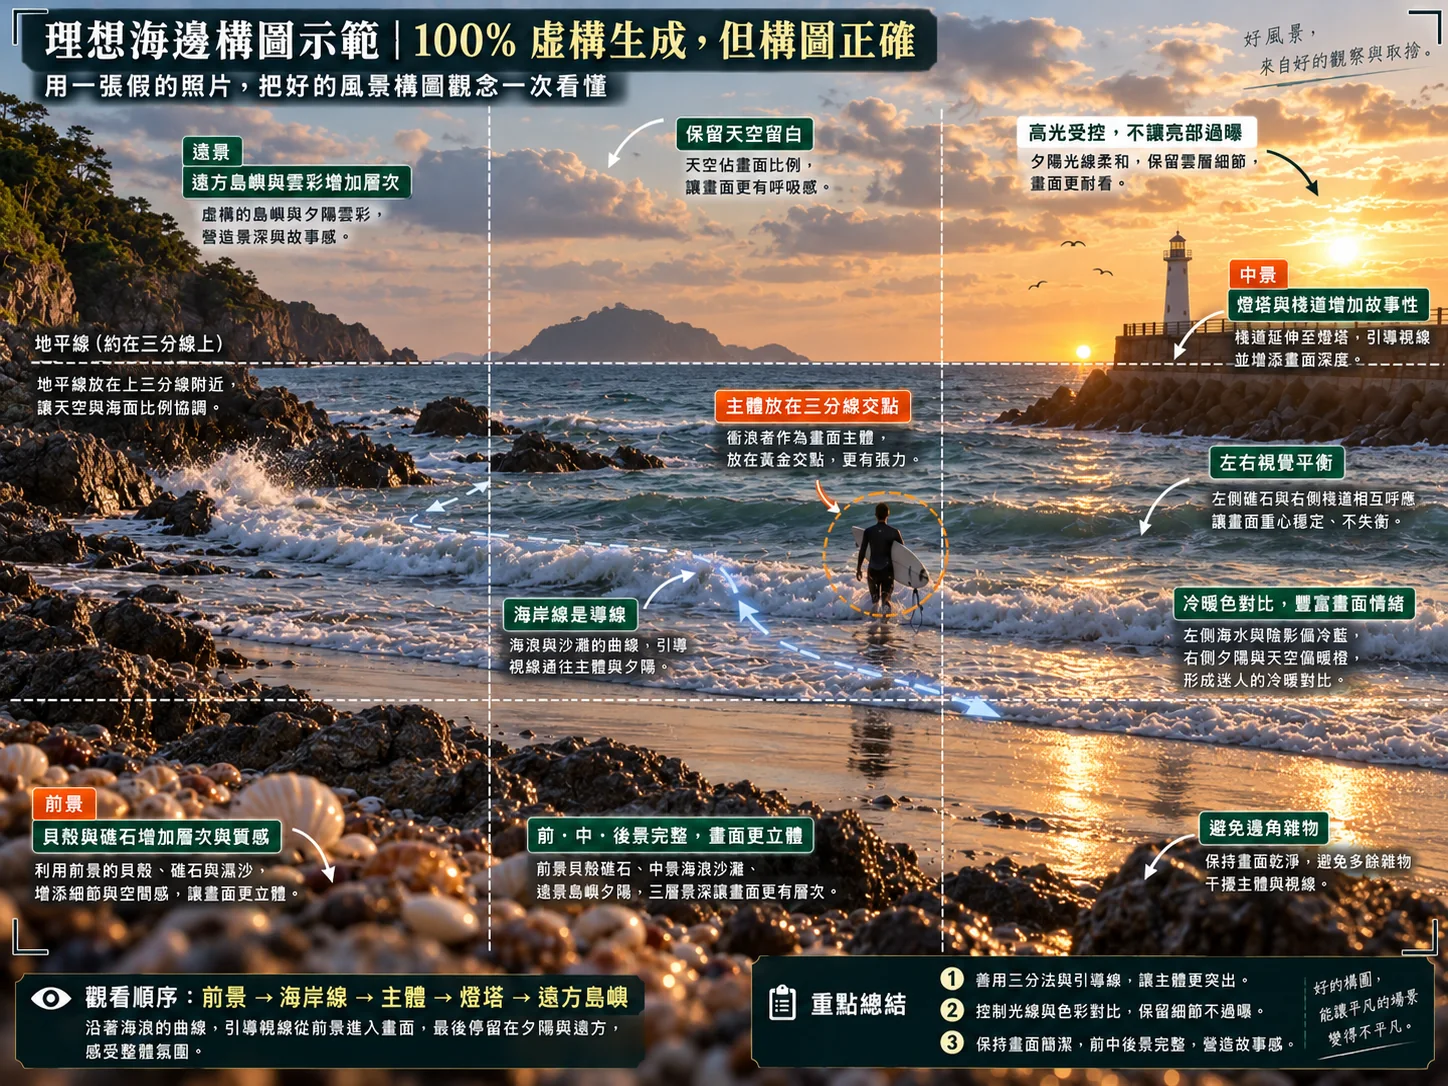
- What this image shows
- The most valuable thing about this image is that it puts all the elements commonly used in seascapes into one readable structure: the foreground, the coastline, the subject, the distant lighthouse and the bright sky.
- Taking it on location
- At the seaside, use it directly as a check: Is the horizon level? Are the foreground rocks or shells clean enough? Can the waves carry the eye to the subject?
- Common failure signs
- If the subject is unclear and all that’s left is pretty waves and a sunset, the picture easily becomes all mood and no structure.
- Good subjects
- Can serve as a combined example for seaside, lighthouse, surfing and sunset seascapes.
Compare with the earlier section: Composition · Open full size
From the author 20
Ideal city example
Reflections on wet ground, tracks as leading lines, a pedestrian as the subject, the city skyline and a warm–cool light contrast, all brought together at once.
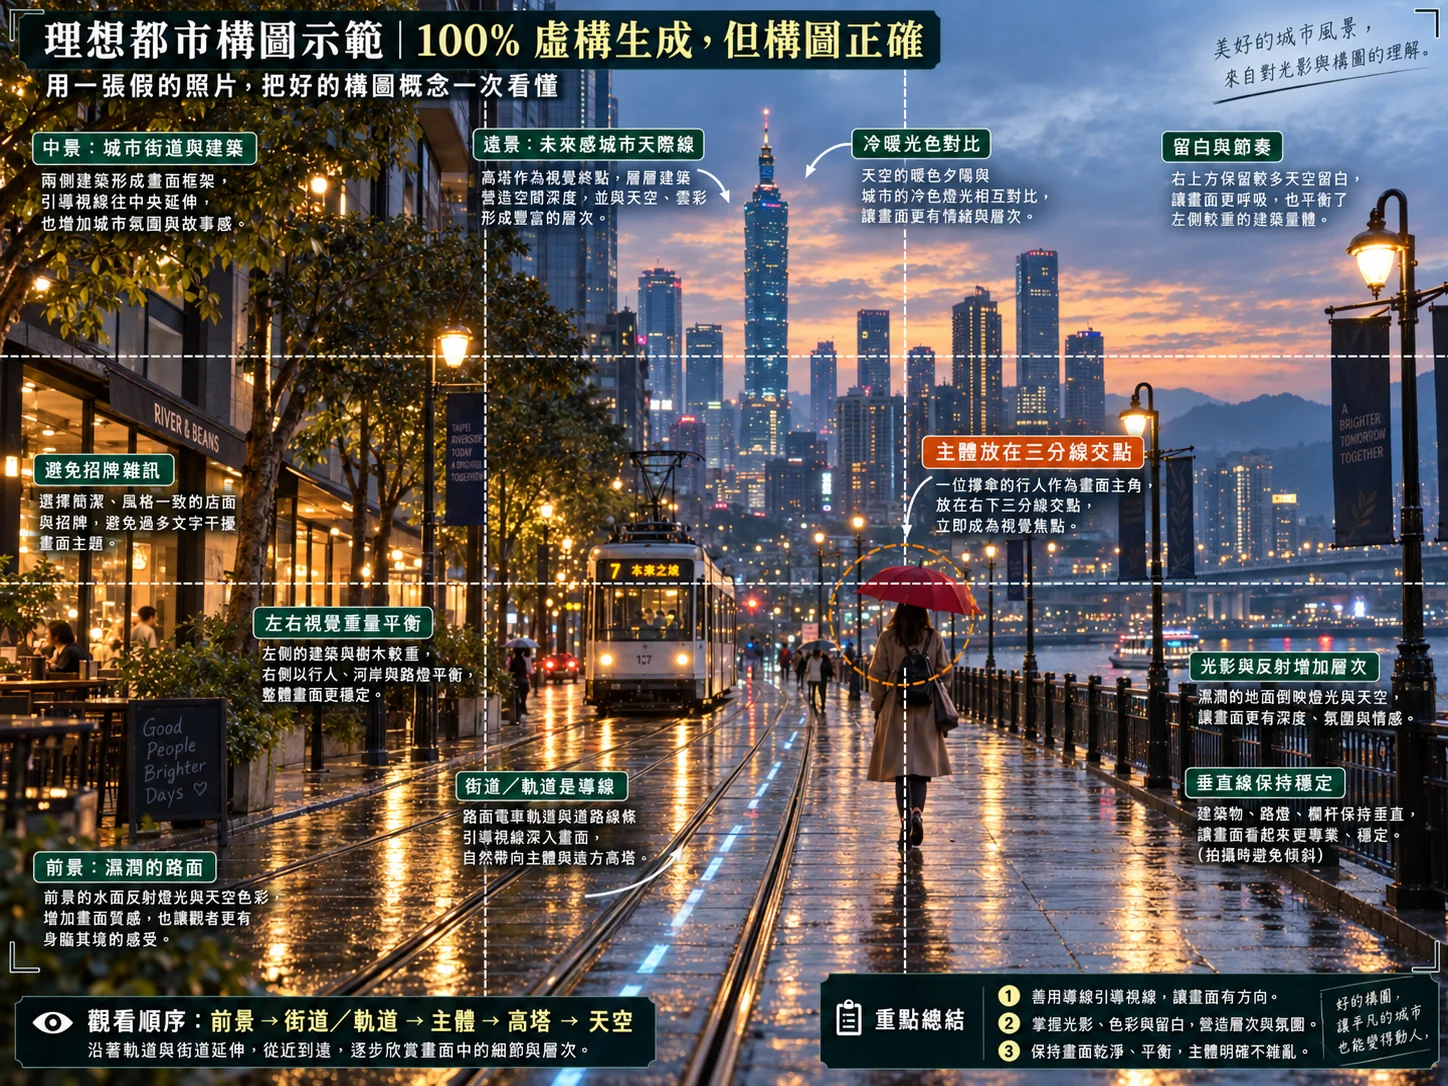
- What this image shows
- The biggest strength of this city example is that it organizes a complex city into a readable path: foreground pavement → tracks and street → pedestrian as subject → tower → sky.
- Taking it on location
- When shooting a city after rain or at blue hour, first find reflective ground, then wait for a person to walk into a strong position; the success rate will be very high.
- Common failure signs
- Without a person or an end point for the eye, a city picture, however beautiful, may look like nothing more than an ordinary street-photography record.
- Good subjects
- Can serve as an ideal template for city walks, streetcar street scenes, rainy-day street photography and blue hour.
Compare with the earlier section: Composition · Open full size
From the author 21
Ideal countryside example
An S-shaped road, a cyclist as the subject, a village in the middle ground, distant mountains in the background and a clean rural rhythm.
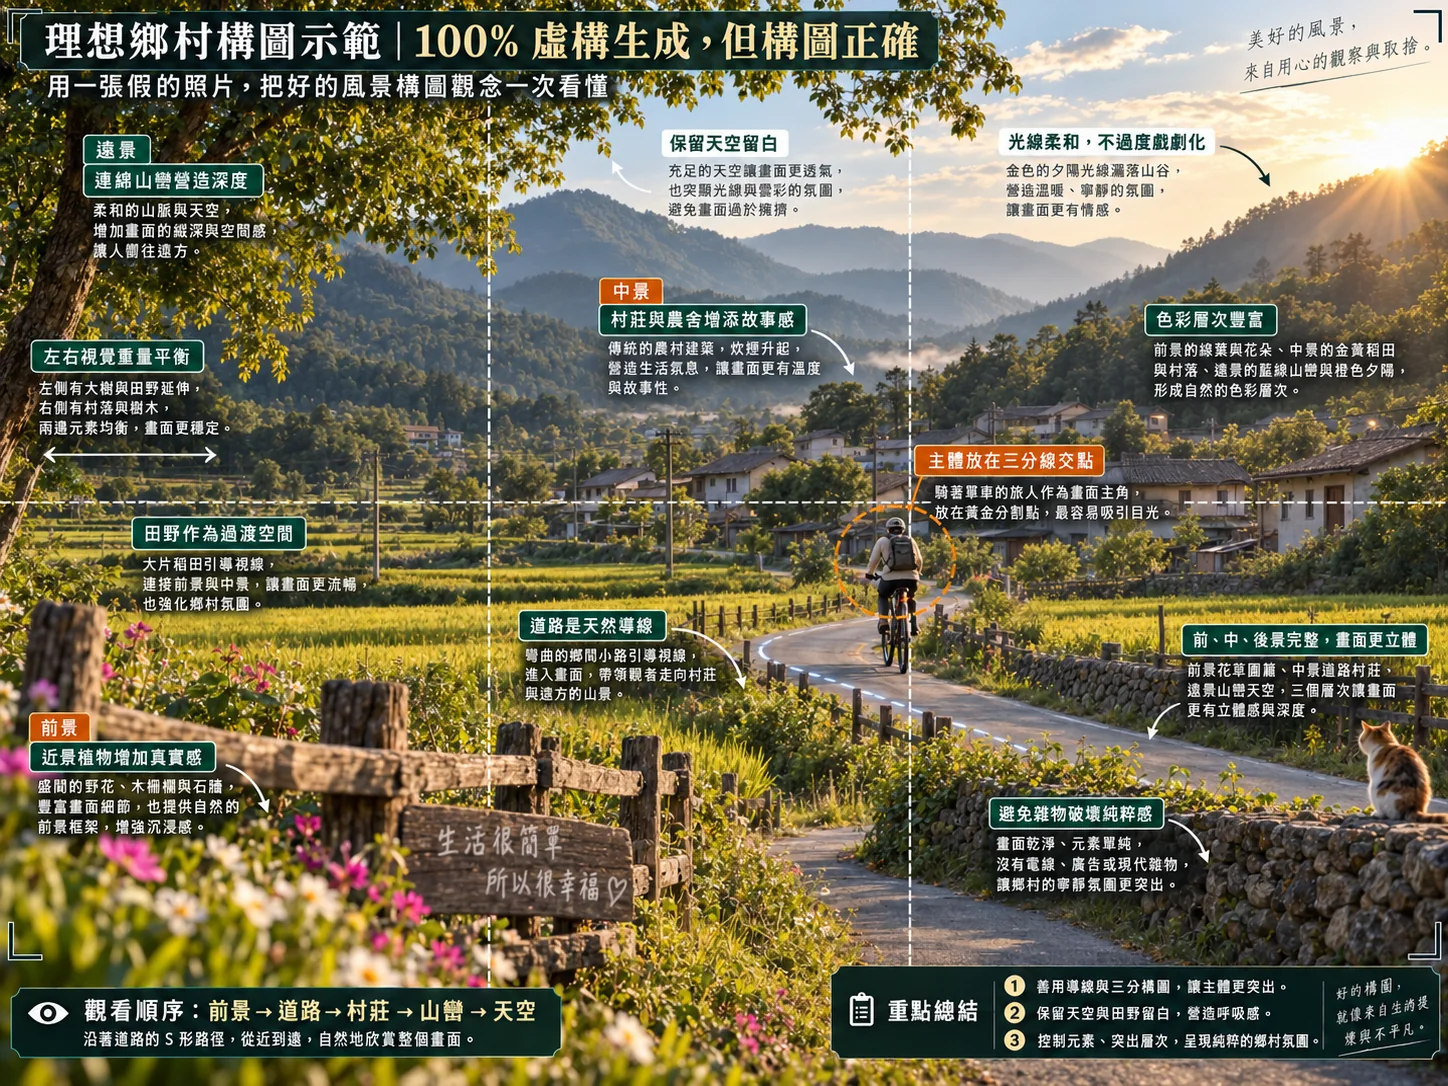
- What this image shows
- This countryside example shows very thoroughly how an ordinary scene can be given a story: flowers, grasses and a wooden fence in the foreground provide an entry point, the road does the guiding, and the cyclist becomes the lead.
- Taking it on location
- When shooting in the countryside, first find a bend in the road, then a person, a bicycle or a small car as the subject, and the photo immediately gains a stronger sense of narrative.
- Common failure signs
- Without a subject, a countryside picture easily becomes a mere landscape record; with too many elements, it also loses its sense of purity.
- Good subjects
- Works very well as a master template for photos of the countryside, fields, highways and the feel of village life.
Compare with the earlier section: Five genres · Open full size
Seen in real photos: 12 mm isn’t always grander than 24 mm
From the same camera position, focal length changes the angle of view and the size of objects in the frame; the geometry of perspective is set mainly by where the camera is. If you don’t move the camera, the central scene the main lens captures can be approximated by cropping the ultra-wide photo, although resolution, distortion correction and processing still differ between lenses.
12 mm cedar forest, horizontal: takes in many trunks
original file PXL_20261010_031416116.jpg · 12:14:16 · f/1.7 · 1/113 s · ISO 51
The ultra-wide shows the whole space inside the forest, but every trunk has a similar claim to being the lead.
- To show the rhythm of the trunks, keep the wide view; to emphasize a single sunlit tree, change the camera position and framing.
Same area, vertical: the height of the trunks comes through
original file PXL_20261010_031426340.jpg · 12:14:26 · f/1.7 · 1/281 s · ISO 54
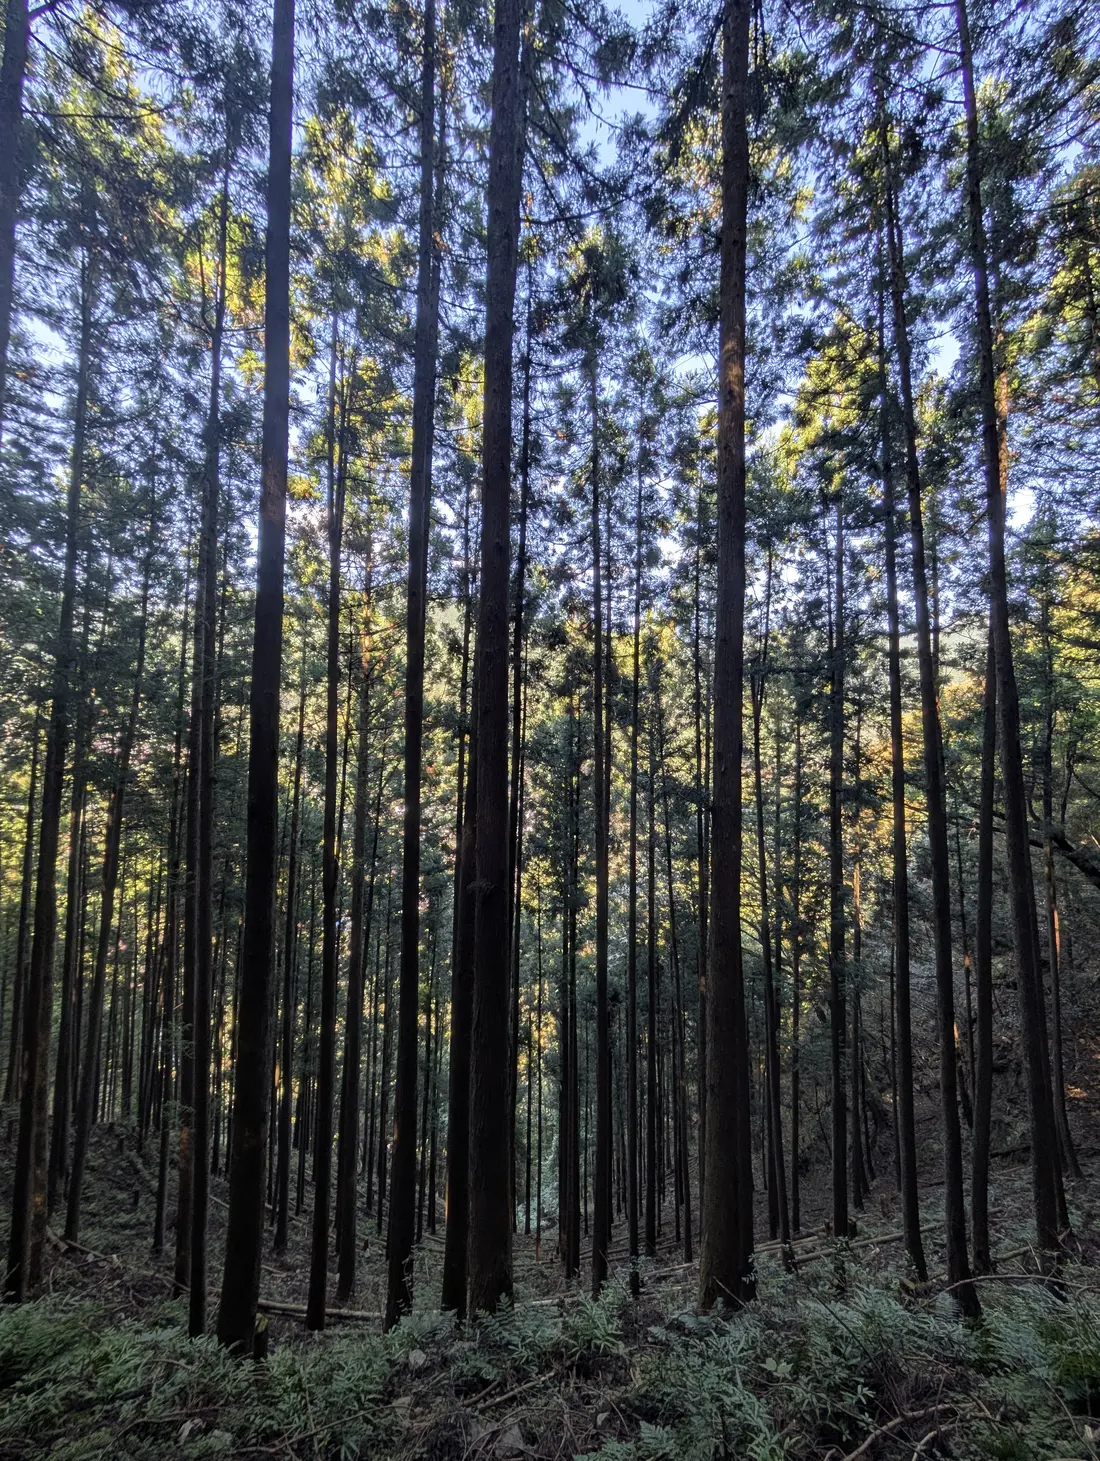
The vertical frame drops the information at the sides, making the trunks’ upward reach the main rhythm.
- Vertical isn’t necessarily better, but it lets you choose deliberately what stays out of the frame.
| Full-frame equivalent angle of view | What to watch for when shooting | Recommended uses | Cost |
|---|---|---|---|
| 12–16 mm ultra-wide | Near objects expand, distant mountains shrink, more clutter enters the corners. | Close views in gorges, spacious interiors, waterfalls at very close range. | The subject easily becomes small, and the frame edges get stretched. |
| 24–35 mm wide | Easier to control the structure of river and forest scenes. | Travel landscapes, rivers, trails. | You have to choose what to frame instead of fitting everything in. |
| 35–70 mm standard | Picks out a particular slope, trunk or patch of light. | Parts of forests, settlements and hillsides. | Less context about the surroundings. |
| 70–200 mm and longer telephoto | Layered distant mountains, patterns and shapes stand out more. | Seas of clouds, silhouetted peaks, distant cities. | Camera shake, haze and heat shimmer matter more. |
Exercise: In the same river valley, take one shot with the ultra-wide and one with the main camera; then fix the focal length and only move forward or back (check that it’s safe first), taking one shot at each spot. At home, compare “a change in angle of view” and “a change in camera position” separately.
Exposure protects the information you need; it isn’t about brightening everything
A phone’s automatic HDR may merge several frames captured around the moment you press the shutter, so the shutter value in EXIF isn’t a complete record of the multi-frame processing. It’s useful for seeing the camera settings at that moment, but a JPEG alone can’t tell you the sensor’s limits or the latitude of a RAW file.
Check the highlights first
Mirror-like reflections on the water, direct sun and the edges of white clouds draw the eye most easily. When the highlights are the subject, let the shadows become silhouettes; when they distract from the subject, change the shooting angle or the exposure strategy.
Then the shadows
Tree shade and gorges are supposed to be dark. Pulling the shadows up too far flattens the sense of space and can bring out noise or phone HDR halos.
Light and shade in the valley: brighter shadows aren’t always better
original file PXL_20261010_025023976.jpg · 11:50:23 · 24 mm equiv. · f/1.7 · 1/625 s · ISO 23
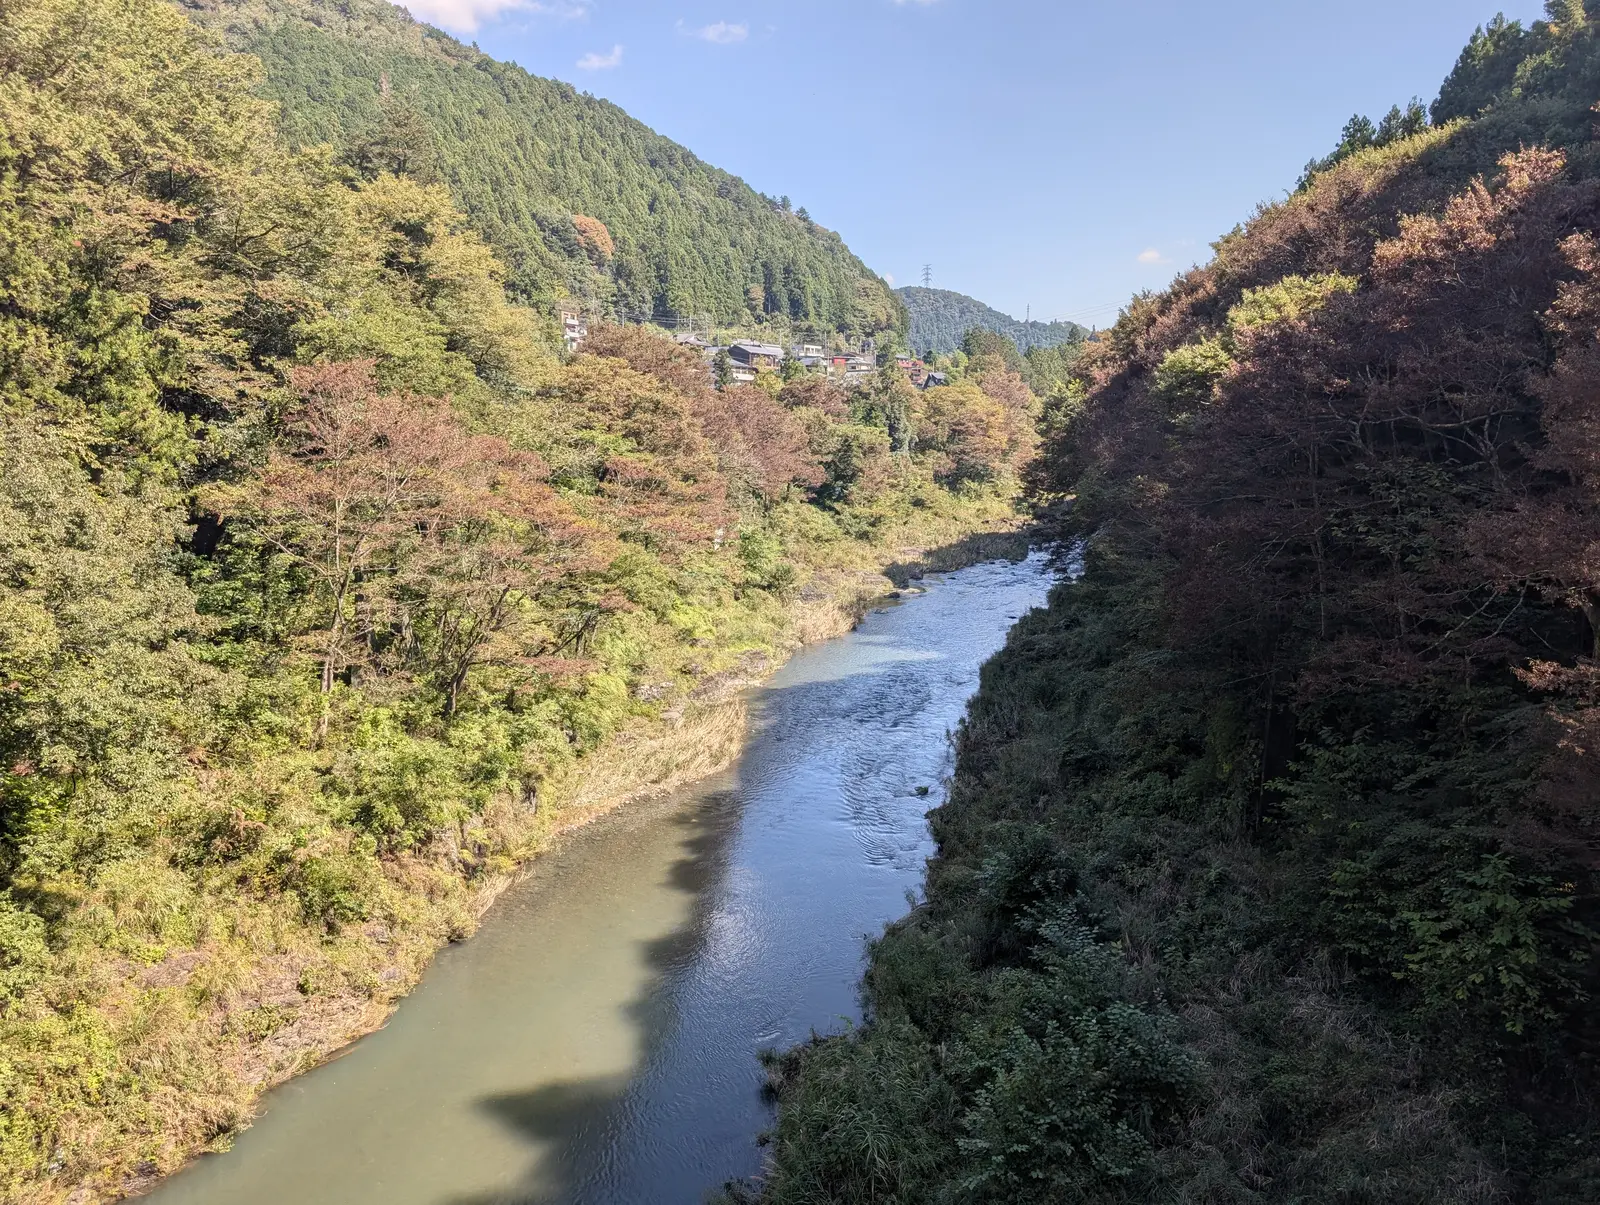
Within this one photo, the light on the left and right slopes differs greatly. Keeping directional shadows lets the eye travel naturally to the sunlit channel.
- ① The river surface naturally forms a visual corridor.
- ② If the sunlit slope on the right is too bright, choose a tighter framing or reduce the exposure slightly; don’t mechanically brighten every slope.
| Control | What it does | Typical starting point (not a guarantee) |
|---|---|---|
| Shoot RAW | More room for editing, but there’s still a clipping limit. | If the camera supports it, start with RAW + JPEG. |
| ISO | Controls the gain applied to the sensor output and the exposure trade-offs. | For static scenes, start from a low or base ISO; raise it when the subject moves. |
| Aperture | Controls depth of field and how much light gets through. | On cameras with an adjustable aperture, start around f/8; phones have a fixed aperture, so there’s no need to imitate this. |
| Shutter | Controls motion blur and brightness. | Set by the water, the wind and camera shake; don’t go by the exposure value alone. |
| Bracketing | Protects brightness information across several stops in high-contrast scenes. | Try 3 frames at −2/0/+2 EV, then adjust to the scene. |
Depth of field and focus: judging distance matters more than memorizing f/22
Depth of field is the range that “looks acceptably sharp under a specified viewing standard”; it doesn’t mean everything from the nearest point to infinity lies on a single focal plane. To get both nearby stones and distant trees sharp, you need to consider the lens’s actual focal length, the aperture, the focus distance and the final output size.
H = f² ÷ (N × c) + f
H is the hyperfocal distance (mm), f is the lens’s actual focal length (mm), N is the f-number, and c is the assumed circle of confusion (mm). When you focus at H, the range of acceptable sharpness extends from H/2 to infinity. You’ll also often see the simplified form f² ÷ (N × c), which drops the + f; at landscape shooting distances the difference between the two is tiny.
For example, with an actual focal length of 24 mm, f/8 and c = 0.03 mm, the hyperfocal distance is about 2.42 m; focused at the hyperfocal distance, the near limit of acceptable sharpness is H/2, about 1.21 m. This is an estimate based on the traditional circle-of-confusion assumption, not a promise of pixel-level sharpness: when focused at the hyperfocal distance, the farthest areas are only just acceptable, so you can focus slightly farther away [R8]. A phone photo’s 24 mm “equivalent angle of view” can’t be plugged directly into a formula that needs the actual focal length.
Hyperfocal distance calculator
Use it to understand how the variables relate; it can’t replace zooming in to check the actual focus.
Showing the defaults: actual focal length 24 mm, f/8, c = 0.030 mm.
Why not always use f/22?
A small aperture increases depth of field but makes diffraction more visible; the best compromise depends on the lens and the sensor. When the foreground is extremely close to the lens, consider focus stacking: shoot several frames focused at different planes, then blend the sharp parts [R7]. Grass moving in the wind or moving water makes stacking difficult.
Phone landscape shots often have great depth of field from near to far, but they still suffer from autofocus misses, weaker resolution at the edges of the ultra-wide, and smearing from computational noise reduction.
Streams and waterfalls: don’t turn all water into silk
Moving water can be frozen into splashing detail, or the shutter can build it up into soft streaks. Which is better depends on whether you want to convey “power” or “calm.” The small waterfall, streambed and river valleys in this set are all good for practice.
A real small waterfall: the flow has a clear axis
original file PXL_20261010_025813058.jpg · 11:58:13 · 24 mm equiv. · f/1.7 · 1/59 s · ISO 18
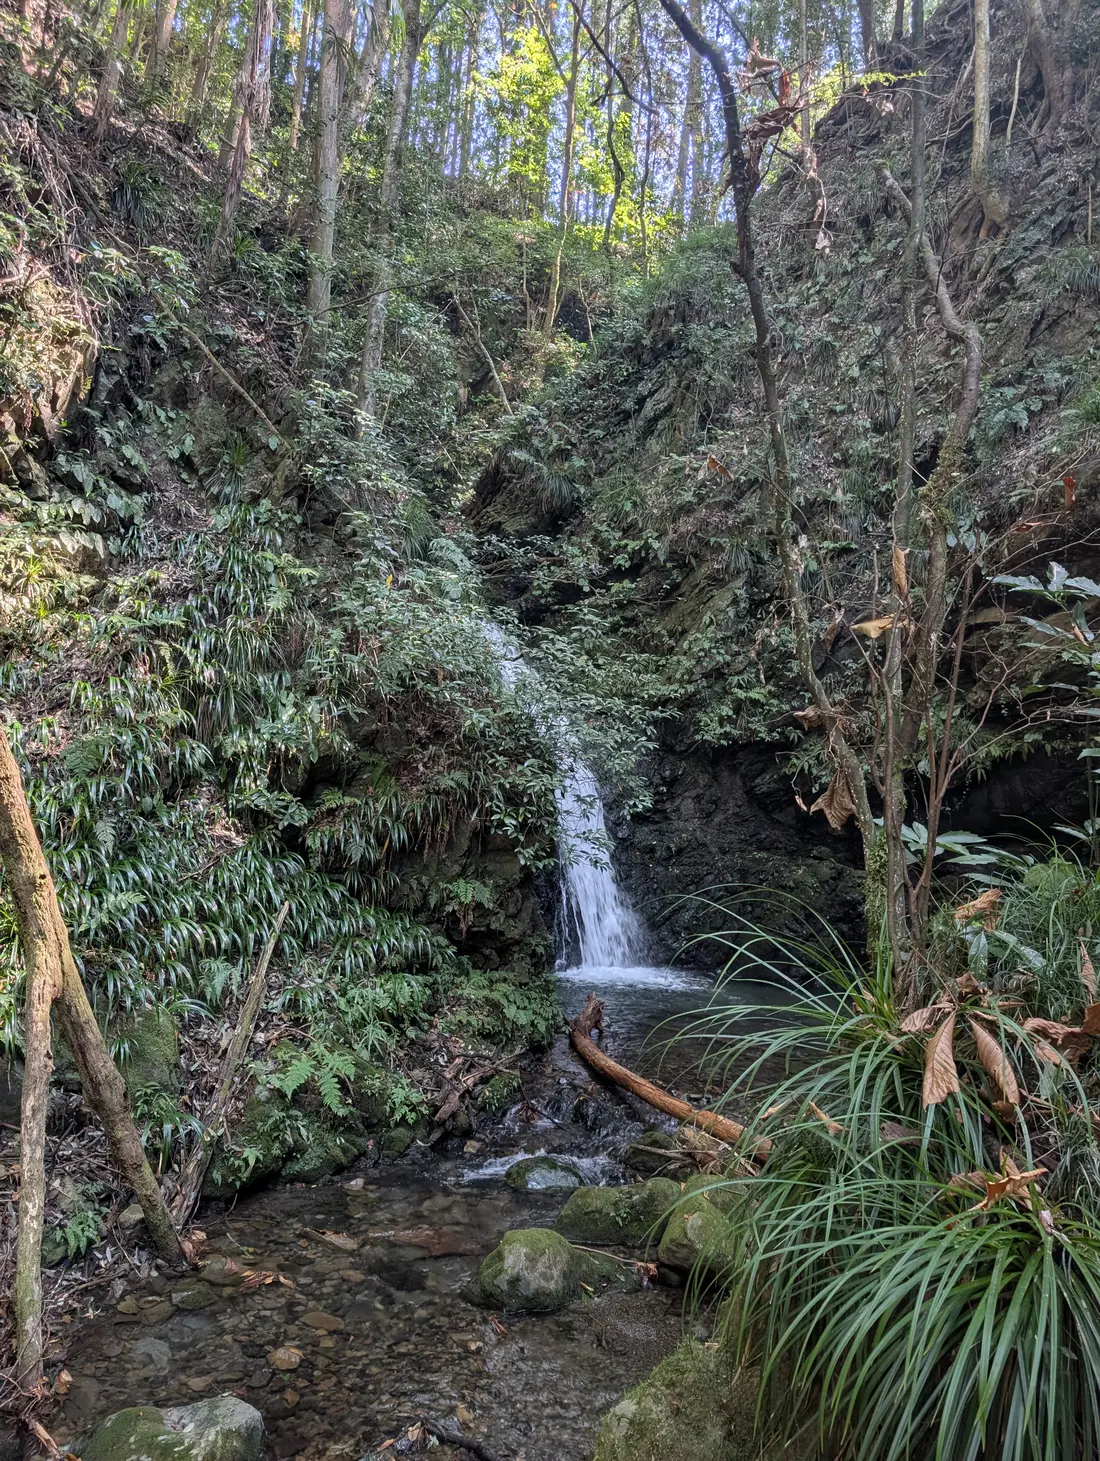
The vertical frame draws the eye to the waterfall itself. When you can control the shutter on location, test separately for crisp detail, natural flow and a soft long exposure.
- ① The center of the flow is clear, a natural focal point for the eye.
- ② If the surrounding grass and rocks are too bright or too many, they pull attention away from the water.
| Effect | Starting shutter speed | What to judge | What can go wrong |
|---|---|---|---|
| Frozen droplets | 1/500–1/2000 s | Spray, droplets and rapids show clear texture. | Not enough light, or ISO forced very high. |
| Natural streaks | 1/8–1/2 s | Keeps the direction and a little water texture. | Handheld shake; leaves blurred by the wind. |
| Silky long exposure | 1–4 s or longer | Soft water, while still rocks stay sharp. | The water loses its texture and plants blur. |
These values are only starting points. Water speed, distance and direction of flow, the amount of light and whether you use an ND filter all make the same shutter speed produce different results; a tripod also doesn’t guarantee that the leaves by the water stay still.
ND filter shutter calculator
Assuming the aperture and ISO stay the same and the ND rating is accurate: new shutter time = original shutter time × 2 raised to the number of ND stops.
Showing the defaults: original shutter speed 1/60 s, a 10-stop ND.
CPL (polarizing) filter: Reduces reflections on surfaces such as water so you can see the stones below, but it can also remove an attractive reflection on the water [R11]; with an ultra-wide lens on a large area of sky, the sky can darken unevenly [R10]. GND (graduated ND) filter: Darkens the sky, but along an uneven mountain line it easily darkens the mountains along with it.
Mountains, forests, coast, city, countryside: what to look for in each
This section still relies mainly on real photos; the GPT-generated composition illustrations are gathered in chapter 04A and are not a substitute for real photography. The set includes real valleys, forests and buildings in a mountain town, but no coastal photos or big-city skylines; for those two genres, the page links to public real photos whose licenses you can verify, clearly labeled as external photos. External photos need an internet connection to open; this page doesn’t embed them.
-
Mountains and gorges
Subject: river valleys and distant mountains. First find a river channel or ridgeline to serve as the backbone for the eye. When distant mountains get too small in the ultra-wide, try 24–70 mm; side light strengthens the terrain better than simply going ultra-wide.
the author's photo · original file PXL_20261010_034054885.jpg
-
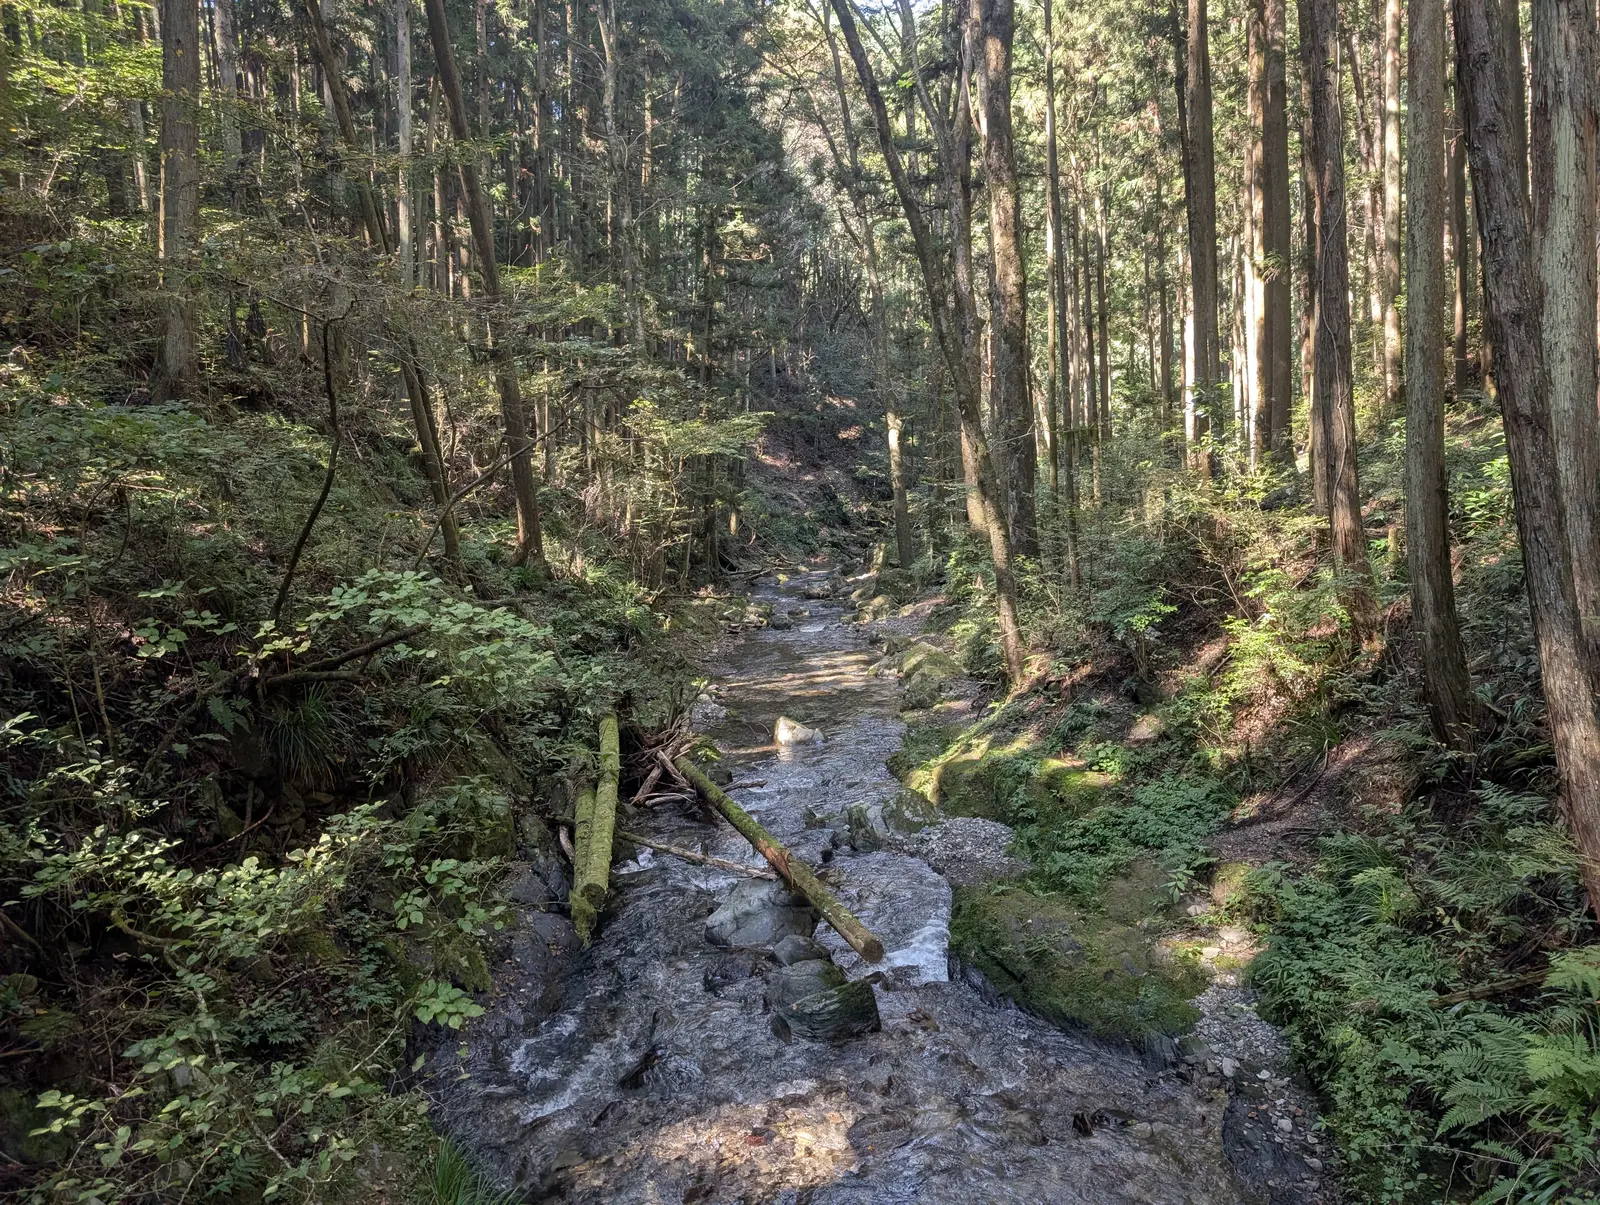
Forest
Subject: stream stones, patches of light, a lone tree. Choose one sunlit object or a point along the stream as the visual end point. Trunks can serve as a frame or get in the way; under harsh midday light, you can shoot just the details in the shade.
the author's photo · original file PXL_20261010_030015888.jpg
-
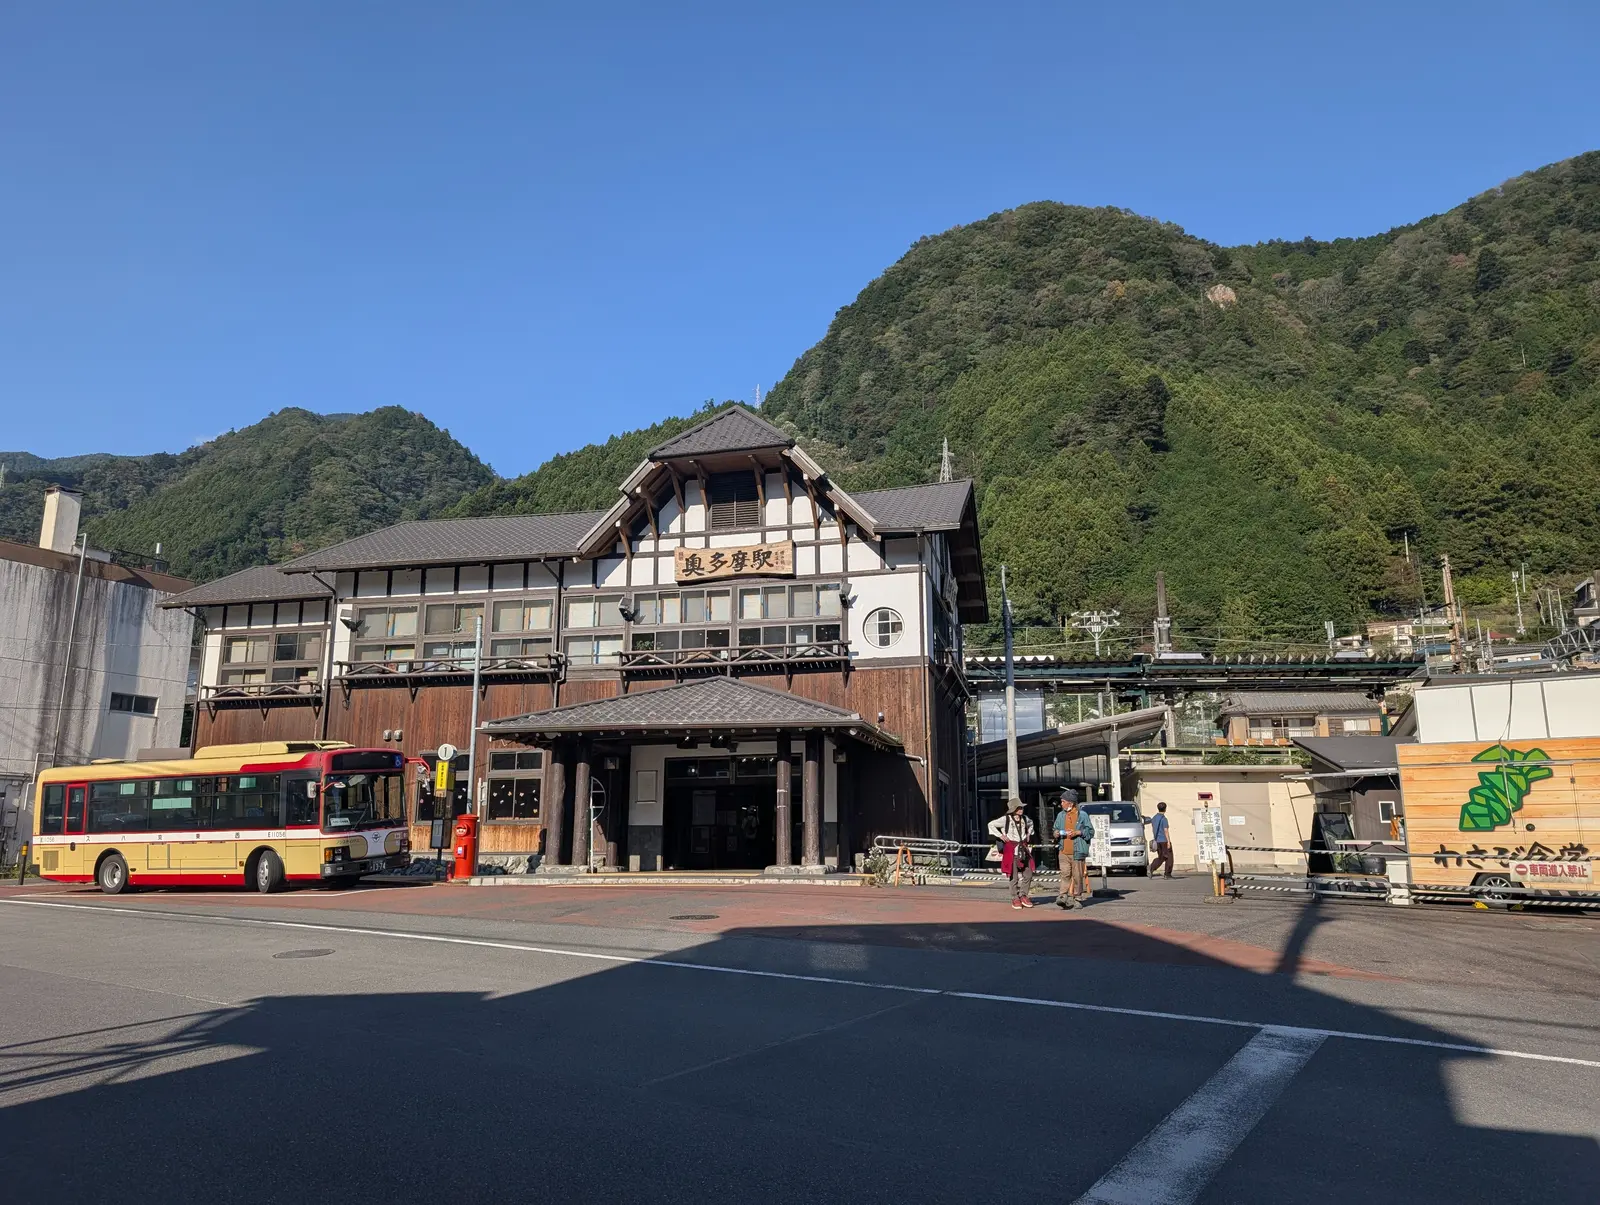
Towns (example: buildings in a mountain town)
Subject: architectural lines and transport. Check vertical lines, where people and vehicles are, and whether signs scatter attention. This is a local station, not a big-city night scene; for a blue-hour skyline, see the external photo link below.
the author's photo · original file PXL_20261010_055341159.jpg
-
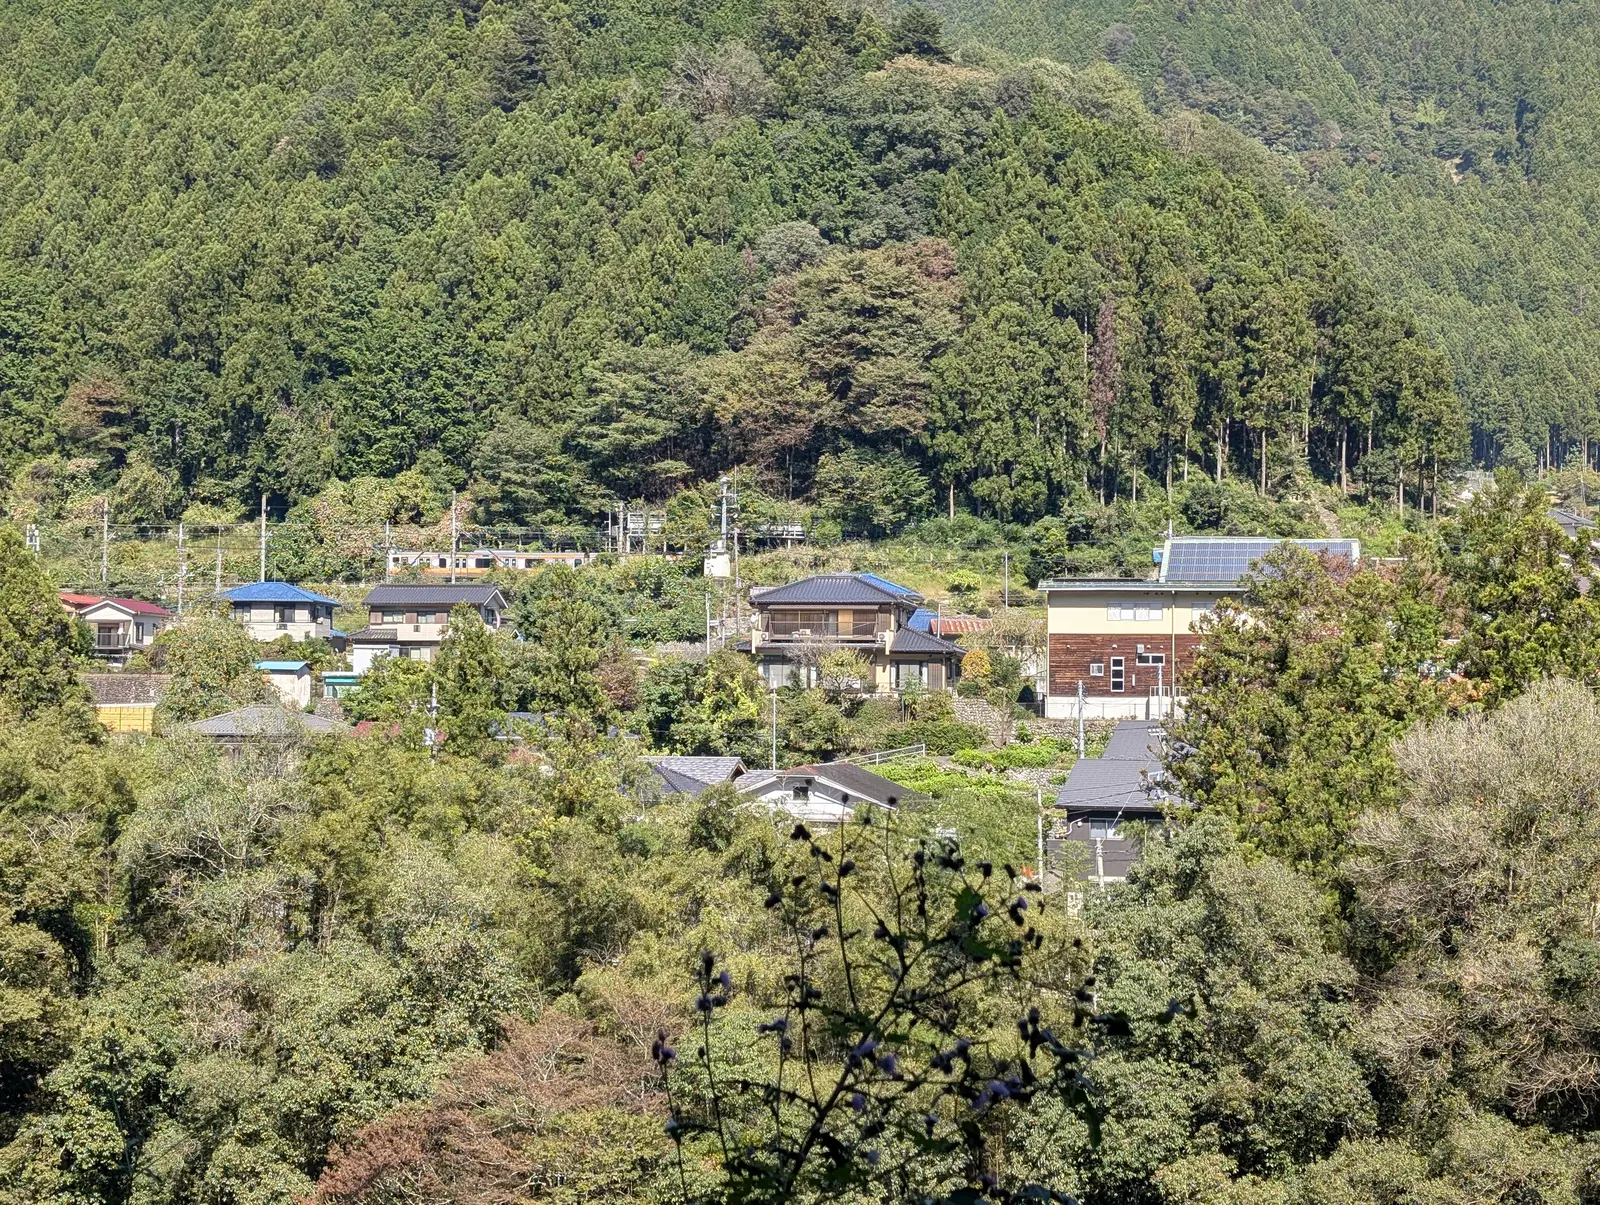
Countryside and settlements
Subject: the scale of village houses and hillsides. First decide whether you’re shooting “the houses” or “the lay of the mountain,” then use the rhythm of roads, rivers or rooftops to lead the viewer in; clear the branches out of the foreground.
the author's photo · original file PXL_20261010_023959391.jpg
-
Seaside and coast
Subject: lines of surf, reef rocks and the horizon. Keep the horizon level; lines of waves can become leading lines. Compare frozen spray with the trails a medium-slow shutter speed such as 0.4 s brings out. Leave yourself a safe way back, and don’t stand on slippery ground that waves can reach.
This set has no seaside material, so no seascape is invented here. An external, licensed real photo can be opened online for comparison:
D Coetzee|Waves crashing on rocks at bay shore at sunset (Wikimedia Commons, CC0)
Nikon D800 · 16 mm · f/11 · 0.4 s · ISO 100
-
Big cities and blue hour
Subject: lights and depth along the line of sight. Night views of high-rises need more checking than natural landscapes: vertical lines, bright signs, light trails and the proportion of sky. Catch the moment when the blue sky still holds detail, and the lights don’t all need to be overexposed.
Romain Guy|Tokyo blue hour (Wikimedia Commons, CC0)
External photo · 20 s · f/11 · ISO 100
.jpg)
.jpg)
Quick settings for five genres (camera settings are starting points)
| Scene | Full-frame equivalent focal length | Typical starting aperture and shutter speed | Practical decisions |
|---|---|---|---|
| Mountain ridges | 24–70 mm; 70–200 mm for layers. | f/8–f/11; when handheld, raise the shutter speed to suit the focal length. | Use ridgelines, foreground scale and mist to separate layers; avoid distant peaks that are too small. |
| Forest | 35–70 mm; 16–24 mm only when space is tight. | f/5.6–f/11; in strong wind, start from 1/250 s. | First clear up overlapping trunks, then look for a single sunlit subject. |
| Coast | 20–70 mm. | f/8; about 1/1000 s to freeze spray, 0.3–2 s for wave trails. | Safety and tides first; control the direction of the waves and the horizon. |
| City blue hour | 24–70 mm. | Tripod, base ISO; start at about 1–10 s. | Vertical lines, highlights on illuminated signs, ghosting from moving objects. |
| Rural settlements | 35–100 mm. | f/5.6–f/11; set the shutter speed by how people and vehicles move. | One main house or one paddy ridge; don’t describe every element equally. |
A real panorama: wider stitching isn’t always better
Stitched gorge panorama: the side-to-side context is complete
original file PXL_20261010_034400603.PANO.jpg · original output 12416 × 3104 px (compressed on this page)
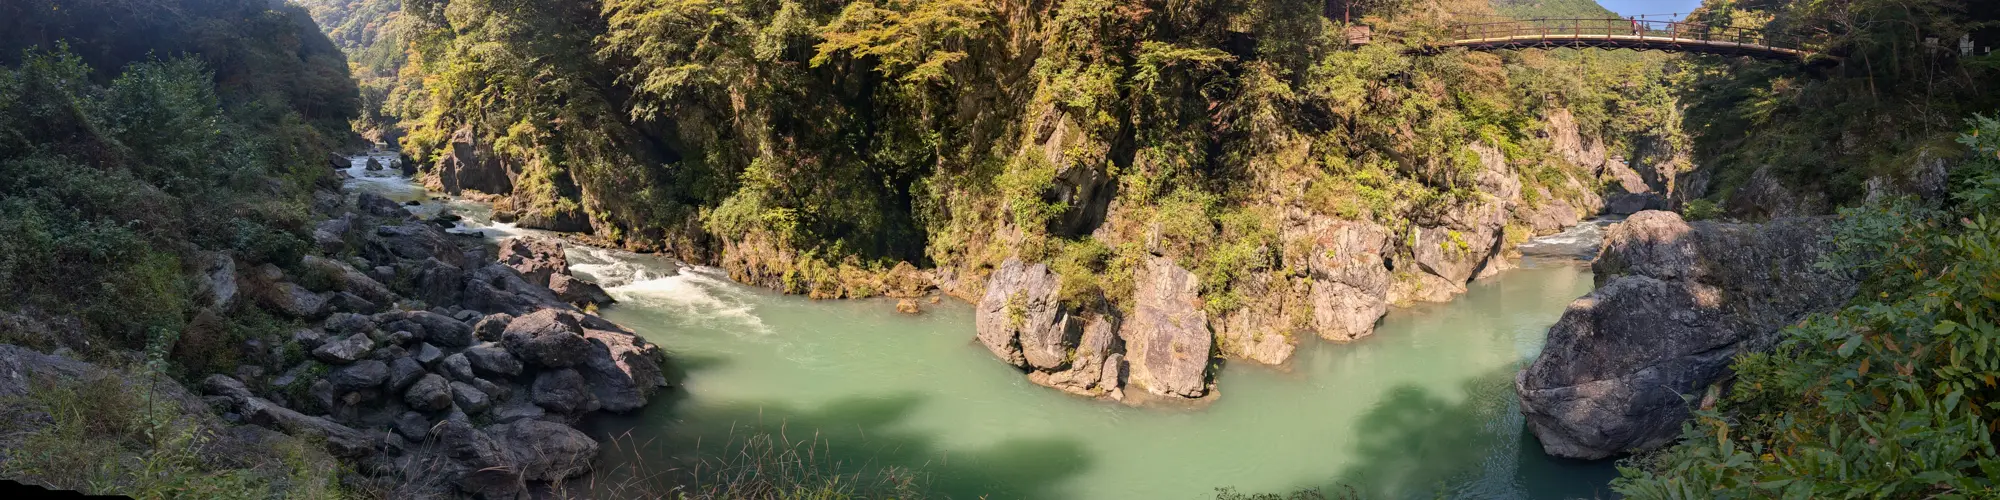
The left and right branches, the main rock wall and the bridge above are all in frame, but the proportions are ultra-wide and the visual center is relatively weak.
- Panoramas are good for explaining terrain and routes; to make a single finished work, you’d need to choose again between the flowing water on the left and the emerald pool on the right as the lead.
- Look closely at the bottom edge of the panorama and the moving water: stitching can produce black edges, seams or misaligned shapes, so verify by zooming in on parts instead of judging from the thumbnail.
- When shooting a panorama frame by frame with a camera, you can start testing with about 25–40% overlap between adjacent frames, and keep white balance and exposure fixed where possible. When the foreground is very close, rotating the camera around different points can cause parallax.
Advanced subjects this set didn’t cover, but still worth keeping
| Scene | Suggested starting settings | What to verify | What not to infer |
|---|---|---|---|
| Snow and sand dunes | Full-frame equivalent 35–200 mm, start at f/8; set exposure compensation by the histogram. | Whether snow detail is clipped and whether auto metering turns bright snow gray; whether side light on dunes brings out texture. | A very bright photo doesn’t mean “wrong exposure.” |
| Night sky and landscape | 14–24 mm, f/1.8–f/2.8, ISO 1600–6400, 5–15 s as test values. | Zoom in to check whether stars trail; the nearby landscape can be exposed separately, and disclose any compositing as the type of work requires. | The “500 rule” doesn’t guarantee that a high-resolution camera won’t show star trails [R12]. |
| Abstract slopes and landforms | 70–300 mm, f/5.6–f/11; adjust the shutter speed for camera shake and wind. | Make blocks of color, lines and shadows the subject instead of documenting the whole spot. | A telephoto focal length doesn’t by itself change the perspective between objects. |
No AI: cropping alone shows the direction to improve
The right side of each pair below is a crop of the real JPEG with very slight global contrast and saturation adjustments; no sky, bridge, rock, person or new sunlight was added. These examples don’t mean “a reshoot would look exactly like this”; they only illustrate the trade-offs.
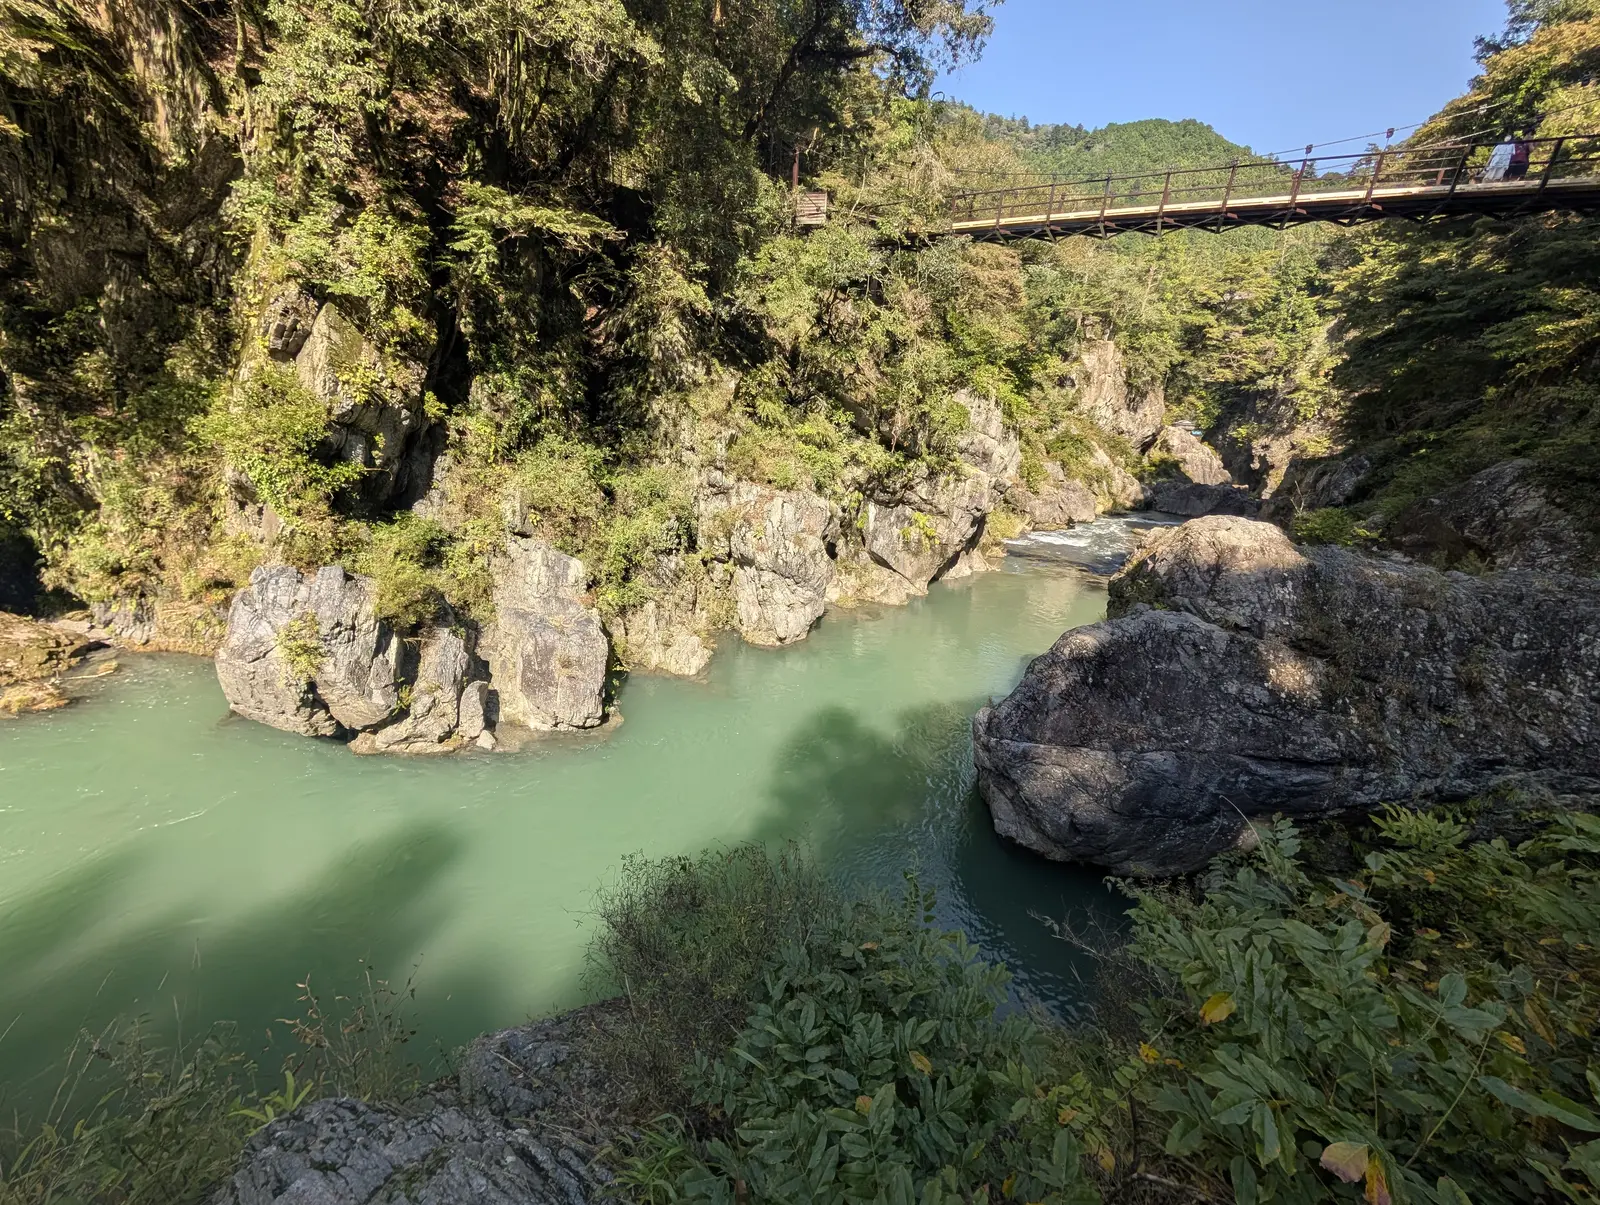
Gorge | Less of the partial bridge and the nearby weeds
Original
Original: only part of the bridge is in frame; the leaves at the lower right take up a noticeable area.
Cropped and lightly adjusted (not AI-generated)
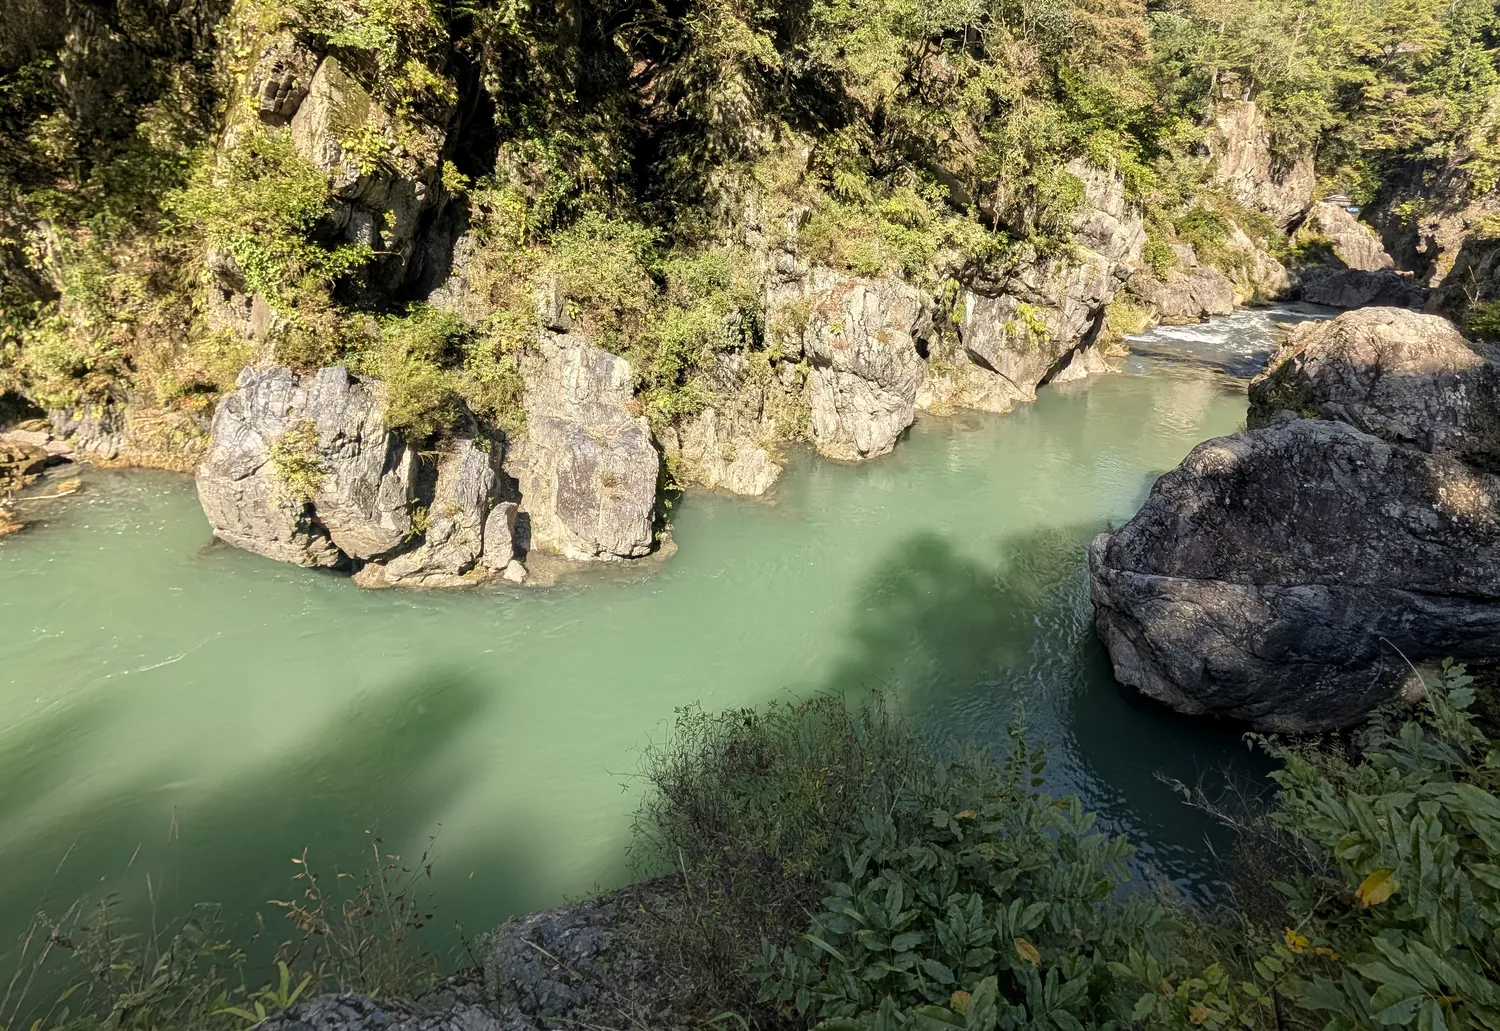
Cropped: pushes attention toward the rocks and water; the price is losing some of the surrounding context, and it doesn’t fill in the rest of the bridge.
River valley | A more focused view from the same 24 mm scene
Original
Original: already a narrower 24 mm framing, with the river in the center of the frame.
Cropped and lightly adjusted (not AI-generated)
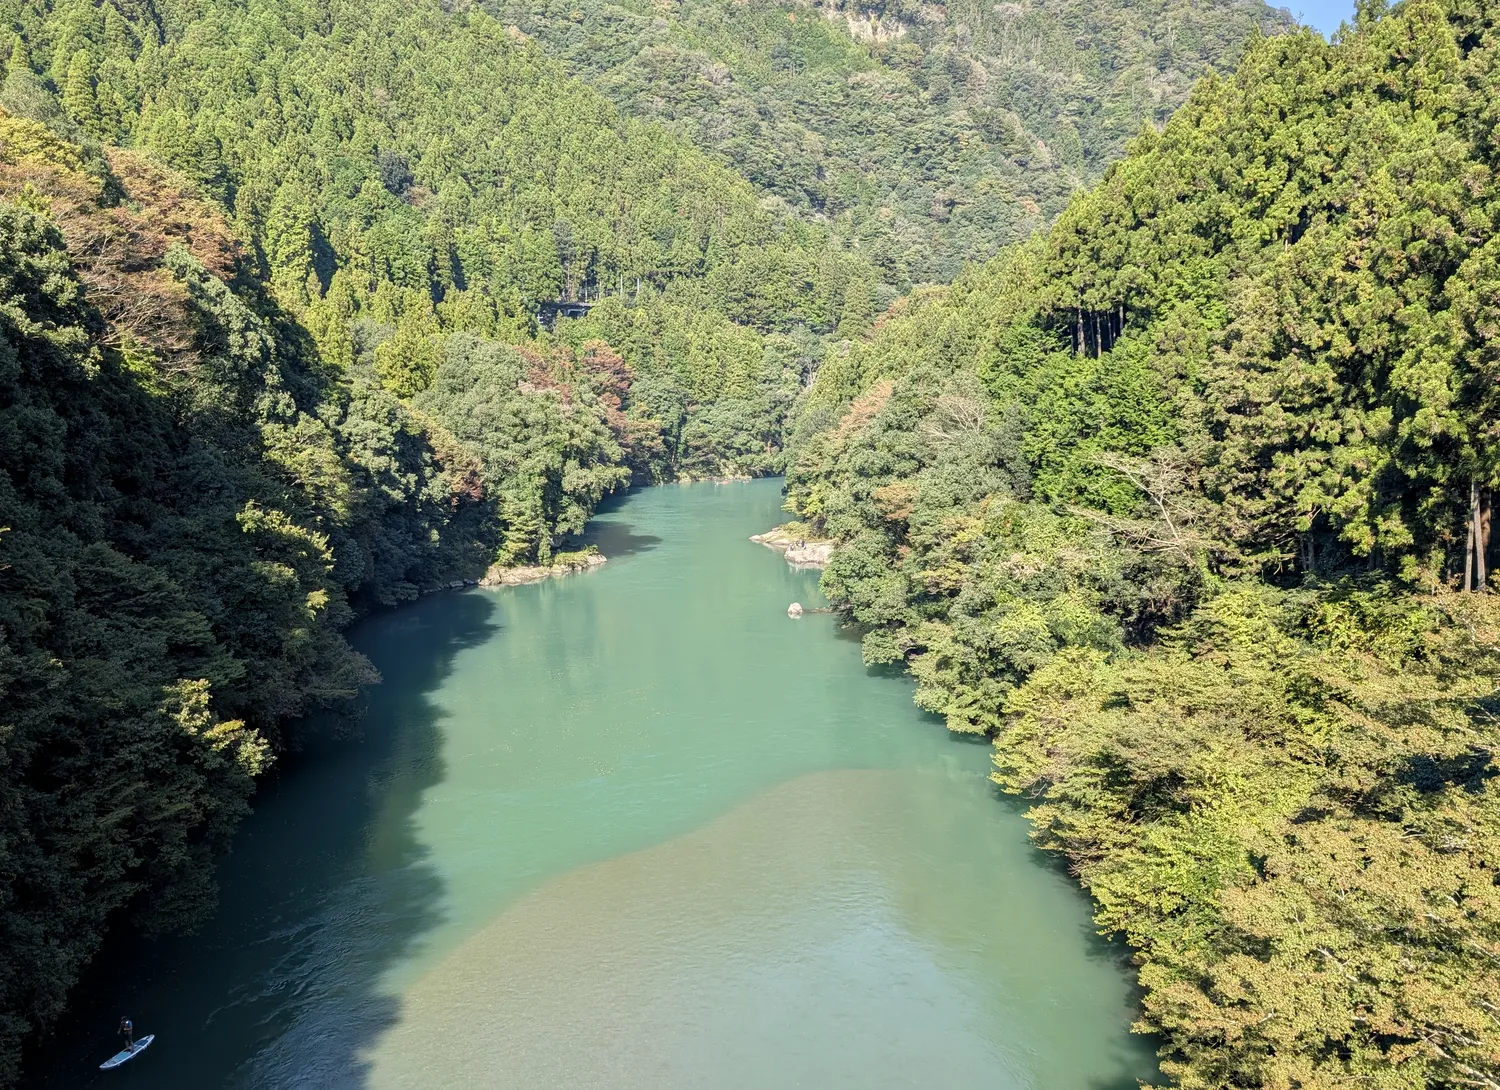
Cropped: removes more of the unhelpful edges and concentrates on the distant channel; the paddleboard may end up closer to the edge, so choose the ratio carefully.
Backlight | Trimming a little around the sun
Original
Original: the direct light and the reflection on the river are strong, and the shadows are deep.
Cropped and lightly adjusted (not AI-generated)
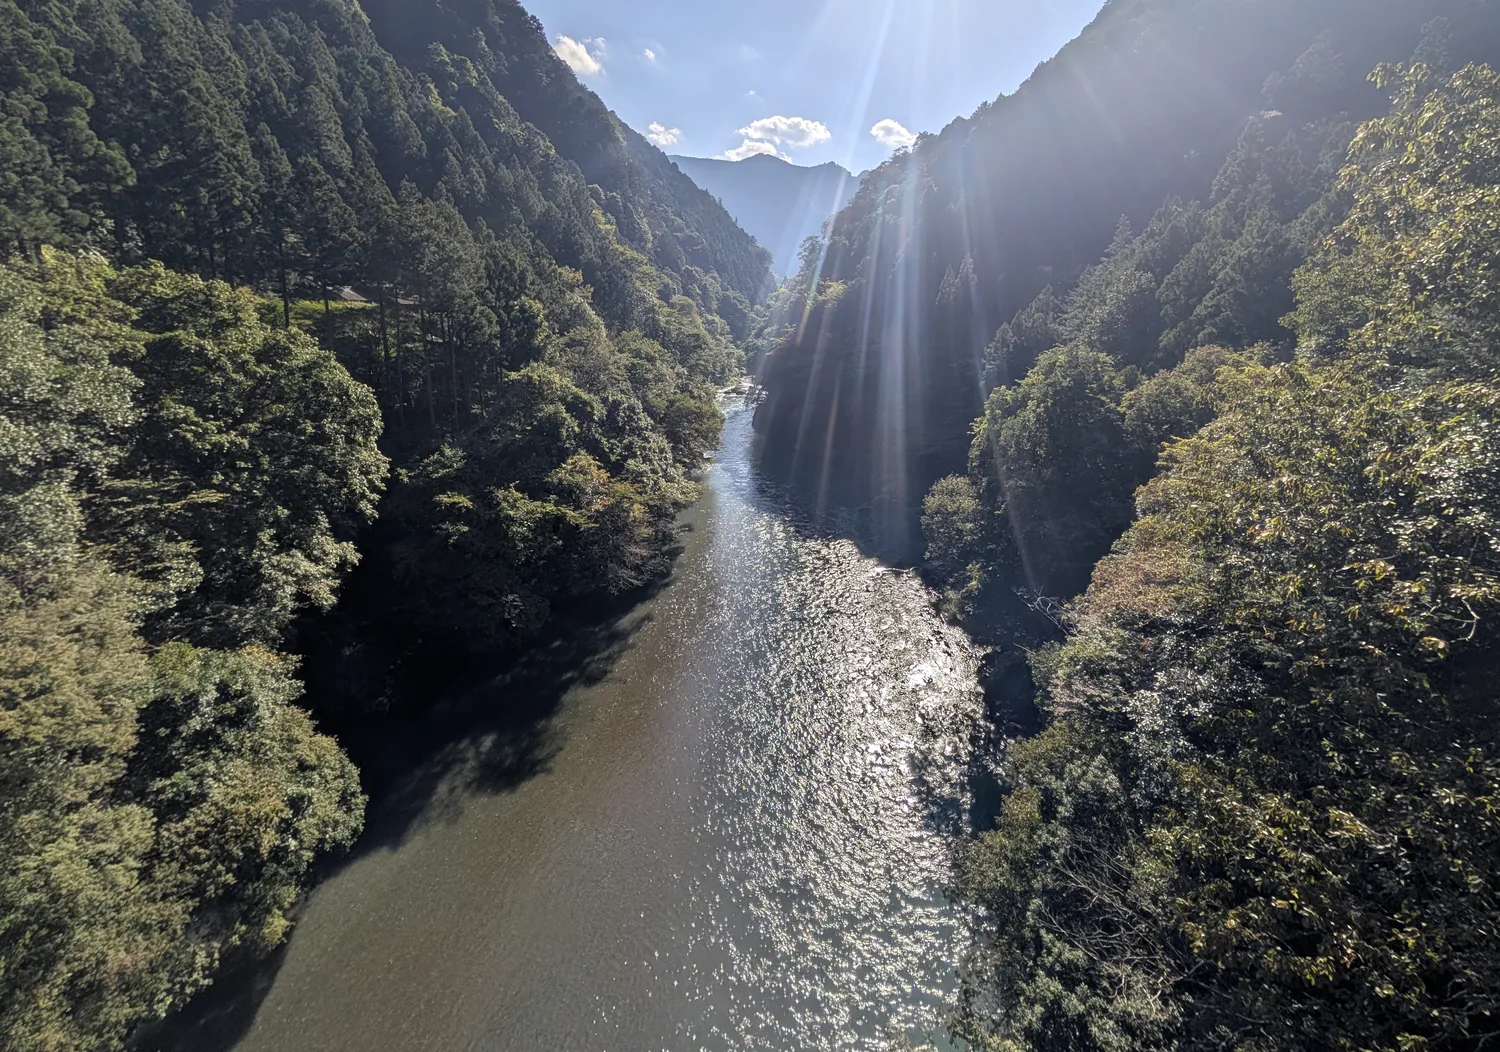
Cropped: can reduce some of the visual weight of the glaring sky, but highlights that have already clipped can’t be recovered from the JPEG.
Suggested RAW/JPEG editing order
- Geometry and subject First correct any tilt and the framing proportions. When a person, bridge or building is cut in half, raising saturation usually can’t save it.
- Overall tone Adjust exposure, the white point and the black point, keep a sense of direction in the shadows, and check the RGB channels for clipping.
- Warmth and color When water and rock already have a natural warm–cool contrast, there’s no need to push every color; compare with your impression at the moment you shot it.
- Local masks Fine-tune the sky, forest or river, avoiding an overly dark sky and overly bright ground that create implausible HDR halos.
- Detail and haze Use Texture, Clarity and Dehaze sparingly; distant mountains should stay a little soft so aerial perspective survives.
- Export and check Check for white fringes along edges, sharpening halos, color banding and the false textures phone HDR can create.
How to shoot when you’re out: a repeatable 30-second check
- Decide on the subject first Say it in one sentence: is this a photo of the river, the suspension bridge, the rays, the trunks or the small boat?
- Find a leading line or frame River channel, footpath, rock wall, trunks: at least one should carry the eye to the subject.
- Compare two lenses or crops Take a baseline shot at 1x first, then try the ultra-wide or the optical telephoto; don’t just aim to fit more in.
- Change position (check safety first) Stand, crouch or move a few steps to the side, and see whether the branches move off the subject.
- Protect highlights and shutter speed Look at the reflections on the river and the sky; if needed, lower the exposure, bracket, or wait for the light to change.
- Then shoot variations One horizontal and one vertical, one close and one far; secure a usable version first, then experiment.
Field checklist
Checkmarks exist only in the currently open page and are cleared when you reload; this page doesn’t save or send any data.
31 real photos: a photo-by-photo review
Here are the original 31 JPEGs, sorted by file name (shooting time). The labels are subjective teaching judgments of “subject clarity and composition as a landscape work,” not objective scores of a photo’s beauty. “Record” doesn’t mean a photo isn’t worth keeping; a travel record’s value can come from information and memories rather than from landscape-work standards.
Label breakdown: Top pick 1, Good 12, Could improve 15, Record 3.
Showing 31 of 31
-
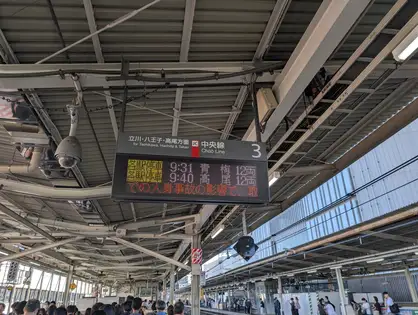
Station platform Record The station roof forms a vanishing point, but the equipment and signs above add a lot of information; to capture the architectural rhythm, tighten the frame a little. PXL_20261010_002848591.jpg · 24mm equiv. · ISO 21 -
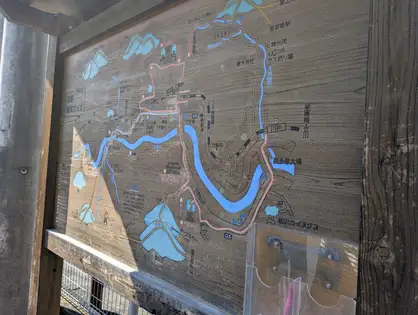
On-site map board Record A travel record; reflections on the glass reduce legibility. Step slightly to the side to avoid the mirror-like reflection. PXL_20261010_020829314.jpg · 24mm equiv. · ISO 23 -
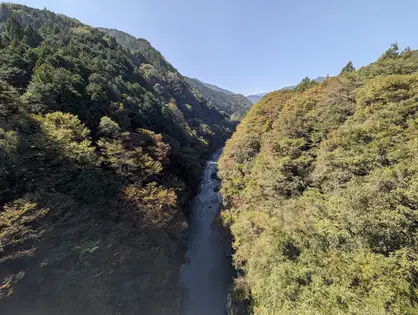
Gorge from above Good The gorge walls converge naturally and give depth; the river is a bit small, so narrow the angle of view to emphasize the channel. PXL_20261010_022724150.jpg · 12mm equiv. · ISO 57 -
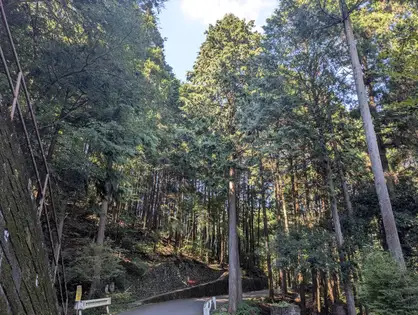
Forest entrance Could improve Rich tree textures, but no clear focal point; try isolating one sunlit tree. PXL_20261010_023018362.jpg · 24mm equiv. · ISO 24 -
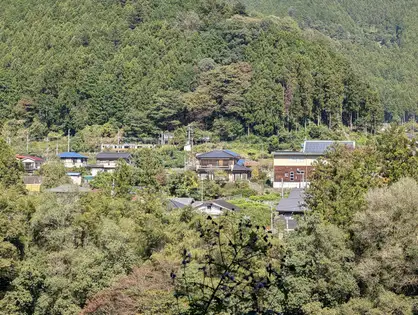
Hillside settlement Could improve The hillside houses add a human scale, but the foliage behind is messy and the subject is scattered. PXL_20261010_023959391.jpg · 49mm equiv. · ISO 23 -
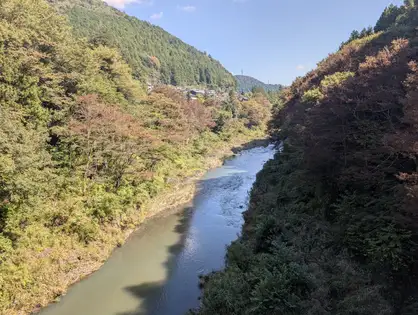
Winding river Good The channel works as a clear leading line into depth; the light difference between left and right can serve as dramatic tension. PXL_20261010_025023976.jpg · 24mm equiv. · ISO 23 -
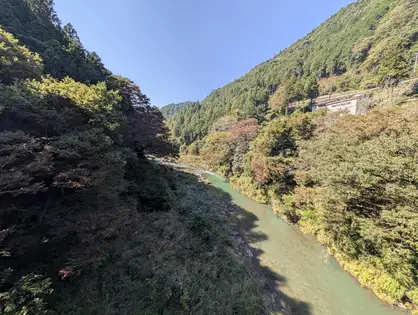
Wide-angle valley Could improve An open view, but the bright slope and the channel have no clear hierarchy; try a tighter framing. PXL_20261010_025036139.jpg · 12mm equiv. · ISO 57 -
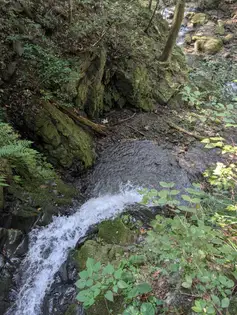
Stream stones from above Record Shows the state of the flowing water; change your position so the cascade becomes a clearer subject. PXL_20261010_025740936.jpg · 24mm equiv. · ISO 510 -
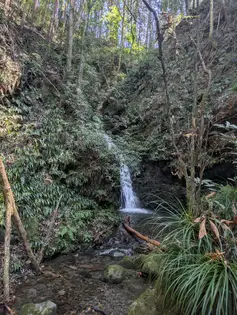
Small waterfall, vertical Good The water’s vertical axis is clear; watch the bright grass on the right and stray branches behind. PXL_20261010_025813058.jpg · 24mm equiv. · ISO 18 -
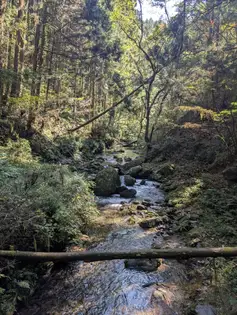
Forest stream Good The stream channel and rocks in front lead the eye into the frame, but the log close to the camera feels like a barrier. PXL_20261010_030011621.jpg · 24mm equiv. · ISO 52 -
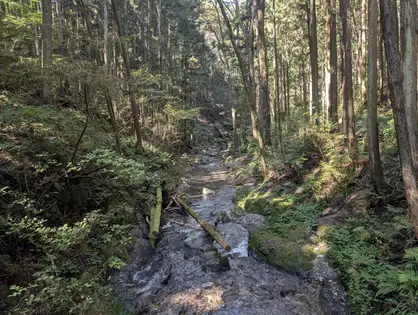
Forest stream valley, horizontal Good The rays, the stream and the stones create continuous depth; a slightly tighter angle would reduce interference from branches. PXL_20261010_030015888.jpg · 24mm equiv. · ISO 117 -
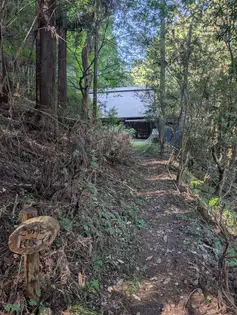
Forest trail Could improve The trail leads into the scene, but the notice at the bottom and the building on the right compete for attention. PXL_20261010_030321133.jpg · 24mm equiv. · ISO 28 -
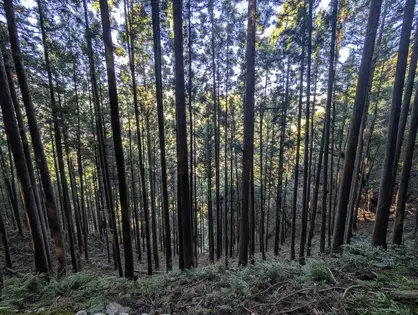
Cedar forest, horizontal Could improve The trunks have rhythm, but there are many bright backlit gaps; pick out a single sunlit main trunk. PXL_20261010_031416116.jpg · 12mm equiv. · ISO 51 -
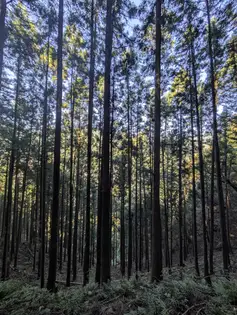
Cedar forest, vertical Good The vertical frame emphasizes the trees’ height, but the dead branches along the bottom could still be reduced. PXL_20261010_031426340.jpg · 12mm equiv. · ISO 54 -
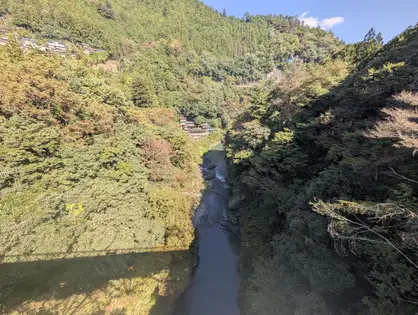
Valley with bridge shadow Could improve Strong valley lines, but the large artificial shadow breaks the eye’s path. PXL_20261010_032704735.jpg · 12mm equiv. · ISO 55 -
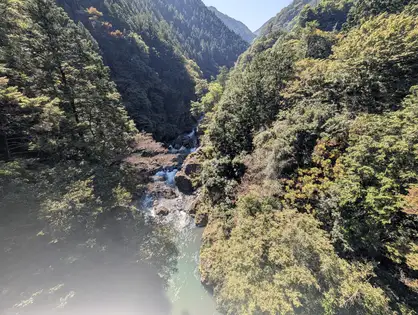
Valley in strong backlight Could improve The valley has layers, but the hazy white and highlights up close hurt clarity; change the angle or the timing. PXL_20261010_032712401.jpg · 12mm equiv. · ISO 51 -
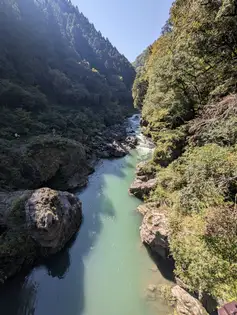
Jade-green channel in the gorge Good The vertical frame strengthens the river’s depth; the balance of water and rock is appealing. PXL_20261010_034054885.jpg · 12mm equiv. · ISO 59 -
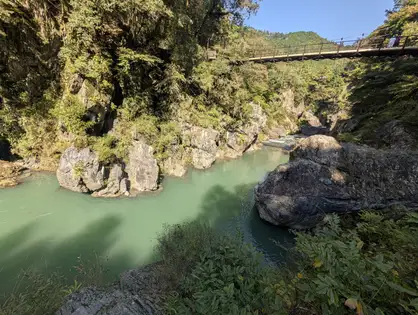
Emerald gorge and suspension bridge Top pick The water color and the layers of rock wall are very vivid; the weeds along the bottom and the incomplete bridge could be removed. PXL_20261010_034347195.jpg · 12mm equiv. · ISO 56 -
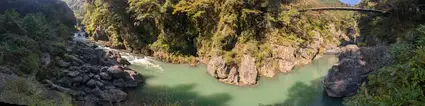
Stitched gorge panorama Good Shows the whole landform and suits documentation; the extremely wide ratio makes the subject small, and the stitching along the bottom edge needs checking. PXL_20261010_034400603.PANO.jpg · 24mm equiv. · ISO 29 -
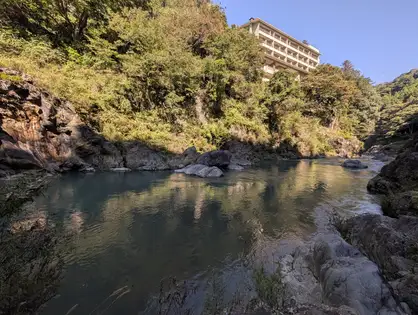
Pool and hillside buildings Could improve Calm water, but the buildings above are very bright and the information at left and right is scattered; decide whether you’re shooting the human element or the water color. PXL_20261010_035547268.jpg · 12mm equiv. · ISO 49 -
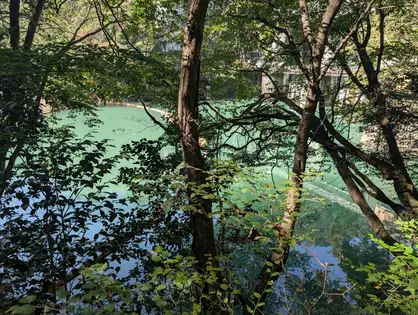
Emerald lake through the trees Could improve Beautiful color, but branches block the water; use the trunks to form a cleaner natural frame. PXL_20261010_043608407.jpg · 24mm equiv. · ISO 20 -
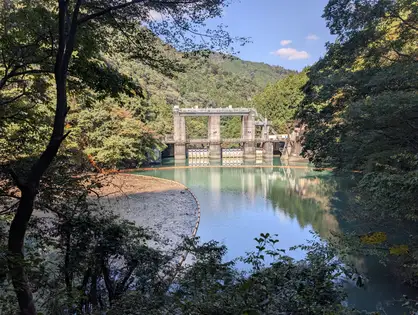
Water gate and lake Good The forest frame leads to the water gate, but there are slightly too many small branches in the foreground; it could be simpler. PXL_20261010_043748968.jpg · 24mm equiv. · ISO 21 -
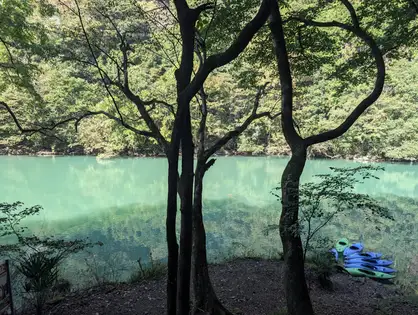
Boughs and kayaks Could improve A graceful tree shape and clear water, but the kayaks are squeezed into a corner and the big trunk steals the show. PXL_20261010_044409306.jpg · 24mm equiv. · ISO 21 -
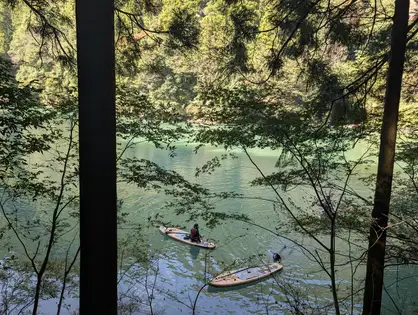
Paddleboard between trees Good The person and paddleboard give scale and a story; moving to avoid the thick trunk in the way would make them stand out more. PXL_20261010_044600603.jpg · 24mm equiv. · ISO 218 -
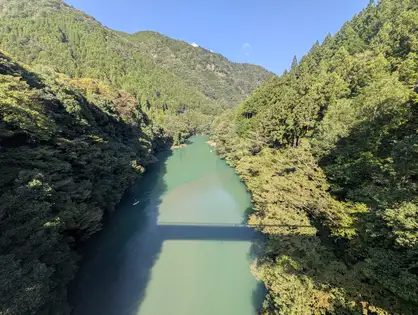
Ultra-wide river view from the bridge Could improve The channel gives a leading line and the paddleboard gives scale; the large bridge shadow and too much near water weaken the focus. PXL_20261010_045807548.jpg · 12mm equiv. · ISO 60 -
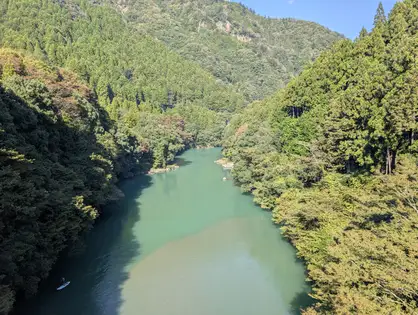
Main-lens river view from the bridge Good Compared with the previous shot, the river is more concentrated and the frame cleaner; the paddleboard at the lower left is still too small. PXL_20261010_045812234.jpg · 24mm equiv. · ISO 20 -
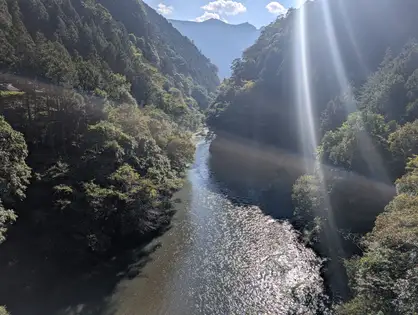
Backlit river A Could improve Dramatic rays, but the overly bright reflection disrupts the eye’s path along the channel. PXL_20261010_045827144.jpg · 24mm equiv. · ISO 19 -
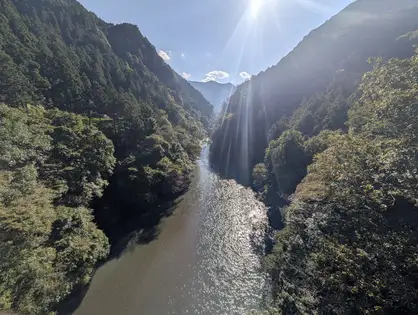
Backlit river B Could improve The light in the valley has atmosphere, but the sun shining straight in, the bright reflections and the flare compete. PXL_20261010_045832826.jpg · 12mm equiv. · ISO 53 -
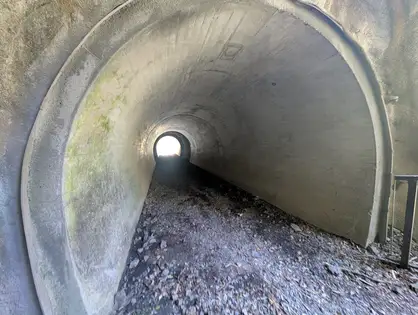
Round tunnel Good A clear vanishing point in the tunnel and a simple composition; watch the brightness difference at the entrance and the clutter on the path. PXL_20261010_051648818.jpg · 12mm equiv. · ISO 292 -
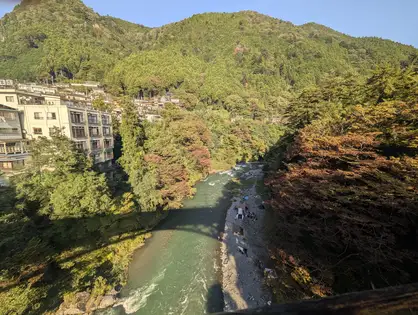
River valley and buildings Could improve The river and settlement can tell a story, but the buildings and the mountains lack a clear hierarchy. PXL_20261010_055012010.jpg · 12mm equiv. · ISO 53 -
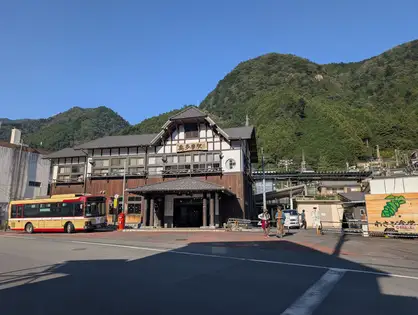
Mountain-town station Could improve The station building has character, but the sky and ground both take up too much of the frame; adjust the focal length and position. PXL_20261010_055341159.jpg · 24mm equiv. · ISO 22
Four-week practice: targeting what this set most needs to improve
| Week | Theme and practice | Review at home | Mistakes to avoid |
|---|---|---|---|
| W1 Simplify to the subject | Find a river or a stretch of forest; shoot the wide view first, then narrow the framing from 2–3 viewpoints and note the brightest object. | Pick 1 photo from each set, state its subject in one sentence and point out two distractions. | Don’t just swap in a more vivid filter. |
| W2 Direction of light | Shoot the same spot in the morning, at midday and in the evening, keeping the camera position as fixed as possible and noting the sun’s position and the contrast. | Compare the brightest areas: are they really where you want viewers to look? | Don’t even out the highlights and shadows. |
| W3 Focal length and position | Shoot the same scene once at 12 mm and once at 24 mm; then fix the focal length, walk to change the perspective, and shoot again. | Explain the angle-of-view trade-off and the difference in perspective separately. | Don’t mistake a change in focal length for a change in camera position. |
| W4 A finished piece | From the same day, pick the 3 photos with the most story and plan the crop, color, marks and a reshoot. | Export the original, the edited version and notes; for each photo, be able to point to the decision the improvement came from. | Don’t replace real shooting with newly generated objects. |
How to check your progress a little more objectively
Don’t pretend to precision with a “100-point composition” or a single beauty score. For each photo, answer just four yes-or-no questions: ① Is the subject clear? ② Does the eye path work? ③ Does the light help the subject? ④ Are there needless distractions at the edges? Choosing photos after a night’s rest, rather than right after shooting, is usually less swayed by the excitement of the moment.
Sources, licensing and what this guide doesn’t claim
Photo sources
- The author's photos: 31 JPEGs; EXIF shows a Google Pixel 9, shot on 2026-10-10 (time zone +09:00). The original photo files were not modified; this page uses only thumbnails with EXIF removed, plus clearly labeled crop examples. There are also 3 video clips, which were not included in the photo-by-photo review.
- GPT composition illustrations: The 21 images in chapter 04A, 5 of them supplied separately by the author. They illustrate composition structure and none of them is a photographic record; the scenes, people, signs, slogans and camera settings in the images are not real data. The files reuse the bytes embedded in the original.
- External coastal photo (link only): D Coetzee|Waves crashing on rocks at bay shore at sunset, Wikimedia Commons, CC0 1.0.
- External city photo (link only): Romain Guy|Tokyo blue hour, Wikimedia Commons, CC0 1.0.
- External countryside photo (link only): Nt|Rice Paddy in Ganghwa Island 1, Wikimedia Commons, CC0 1.0; useful for seeing how power lines, farmhouses and fields are included or left out.

Technical references
- R1 Adobe Lightroom Academy|Composing with leading lines Leading lines, gaze direction and types of lines.
- R2 Cambridge in Colour|Understanding Camera Lenses Focal length, angle of view, and “perspective is set by shooting position.”
- R3 Cambridge in Colour|Using Telephoto Lenses Telephoto trade-offs, how near and far objects compare in size, and common misconceptions.
- R4 Nikon Professional Services|Basic Settings for Landscape Photography Example focus, stabilization and anti-vibration settings for a specific camera model; not guaranteed to apply to every model.
- R5 Adobe|How to read a histogram Histograms, highlight and shadow clipping, and judging exposure.
- R6 OM SYSTEM|Exposure Bracketing: Achieving More Accurate HDR Applying exposure bracketing and exposure blending to different scenes.
- R7 Nikon|Focus Shift, the Basics: Stacking Focus Stopping down increases diffraction; for focus stacking, each frame can use f/2.8–f/8.
- R8 Cambridge in Colour|Understanding Your Camera's Hyperfocal Distance Focused at the hyperfocal distance, everything from half that distance to infinity is sharp; for distant scenes you can focus slightly farther.
- R9 Nikon|Water. Powered. Adjust the shutter speed to how fast the water flows, and use a variable ND to lengthen exposures.
- R10 Nikon (Japan)|レンズフィルターの使いかた (How to use lens filters) Long exposures of moving water with ND filters; uneven sky from a polarizer when shooting the sky wide.
- R11 Nikon|Polarizing Filters Add POW to Pictures Polarizers reduce reflections and make blue skies bluer.
- R12 Nikon|Landscape Astrophotography with the Nikon D810A The article’s author found in field tests that the 500 rule gives exposures that run long and leave star trails, and switched to shorter exposures.
- R13 Apple Support|Use Night mode on your iPhone Multi-frame night shots, keeping the camera steady, and tips for shooting handheld.
- R14 Apple Support|About Apple ProRAW ProRAW and its editing latitude for exposure, white balance and color.
- R15 Adobe Help|Lightroom Classic masking Non-destructive local adjustments such as sky, subject, landscape and gradient masks.
- R16 Google|Pixel phone hardware tech specs Pixel 9 main lens ƒ/1.68, 82° field of view; ultra-wide ƒ/1.7, 123° field of view.
Review log
- The new 2026-10-11 version of the original added chapter 04A, “GPT composition atlas”: this page includes all 21 images and their notes with the image bytes unchanged; the notes in the original’s heading about the revision process (such as fixing an image-scaling problem) were rewritten as an introduction for readers, second-person wording was made neutral, and one typo was corrected.
- The labels on the generated images are only approximate: the symmetry image marks the vertical center line as the axis of symmetry, but the reflection is symmetrical top to bottom; the surfer in the ideal seaside example is not on a rule-of-thirds intersection; and the landscape example’s text names the distant mountains as the subject, while the image labels the river. This page explains this in the Editor’s analysis; the images themselves are not modified.
- The original was written in the second person, addressed to the photographer; this site’s version uses neutral explanations, with the content and judgments unchanged.
- Near limit at the hyperfocal distance: the original estimated it with H²/(2H − f), getting about 1.22 m; by the common thin-lens depth-of-field formula, the near limit when focused at H is exactly H/2, so this page and the calculator now use 1.21 m.
- The original overlays stretched 1000 × 1000 coordinates onto 4:3 or 3:4 photos, distorting the circles and numbers; this page redraws the same marks at each photo’s actual proportions.
- The two cedar forest photos in section 05 originally carried the same number marks as Case D but without matching notes, so this page keeps only the rule-of-thirds lines and the eye path; the backlit photo in section 03 originally had a numbered ① note with no matching mark, so this page turned it into a general note.
- In the photo index, the label for “Station platform” was originally written as “Neutral,” which didn’t match its category “Record”; this page now uses “Record” consistently.
- Photo contents corrected against the images: the shot through the trees shows two stand-up paddleboards and two people, not the two canoes the original described; the shot under the big tree has several kayaks on the shore in the lower-right corner, not one; the small figure in the bridge series is one stand-up paddler, so this page calls it a paddleboard throughout.
- In the original, the eye path on the waterfall photo in section 08 contained an incomplete curve command that browsers skip; this page uses a complete curve.
- The photos reuse the bytes embedded in the original without recompression; photos used more than once are stored only once.
- All external links rechecked on 2026-10-12: the authors and CC0 licenses of the 3 Wikimedia Commons files are correct, and the EXIF of Tokyo blue hour is 20 s, f/11, ISO 100, 24 mm; all the other technical references open.
- The warning that polarizers make the sky uneven with ultra-wide lenses comes from Nikon Japan’s filter tutorial (R10), not Nikon USA’s polarizer article; this page now cites the correct source.
- Added Google’s Pixel tech specs (R16): the official specs give only the field of view, not equivalent focal lengths; the 12/24 mm on this page are values recorded in EXIF.
- Cambridge in Colour’s hyperfocal article supports “from half the distance to infinity” and warns that distant areas are only just acceptable; this page adds that caveat. The author of Nikon’s astrophotography article considers exposures from the 500 rule too long, and this page’s wording agrees with it.